


Hello everybody,
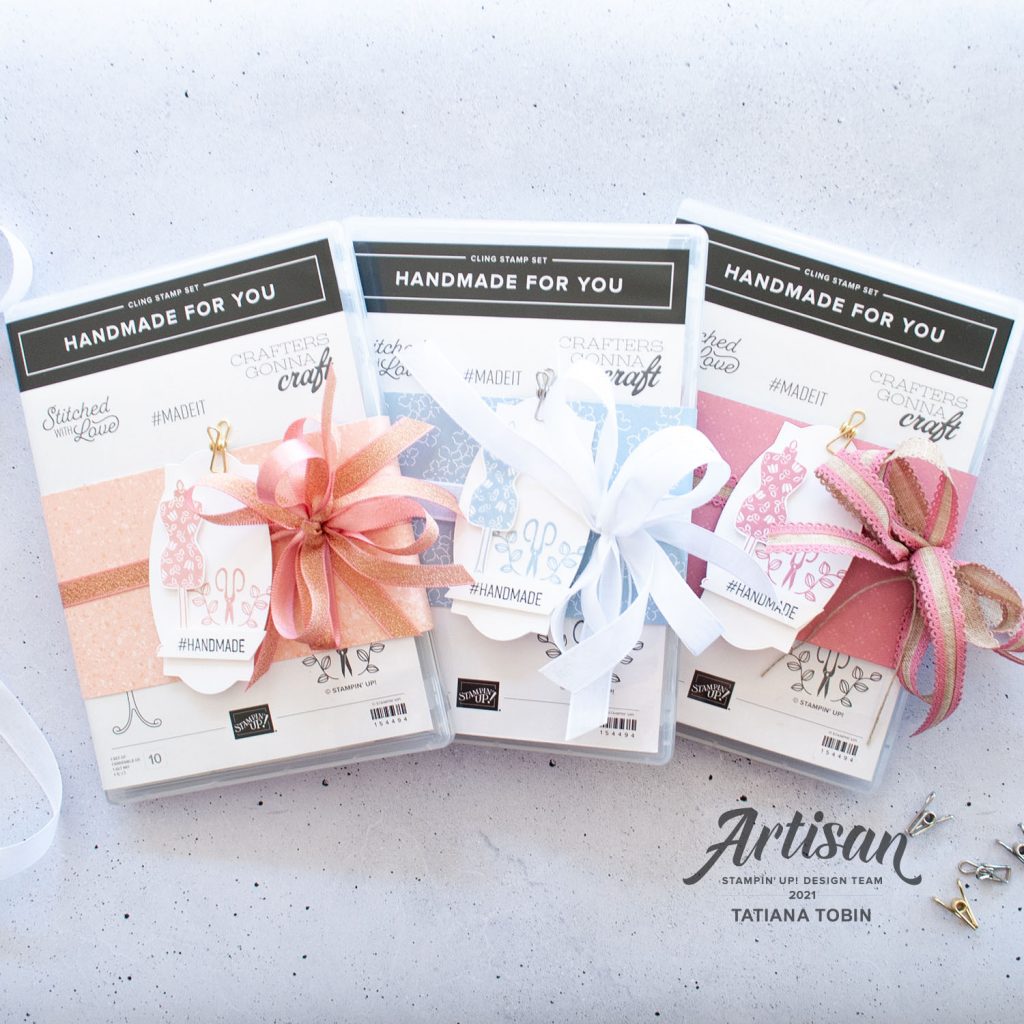
Welcome to my blog! Today I’m sharing a really cute but simple gift packaging idea. This concept was inspired by fellow Artisan Design Team Member Anna Pickering. Back in January 2021 I advanced in Stampin’ Up!® titles to Silver Elite. This advancement is considered to be quite a big one. I am so honoured to have reached this and there are two big groups of people who made this possible – my customers and my team. I wanted to thank my team and I couldn’t think of anything better than gifting them the Handmade For You stamp set. Only problem was I had too many ideas of how to decorate them till I saw Anna’s Instagram Reel and I was immediately inspired.
[Want to recreate this project? You’ll find all the supplies I used at the end of this post, conveniently linked to my Stampin’ Up! online store. I’d love to be your demonstrator and appreciate your support—it means the world to me on this creative journey!]
This is Anna’s reel:
Project Details:
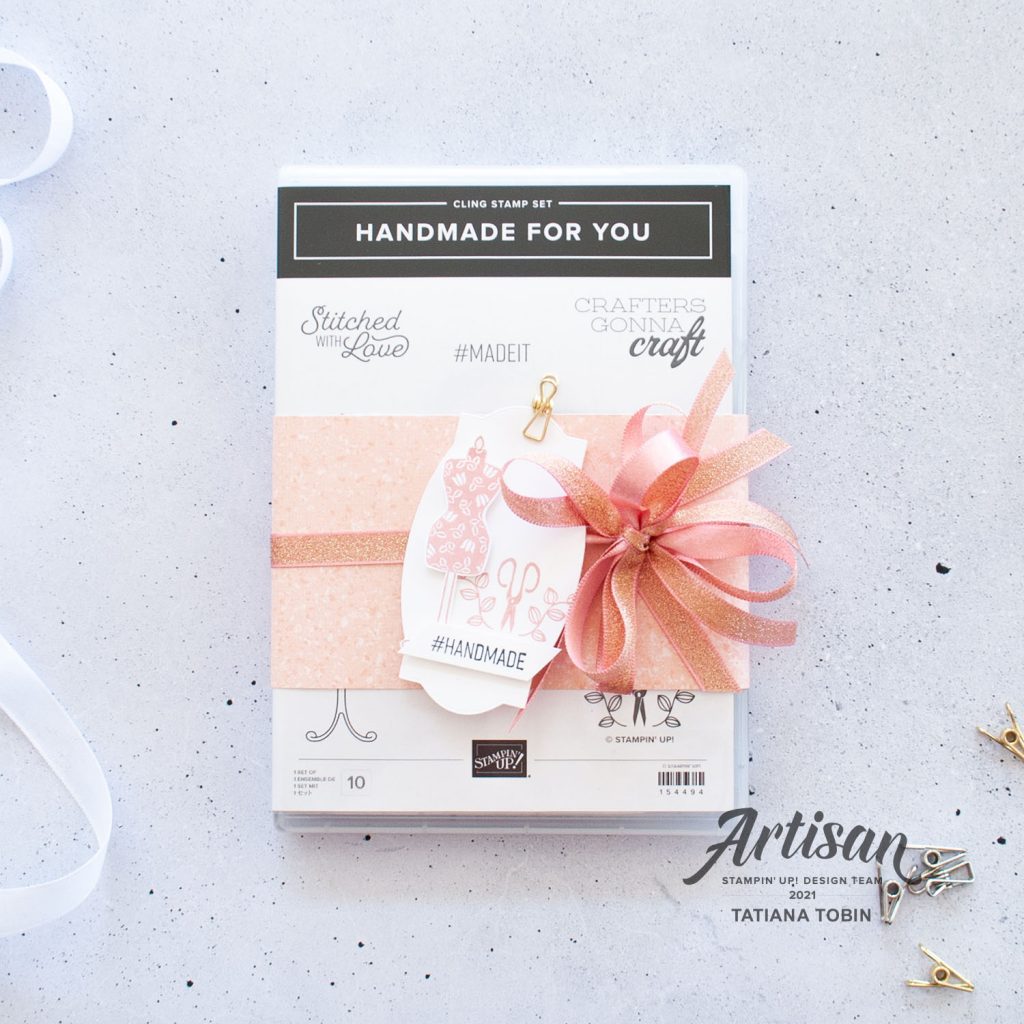
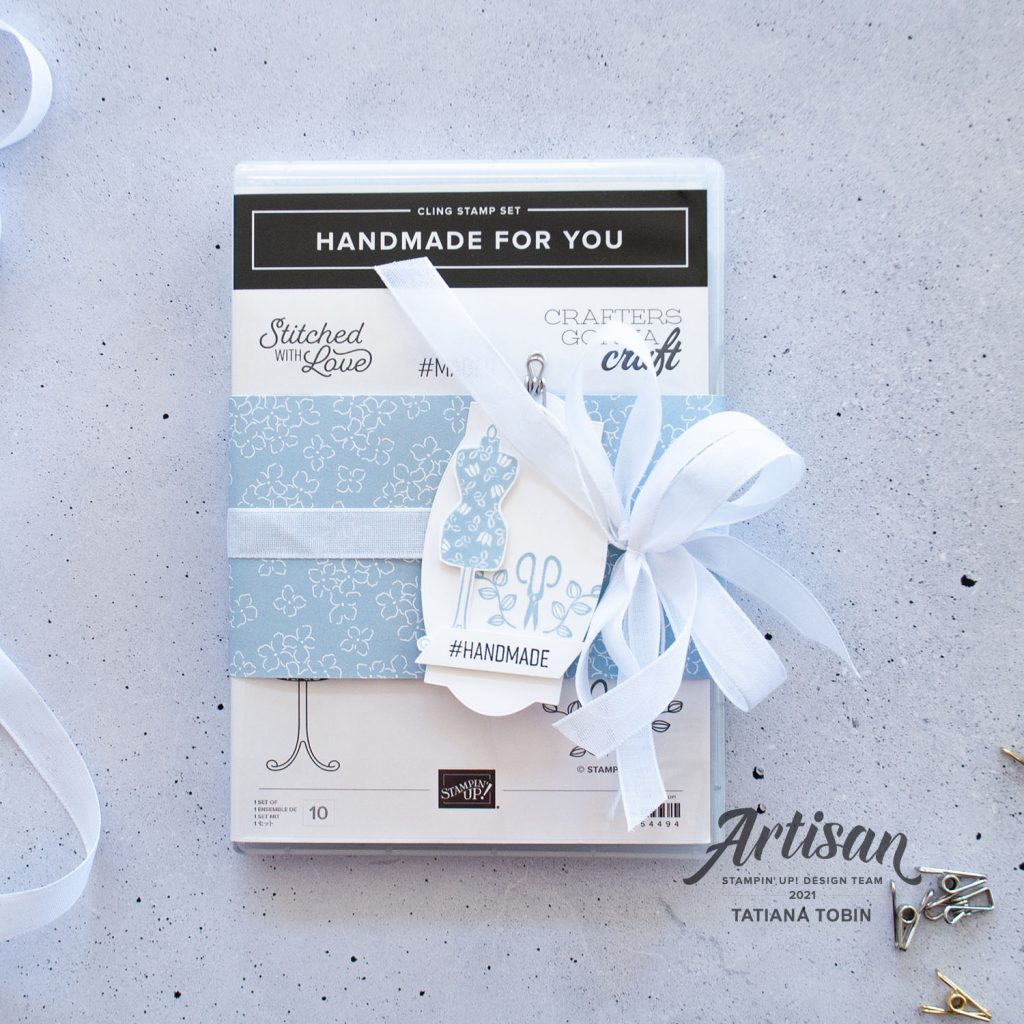
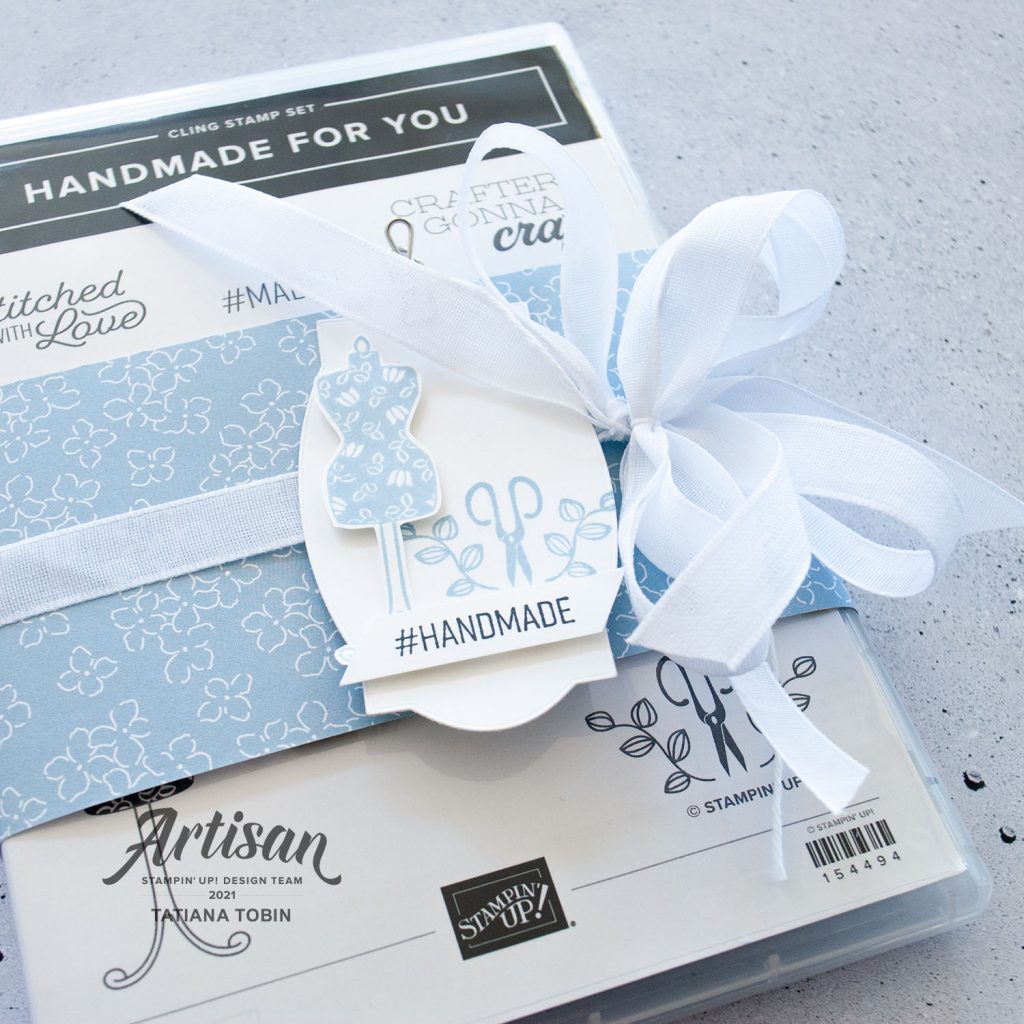
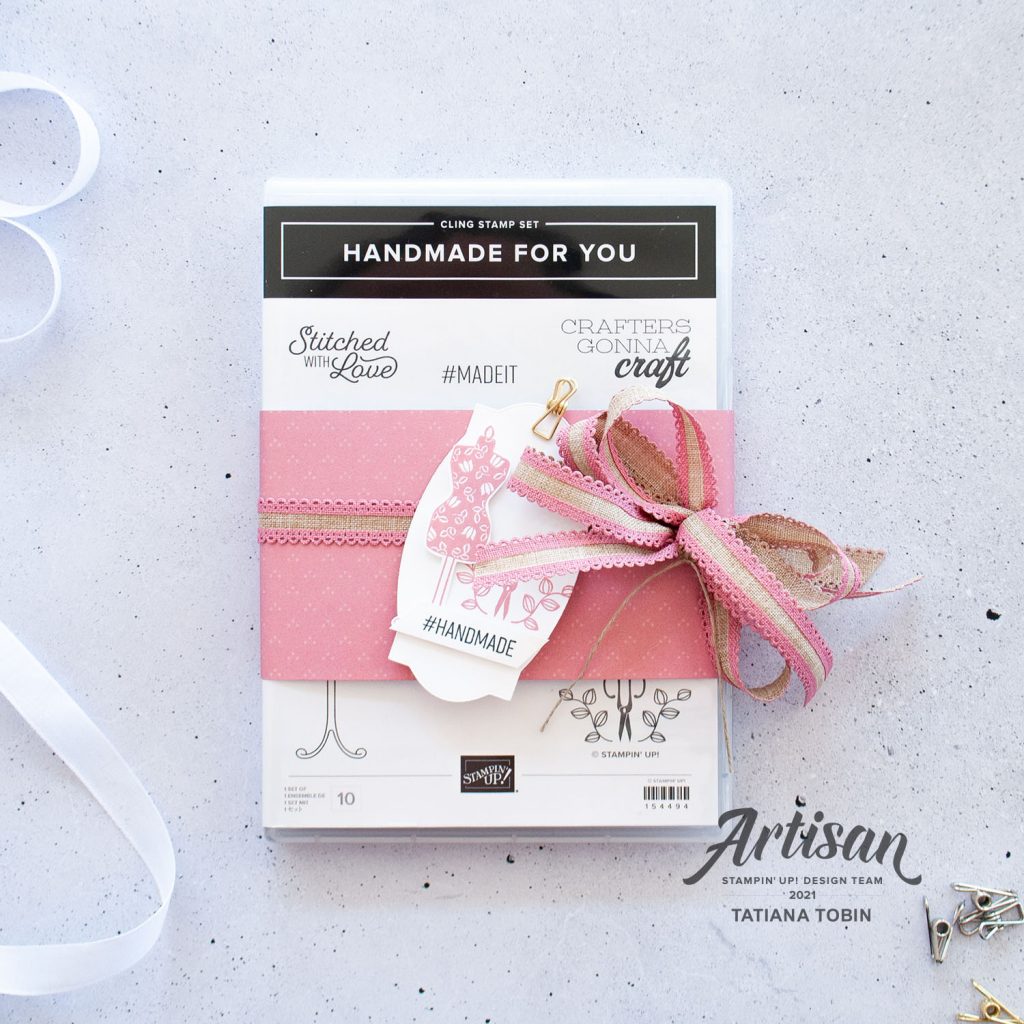
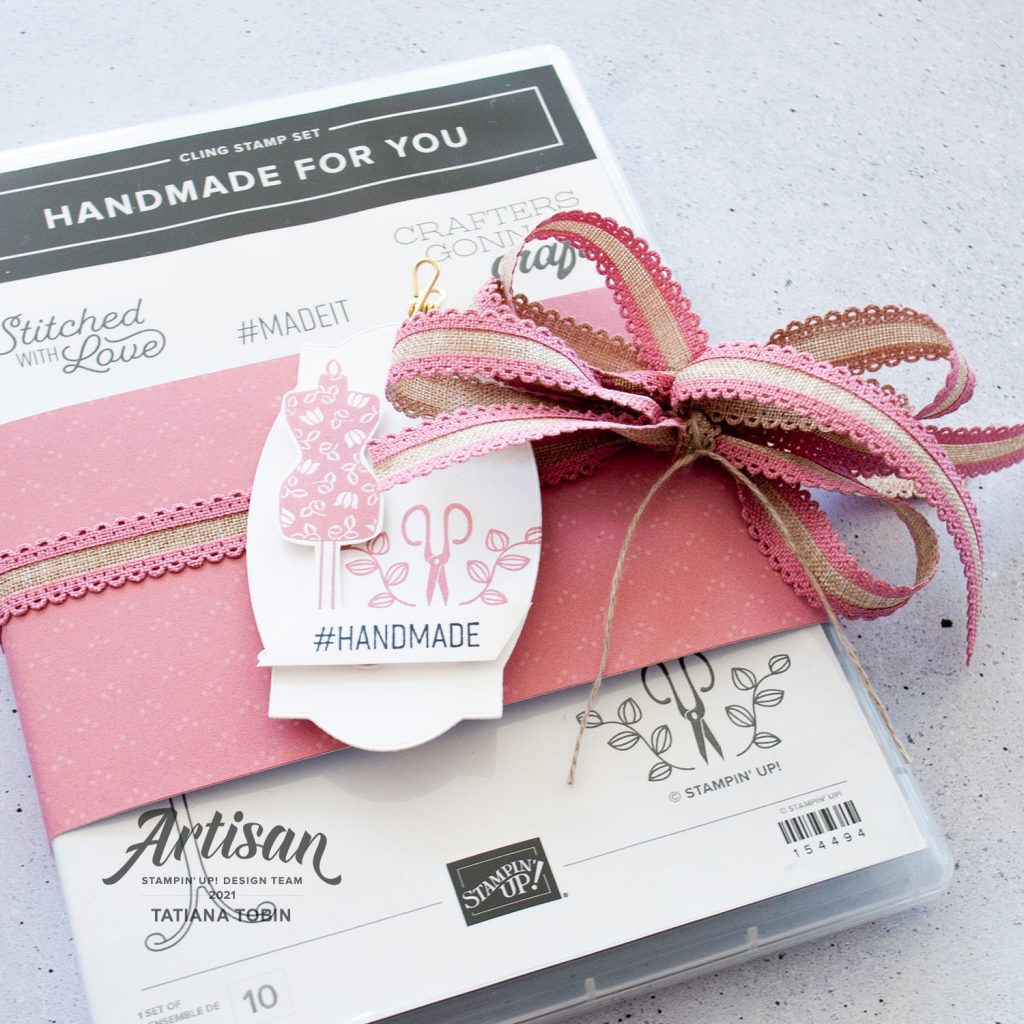
- DSP Belly Band: 3”x12” either Peony Garden DSP or Hydrangea Hill DSP
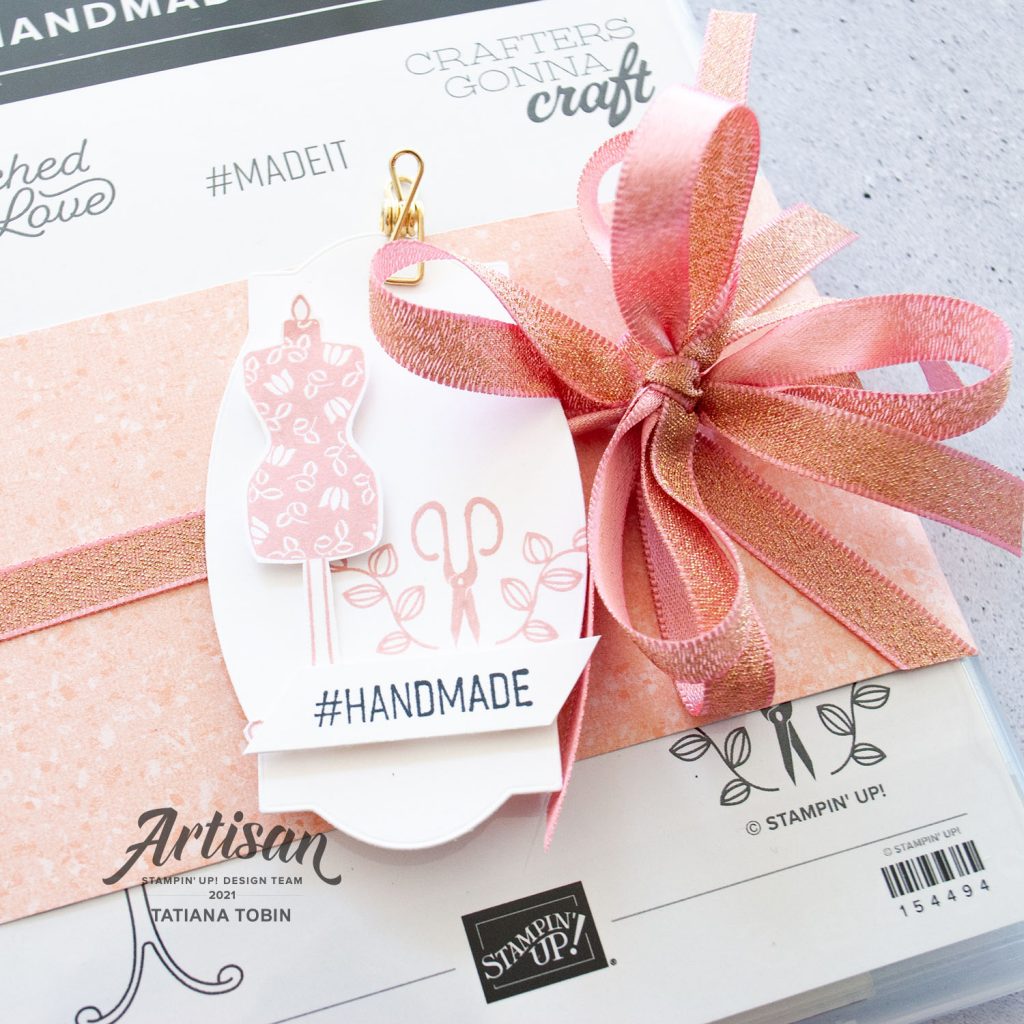
- Gift Tag: Basic White die cut using label from the Hippo & Friends Dies
- Wrap around the stamp case the strip of DSP, add some Tear & Tape Adhesive to one end and adhere it to the other end once wrapped around.
- Wrap around a coordinating ribbon and tie on a bow like Anna shows in her Reel.
- For the Peony Garden DSP I used the Blushing Bride Metallic Ribbon with the pink Snail Mail Twine.
- For the blue Hydrangea Hill DSP I used the white ribbon from the Flowers For Every Season Combo Pack with the white Snail Mail Twine.
- For the pink Hydrangea Hill DSP I used the Rococo Rose Scalloped Linen Ribbon with Linen Thread.
- On some Basic White card stock stamp the dress maker’s mannequin and fussy cut out.
- Onto the die cut gift tag stamp in the same ink the scissors image.
- On a 1cm strip of Basic White stamp the #HANDMADE in Memento Ink and trim edges.
- Adhere with Stampin’ Dimensionals the dress maker’s mannequin and the hashtags sentiment.
- Clip the gift tag using an adorable Clever Clasps.
Thank you so much for visiting my blog! I hope today’s project has inspired you to get creative and try something new.
Until next time,
Tatiana
- Join Stampin’ Up!® to start getting your products at 20% discount: CLICK HERE
- Request a Catalogue to see what products you can purchase: CLICK HERE
- Subscribe to my newsletter to keep up to date with the latest news: CLICK HERE
- Follow me on Facebook for regular updates and inspiration: CLICK HERE
- Go SHOPPING for clearance items and specials: CLICK HERE
If you’re in Australia, you can shop Stampin’ Up!® products through my online store. I’d love to be your demonstrator and help you find the perfect supplies for your next creative project!
Supplies:
You can purchase the of the supplies I used in this project. Please click on the image below to purchase. Thank you for your support.


 Scalloped Linen Ribbon")
 Blushing Bride Metallic Ribbon")


