


When cutting up my DSP (Designer Series Paper) I feel really bad throwing out the little strips that I have left when cutting the sheets to a card front size. I’ve come up this these cute cards as a way to use up those strips of paper. This can be done with any paper. I did, when creating these cards make sure that the strips of paper came from the same set of DSP as I think it coordinates better.
For each of the DSP I’ve used I picked a coordinating single colour card stock for the background. I thought it would be fun to use the Seaside Textured Impressions Embossing Folder to add to the kind of weave theme, but in a different way. I’ve used three different DSPs for these projects.
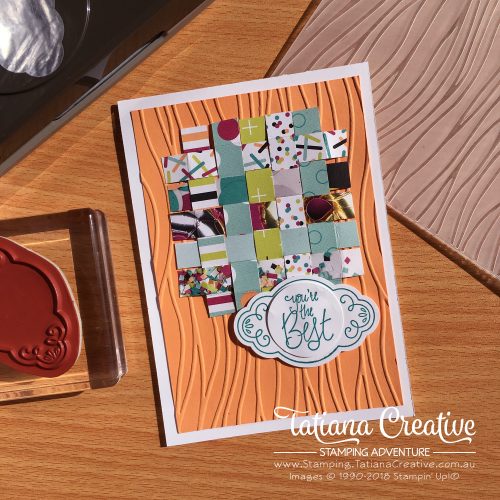
Picture Perfect Party DSP
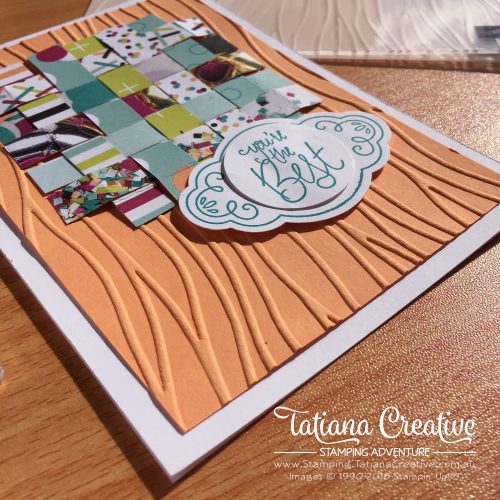
I’ve pared the Picture Perfect Party DSP with Peekaboo Peach card stock. I just love this colour and I’m very sad to see it going at the end of this month. It’s a great bright pastel (I know that that’s a bit of an oxymoron) orange. For the sentiment I chose Bermuda Bay.
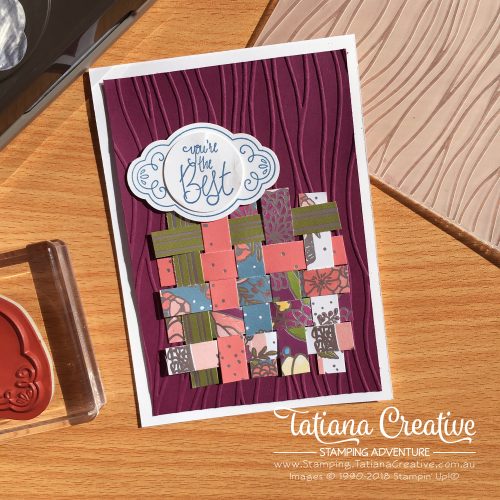
Sweet Soiree Specialty DSP
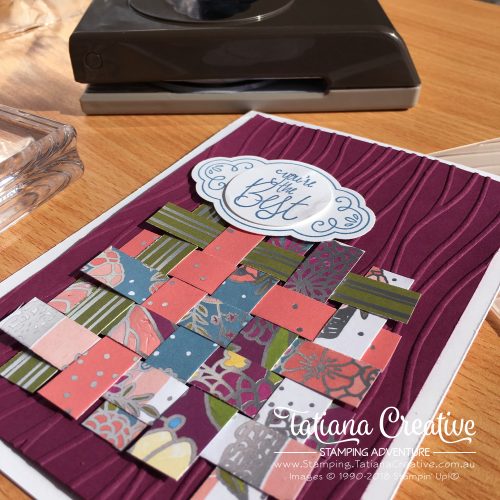
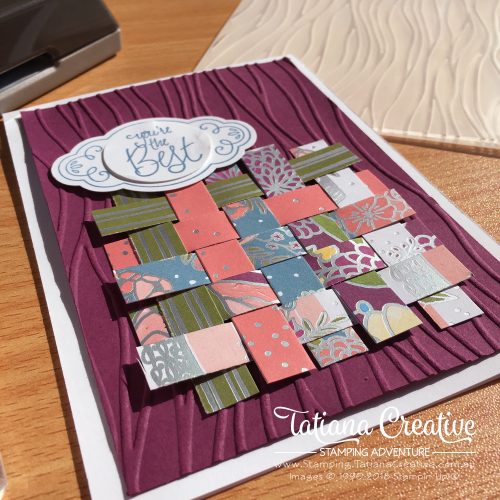
This DSP works so well with Rich Razzleberry. The sentiment is in Marina Mist – another retiring colour, I’ve only recently got it so I’m quite bummed that its going. Oh well.
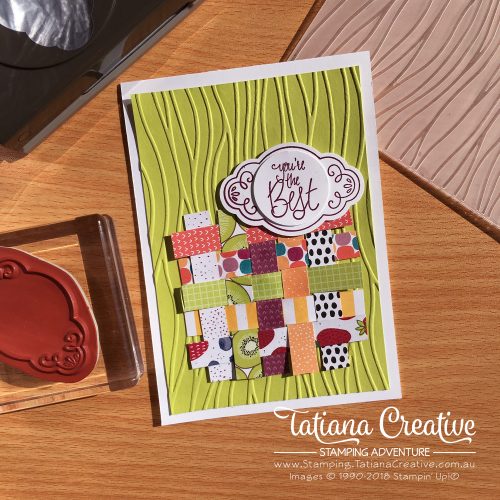
Tutti-Fruirti DSP
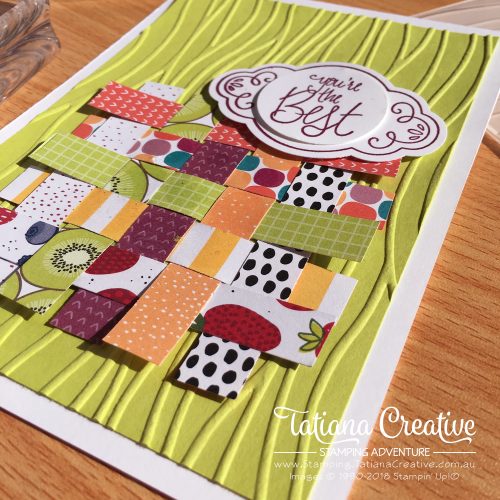
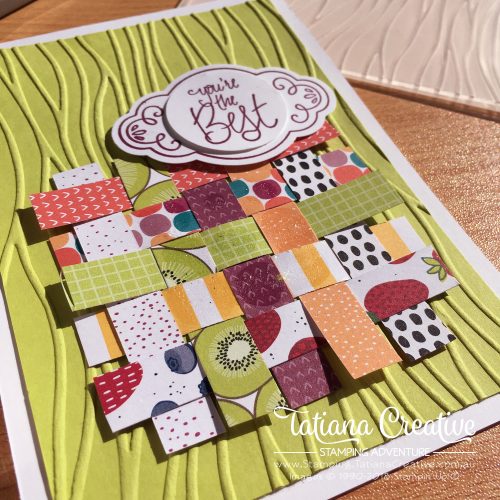
I just love the Lemon Lime Twist in this DSP and felt that this card works very well with it. For the sentiment I used Rich Razzleberry.
To create these cards:
- Prepare the card base, I used Whisper White Thick card stock.
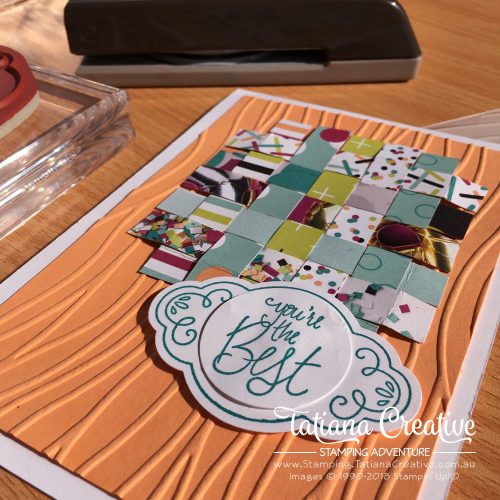
- Cut a coordinating piece of coloured card stock 95mm by 138.5mm for the card front. Run through the Big Shot with the Seaside Textured Impressions Embossing Folder. You can dampen the card stock with a Stampin’ Spritz first, I have found this helps to give a better embossing results.
- Take ten strips of DSP approximately 80mm long each. Start to weave them through each other with five going one way and five going the other way. Once finished glue down a piece of card stock on the back to give the piece some stability.
- On a piece of Whisper White paper stamp the sentiment from the Label Me Pretty Stamp Set. I used the swirly label and You’re the Best sentiment.
- Cut out the sentiment using the Pretty Label Punch. I had stamped the sentiment separately to the label and cut it out using the 1 1/4″ Circle Punch.
- To assemble the card, use Liquid Multipurpose Glue to adhered the card front to the card base, then adhere the weaved DSP.
- Using Stampin’ Dimensionals attach the sentiment!
There you have it, a great way to use up strips of DSP instead of throwing them away.
Thank you so much for visiting my blog! I hope today’s project has inspired you to get creative and try something new.
Until next time,
Tatiana
- Join Stampin’ Up!® to start getting your products at 20% discount: CLICK HERE
- Request a Catalogue to see what products you can purchase: CLICK HERE
- Subscribe to my newsletter to keep up to date with the latest news: CLICK HERE
- Follow me on Facebook for regular updates and inspiration: CLICK HERE
- Go SHOPPING for clearance items and specials: CLICK HERE
If you’re in Australia, you can shop Stampin’ Up!® products through my online store. I’d love to be your demonstrator and help you find the perfect supplies for your next creative project!
Supplies:
You can purchase the of the supplies I used in this project. Please click on the image below to purchase. Thank you for your support.


 Designer Series Paper")

 Designer Series Paper")


