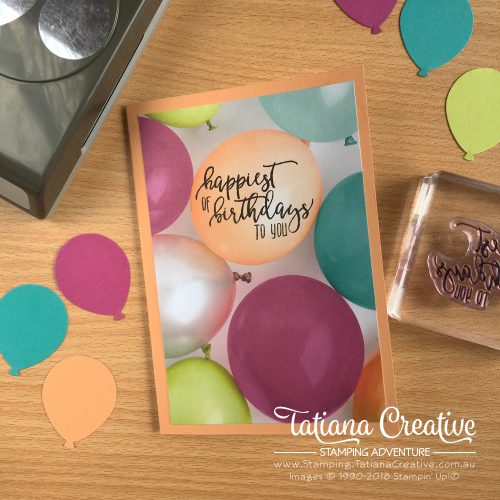
I’ve had many requests for a tutorial for my Birthday Balloon Surprise card and I’m so excited to be finally sharing it with you all! It took me some time because I wasn’t sure what was the best method for the tutorial. I finally decided that video was necessary to show how I cut the card stock for the pop up and you need a PDF for the measurements, which I will provide at the bottom of this blog post.
From the front the card doesn’t look like it has so much excitement on the inside. I did think that this Picture Perfect Party DSP would be fun for this card, particularly the balloons. The coordinating stamp set had the perfect sentiment to stamp right onto a a balloon.

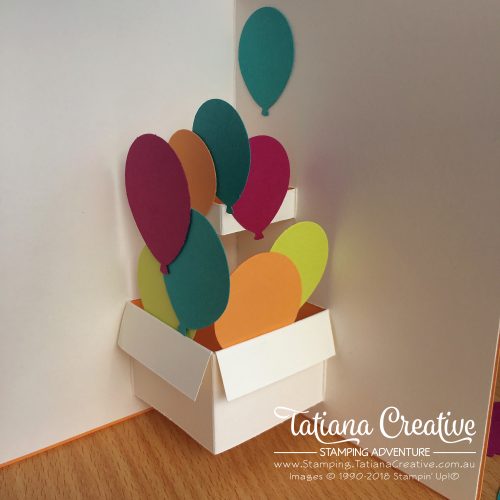
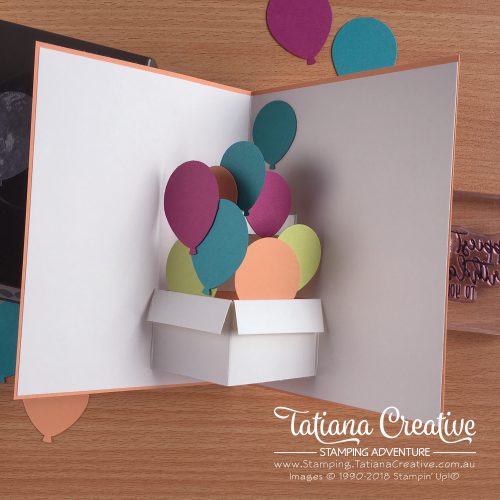
Honestly you can do anything you want on the card front. Its the inside where the magic really is. Here is the inside:


As you can see, the inside is quite fun with the appearance of an open box of helium balloons floating up, up, and away! The video below best show you how I created this card:
Tatiana Creative – Birthday Balloon Surprise Tutorial from Tatiana Tobin on Vimeo.
Measurements, cutting and scoring guides for this card can be downloaded here:
Do not distribute the above PDF files. Please direct anyone interested to this blog post. Please feel free to create your own versions of my Birthday Balloon Surprise and use the #BirthdayBalloonSurprise with your photos as I would love to see what you create!
Thank you so much for visiting my blog! I hope today’s project has inspired you to get creative and try something new.
Until next time,
Tatiana
- Join Stampin’ Up!® to start getting your products at 20% discount: CLICK HERE
- Request a Catalogue to see what products you can purchase: CLICK HERE
- Subscribe to my newsletter to keep up to date with the latest news: CLICK HERE
- Follow me on Facebook for regular updates and inspiration: CLICK HERE
- Go SHOPPING for clearance items and specials: CLICK HERE
If you’re in Australia, you can shop Stampin’ Up!® products through my online store. I’d love to be your demonstrator and help you find the perfect supplies for your next creative project!
Supplies:
You can purchase the of the supplies I used in this project. Please click on the image below to purchase. Thank you for your support.


Love this card!
Thank you so much Donna! Please don’t forget to share your versions with #BirthdayBalloonSurprise
Love this card and plan to make one in January
Awesome Mariolla! You will have fun creating it. Thank you for visiting my blog.
I love love love this card!! Thank you so very much for showing it in imperial as well as metric!!
Thank you very much Pam. So thrilled to hear to you love the card. I’m very happy to hear that imperial measurements are useful for you. I will make sure all my tutorial will include them. It’s great to get the feedback regarding that.
Great card, thanks for the tutorial.
You’re very welcome Doris!
Love this pop up card! I’m always on the lookout for fun cards and this certainly fits the bill. Thank you so much for the tutorial.
You are very welcome Alla! Thrilled to hear my card fits the bill ! Would love to see your creation – you can email it to stamping@tatianacreative.com.au or post to my Facebook page
This is a very cute card. I have a box die that I’m going to try with the card. Thank you for the tutorial.
Thank you Joan! That sounds really lovely!
it looks complicated with the measurements to create a pop up. I thought it would be easier to just fold the inner card half, and from there cut parallel , if you get what i mean.
I like your idea of the balloon coming out of the box. It’s neat!
Hi Crystal, thank you for taking the time to comment on my blog post. Yes I do get what you mean! That’s a great idea and you are right it would be easier. Honestly I didn’t think of doing it that way! Thank you for the suggestion!
Hi from Missouri, USA – I just found this awesome card! Just what I need for my 2 year old great-granddaughter. Putting the pattern on the back – Genius! Thanks so much for your idea!
Hi Sandy! Thanks for visiting my blog! So thrilled to hear that my card tutorial is helping you make a card your your granddaughter. It’s my pleasure! Happy crafting!
Tatiana