


Hello everybody!
Welcome to my blog. Today I’m sharing another project created for the Stampin’ Fancy Friday Challenge. This month’s theme is “Gratitude” and it could be expressed in any way we wanted. I try to find three things I’m grateful for everyday and I imagine that my family is sick of hearing my gratitudes of seeing another beautiful sunset. I LOVE <3 LOVE sunsets and they just inspire me. I even have a note on my phone to write down the Stampin’ Up!® colours I see in a sunset. I pulled this up when creating my project for this challenge and combined it with a sentiment from the Crafting With You stamp set “You Inspire Me” because the sunset inspired me.
[Want to recreate this project? You’ll find all the supplies I used at the end of this post, conveniently linked to my Stampin’ Up! online store. I’d love to be your demonstrator and appreciate your support—it means the world to me on this creative journey!]
Card Details:
- Card Base: Basic White Thick
- Card Front: Basic White (start with 10.5 x 14.85 cm)
- Sentiment: Basic White
- Card Insert: Basic White (10 x 14.35 cm)
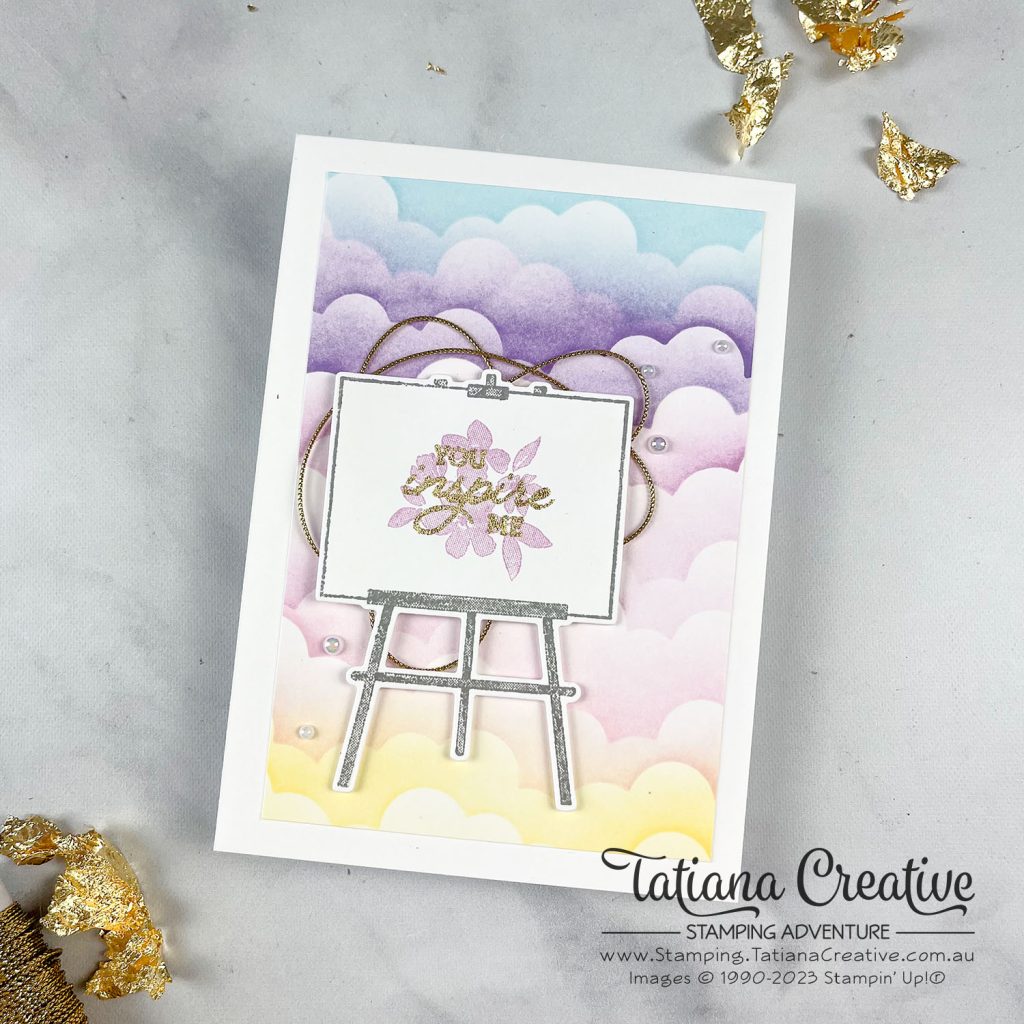
- Let’s start by creating the sunset clouds
- Take a 6”x6” piece of window sheet and die cut out from one edge the cloud edge from the Basic Borders Dies. This is your cloud template that you can reuse.
- I like to start with a slightly larger piece of cardstock when doing this as the edges pick up more ink and I can trim them all off.
- Starting from the top of the Basic White card front place the cloud template so that it covers most of the card front and only exposes the top edge.
- Using a Blending Brush and Balmy Blue ink, start blending onto the card front the ink. TIP: For no harsh ink spots tap the Blending Brush onto some grid paper first and start the blending on the Window Sheet Template so that it glides onto the cardstock.
- Move the cloud template down a little and position the clouds differently and blend more Balmy Blue ink onto the card front. Trying not to overlap the previous row so that there’s a tad of white on the top of the clouds.
- Remove the cloud template and wipe clean. You can also flip the template so that there’s variation in the cloud pattern. Continue moving the template down and adding new rows of cloud and changing the ink colour every two rows. Remember to wipe clean the template between each colour so that the ink doesn’t blend.
- Next I used Highland Heather, followed by Fresh Freesia, then Bubble Bath and finally Lemon Lolly.
- Blend some Lemon Lolly on the bottom free edge of the card front.
- Cut the card front down to 9 x 13.35 cm (trim off each of the four edges).
- You can now adhere the card front to the card base.
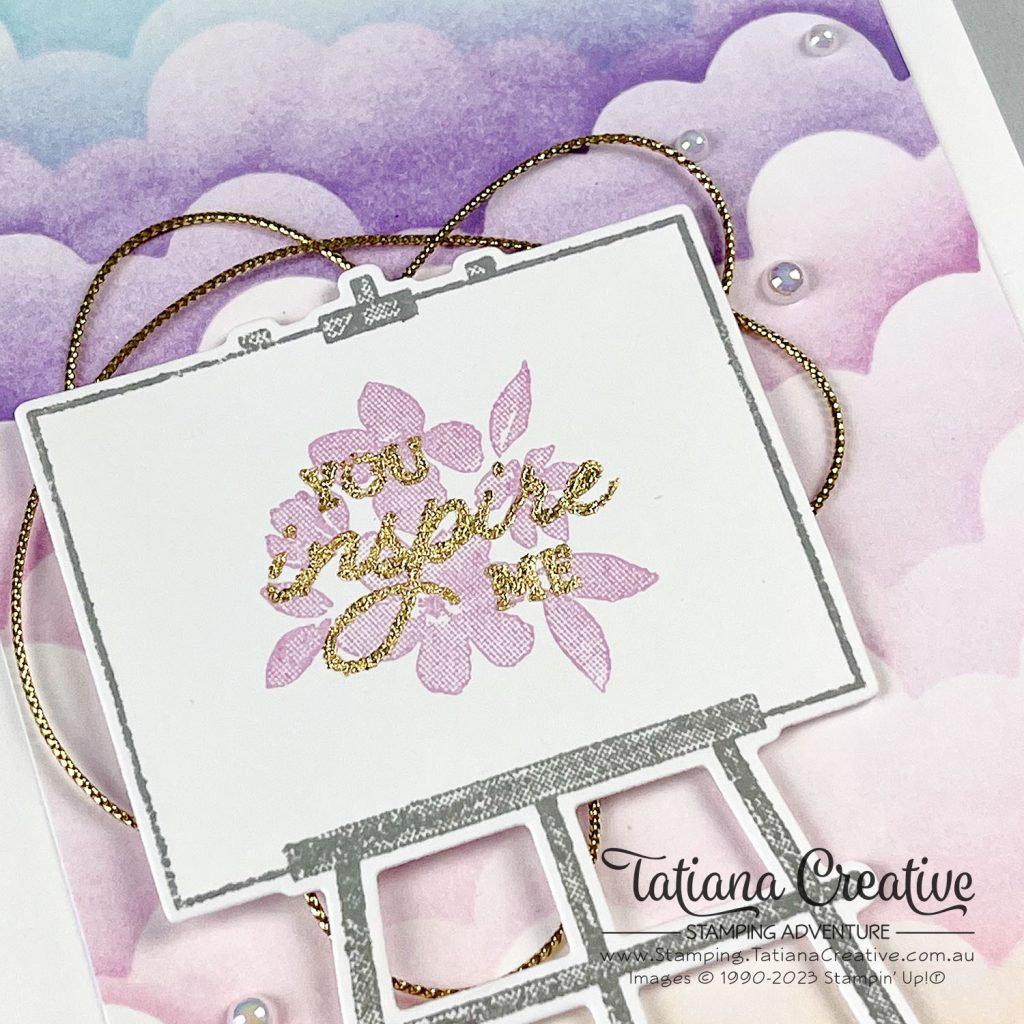
- Onto the Basic White for the sentiment, stamp the easel from Crafting With You stamp set in Smoky Slate ink.
- Into the middle of the easel board stamp the large floral image from Crafting With You stamp set in Fresh Freesia.
- Stamp the sentiment “You Inspire Me” using Versamark ink and then heat emboss the Heat & Stick Power. Once that has been heated add Gilded Leafing over it and rub off the extra. I wanted the sentiment to be shiny and bright.
- Die cut out the easel.
- Add some of the Gold Simply Elegant Trim to where the easel will be on your card front. TIP: Using Stampin’ Seal+ Or Tear & Tape to secure it.
- Adhere the easel over the top of the trim using Stampin’ Dimentionals. TIP: Cut Mini Stampin’ Dimentionals in half and add the the legs of the easel.
- Finish off by adding some Iridescent Pearl Basic Jewels.
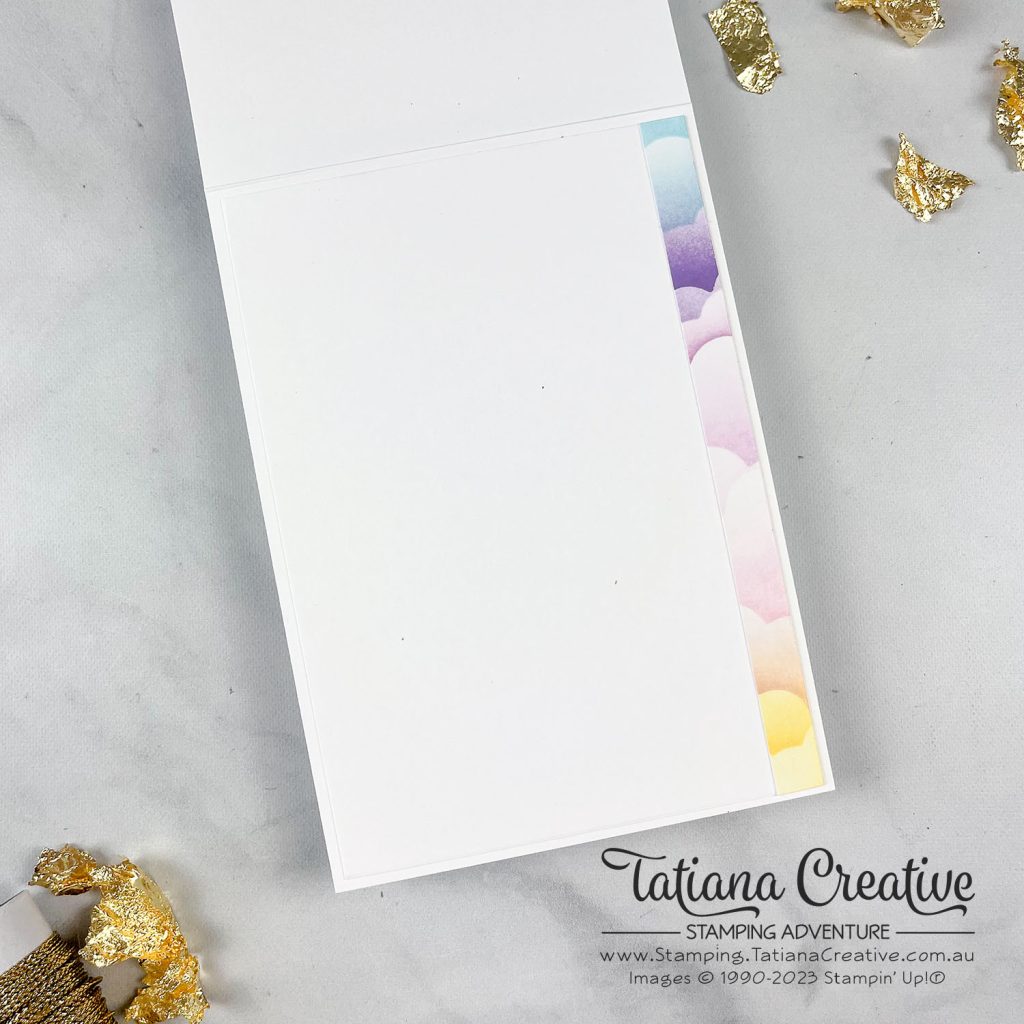
I didn’t want to waste the edge of the cloud background so I added it to the card insert inside.
What made you grateful? You can join in the Stampin’ Fancy Friday Challenge and create a gratitude card too. Share by using the hashtag #StampinFancyFriday or #FancyFridayChallenge on Facebook or Instagram!
Thank you so much for visiting my blog! I hope today’s project has inspired you to get creative and try something new.
Until next time,
Tatiana
- Join Stampin’ Up!® to start getting your products at 20% discount: CLICK HERE
- Request a Catalogue to see what products you can purchase: CLICK HERE
- Subscribe to my newsletter to keep up to date with the latest news: CLICK HERE
- Follow me on Facebook for regular updates and inspiration: CLICK HERE
- Go SHOPPING for clearance items and specials: CLICK HERE
If you’re in Australia, you can shop Stampin’ Up!® products through my online store. I’d love to be your demonstrator and help you find the perfect supplies for your next creative project!
Supplies:
You can purchase the of the supplies I used in this project. Please click on the image below to purchase. Thank you for your support.
")


Basic Supplies:
I highly recommend the following basic supplies to make your paper crafting experience easier. I use this products in every project.


You really inspired me to try something new. Can hardly wait to make a card like this!
Awe that so fabulous Mary! Thank you so much for taking the time to share with me! I would love to see what you make, you can email me at stamping@tatianacreative.com.au