


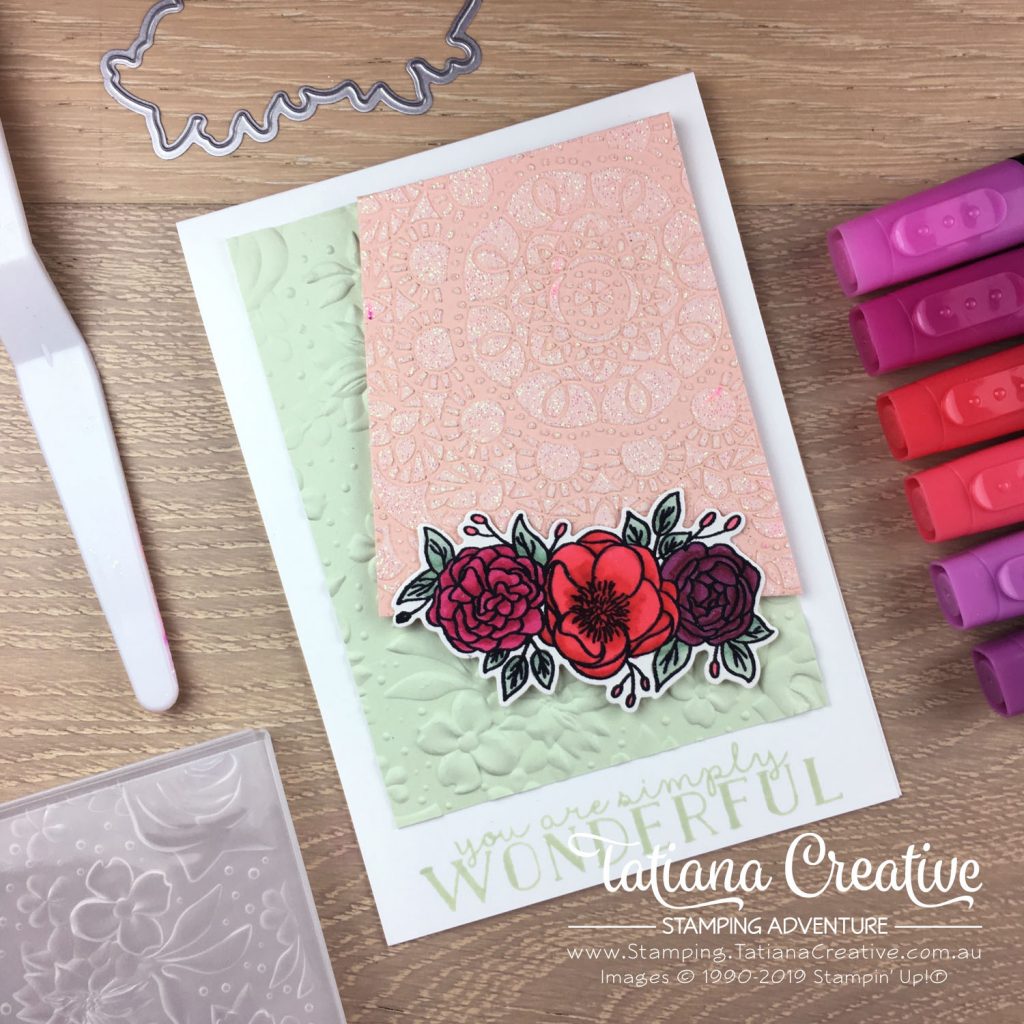
I hinted in my blog post on Wednesday that I will have a card with the pretty Bird Ballad Laser-Cut Card being used as a stencil. Here it is! I’ve paired it with the same Bloom & Grow stamp set but it has a whole new look!
[Want to recreate this project? You’ll find all the supplies I used at the end of this post, conveniently linked to my Stampin’ Up! online store. I’d love to be your demonstrator and appreciate your support—it means the world to me on this creative journey!]

You can see from the photo above how the Laser-Cut card was used as a mask to create the really pretty sparkly background. This was done while creating the card I share a few days ago.
Tips to create this card:
- Line your table with clean scratch paper (paper to get dirty). I used a piece of paper that had bits of Pigment Sprinkles on it and so I have flecks of colour in my Embossing Paste.
- The Country Floral 3D embossing folder will be available again soon in my online store.
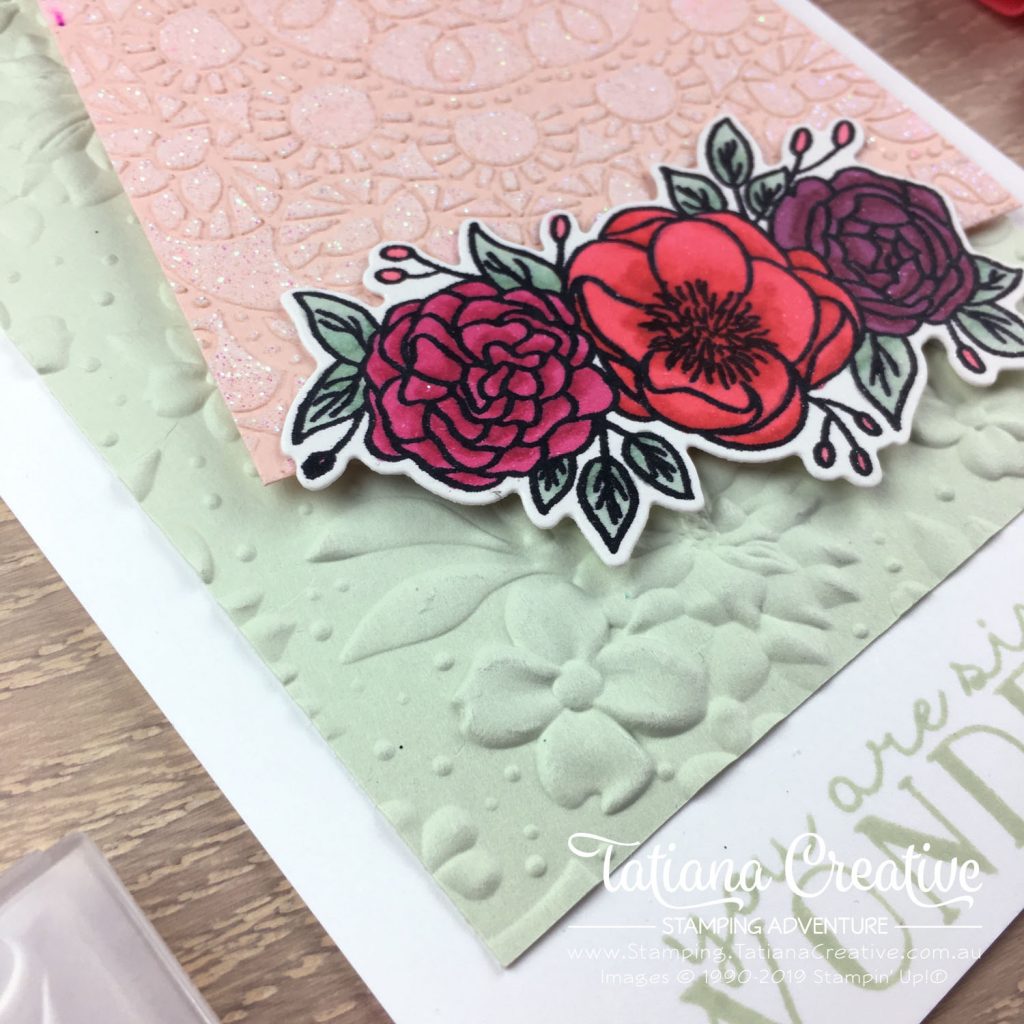
I’m really disappointed in myself that I hadn’t used the Country Floral 3D Embossing Folder before. This is such a GORGEOUS folder. It was a perfect background for the Bloom & Grow stamp set.
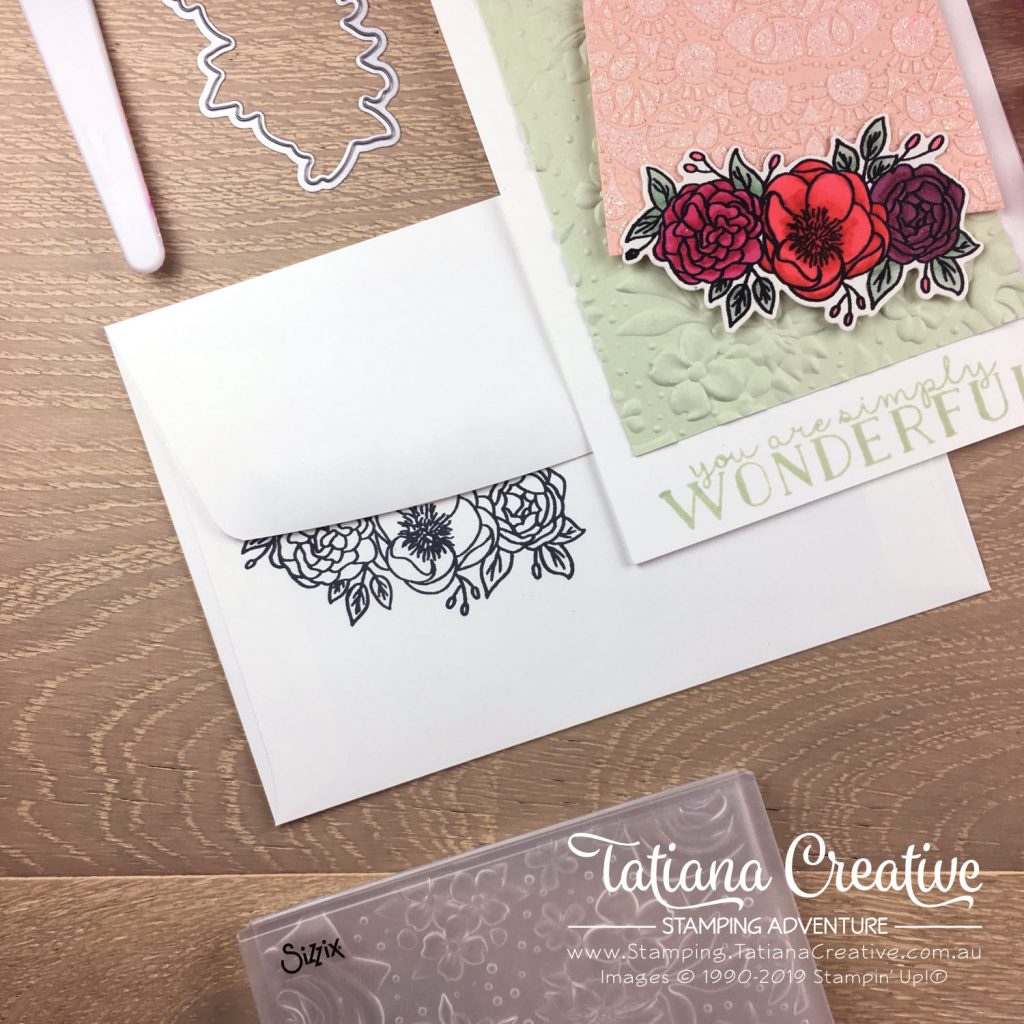
My favourite way to decorate envelopes at the moment is to stamp something so that it will sit behind the envelope flap. It’s just something different and a bit of fun. I used the same floral bunch as I did on the card. Thank you for visiting my blog.
Thank you so much for visiting my blog! I hope today’s project has inspired you to get creative and try something new.
Until next time,
Tatiana
- Join Stampin’ Up!® to start getting your products at 20% discount: CLICK HERE
- Request a Catalogue to see what products you can purchase: CLICK HERE
- Subscribe to my newsletter to keep up to date with the latest news: CLICK HERE
- Follow me on Facebook for regular updates and inspiration: CLICK HERE
- Go SHOPPING for clearance items and specials: CLICK HERE
If you’re in Australia, you can shop Stampin’ Up!® products through my online store. I’d love to be your demonstrator and help you find the perfect supplies for your next creative project!
Supplies:
You can purchase the of the supplies I used in this project. Please click on the image below to purchase. Thank you for your support.


