


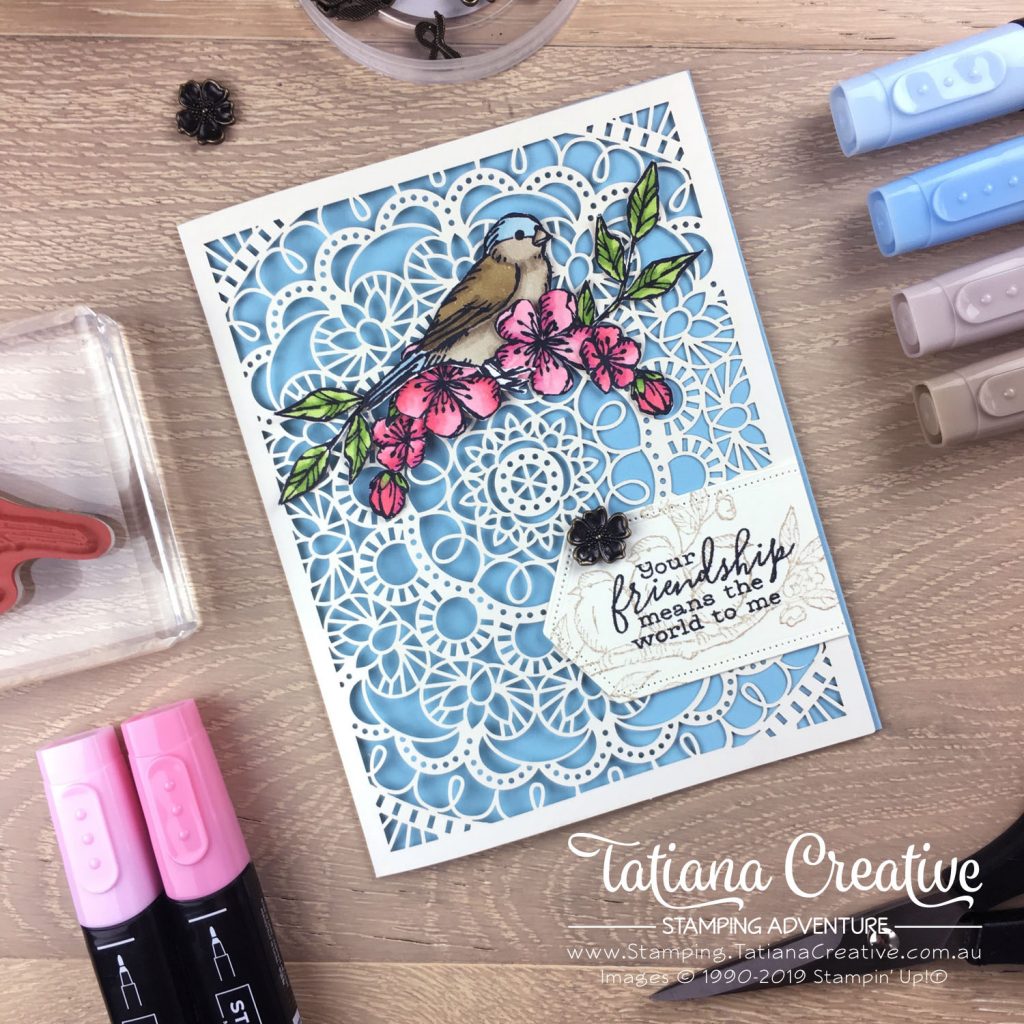
I hinted last week that I had another card made using the Free As A Bird stamp set where I just HAD to have the bird with some blue feathers. Today I’m sharing this card! The stamp set is part of a fantastic new suite called Bird Ballad and part of this suite is the new Bird Ballad Laser-Cut Cards & Tin. Which happens to be my product of the week!
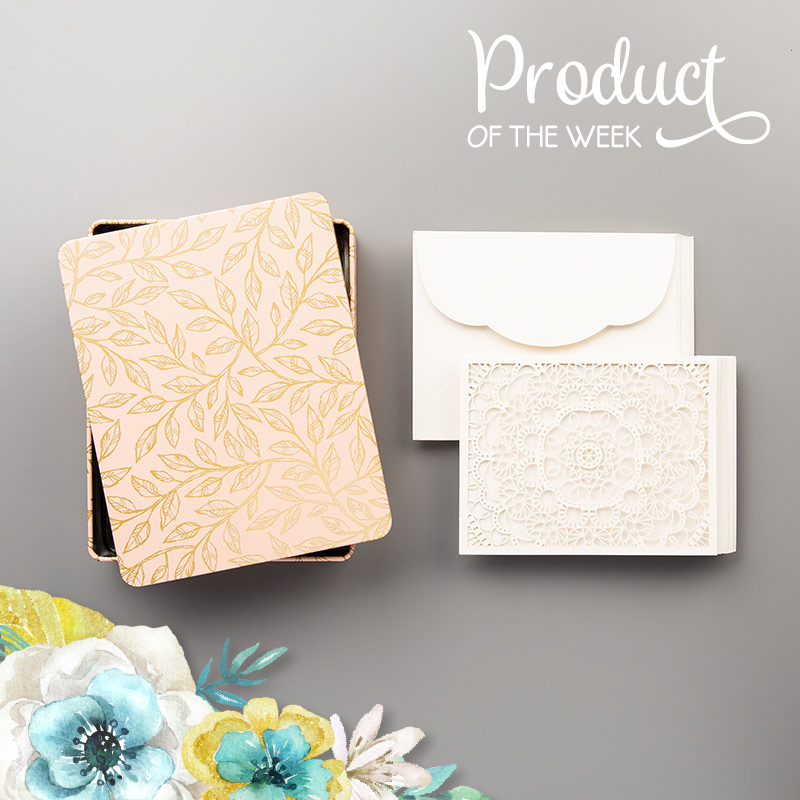
This is a fantastic set of 12 laser-cut Very Vanilla card bases and 12 Very Vanilla envelopes featuring a scalloped edge flap. Best part is that you also get the tin to use to store your wonderful projects – or it would make lovely packaging for a gift! Being part of the Bird Ballad suite the first project I shared just had to feature the Free As A Bird stamp set.
[Want to recreate this project? You’ll find all the supplies I used at the end of this post, conveniently linked to my Stampin’ Up! online store. I’d love to be your demonstrator and appreciate your support—it means the world to me on this creative journey!]
Tips for creating this card:
- Stamp the bird, flowers and leaves on Shimmery White card stock using Memento Ink – this ink is perfect when working with Stampin’ Blends. It wont be picked up by the blends.
- Fussy cut the stamped images on the black line to get a clean look.
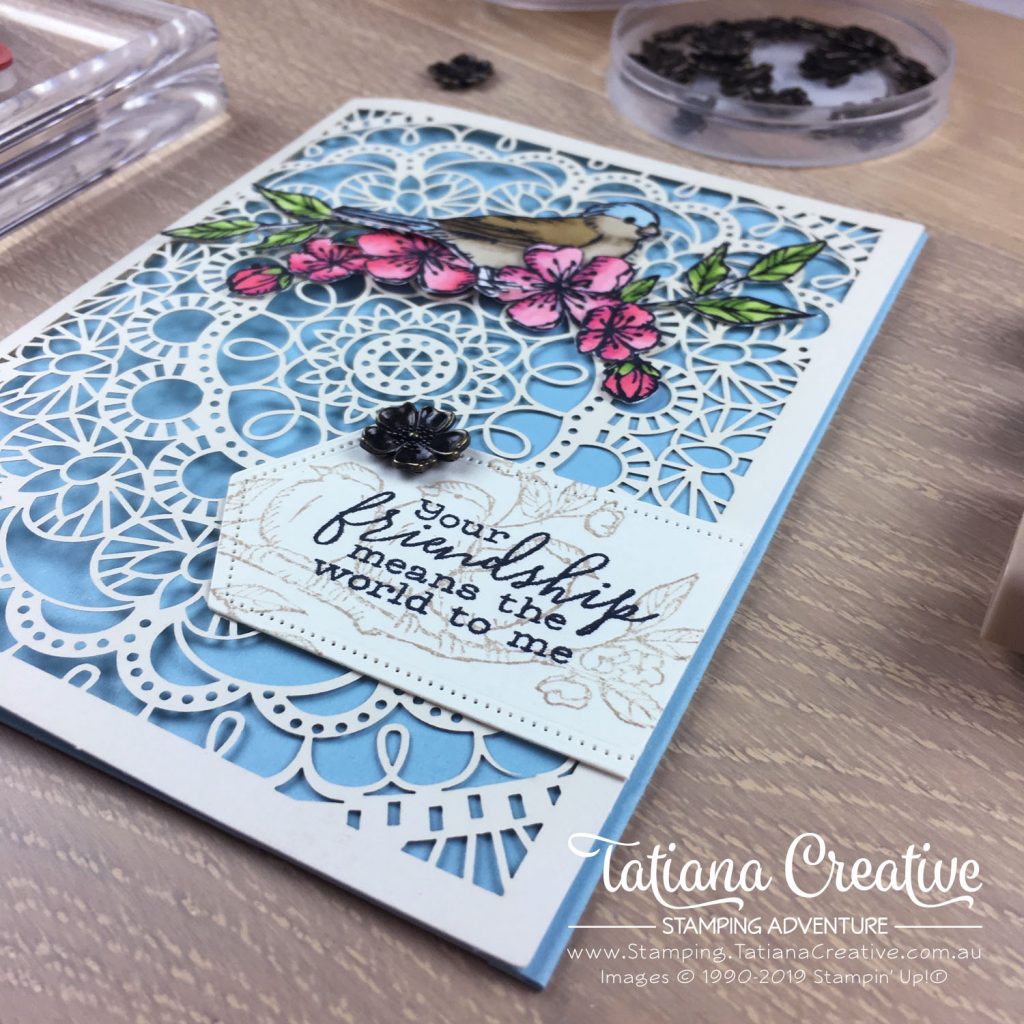
- Mount a piece of coloured card stock (I used Balmy Blue) to the back of the card front so that the laser cut lace is more emphasised. This also makes sure you can’t read the inside of the card till you open it.
- Use a Glue Dot to adhere the Bird Ballad Trinket to the card.
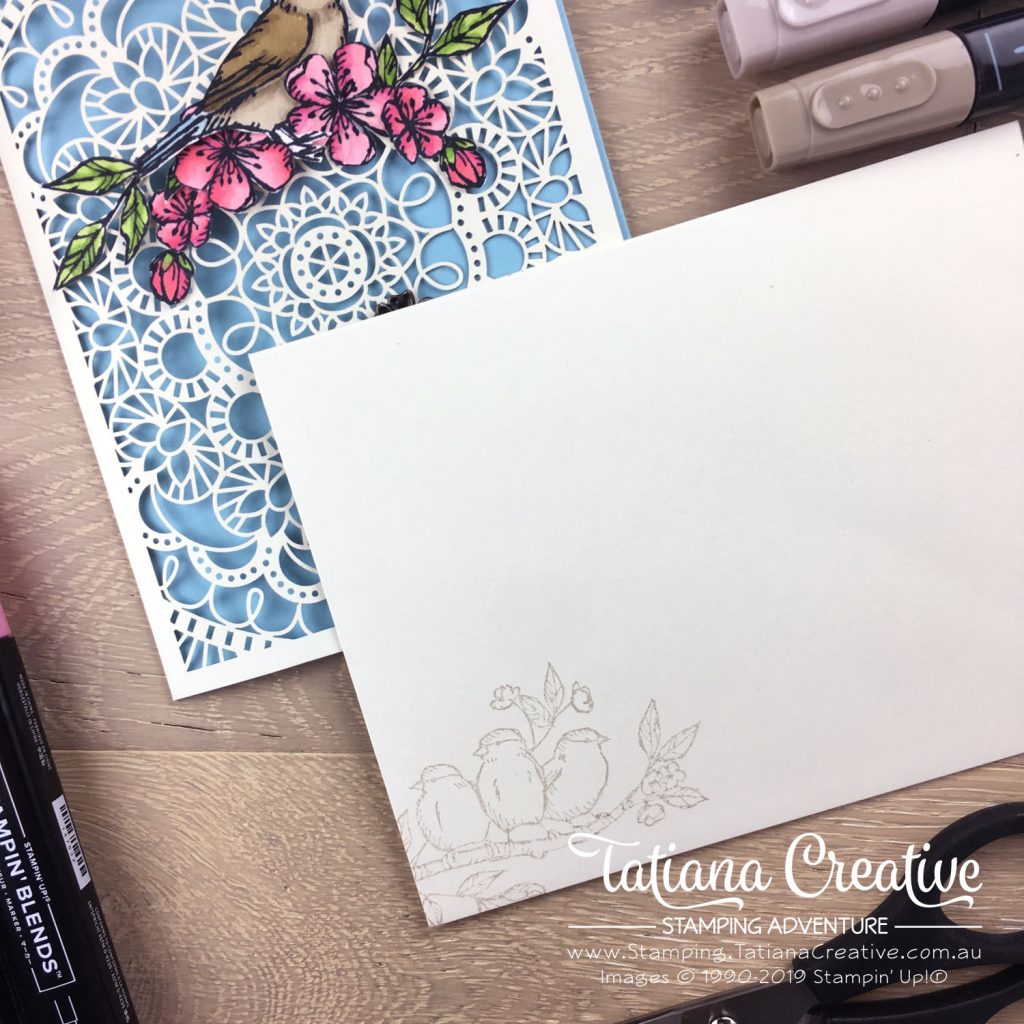
- Stamp using Sahara Sand the birds onto a piece of Very Vanilla cut out with the Stitched Nested Labels Dies. Then stamp the sentiment on top using the Memento Ink. This gives extra visual interest to your sentiment.
- If you love both the Free As A Bird stamp set and the Stitched Nested Labels Dies you can save 10% by purchasing the bundle. I’ve listed both the individual products as well as the bundle in the Product List below.
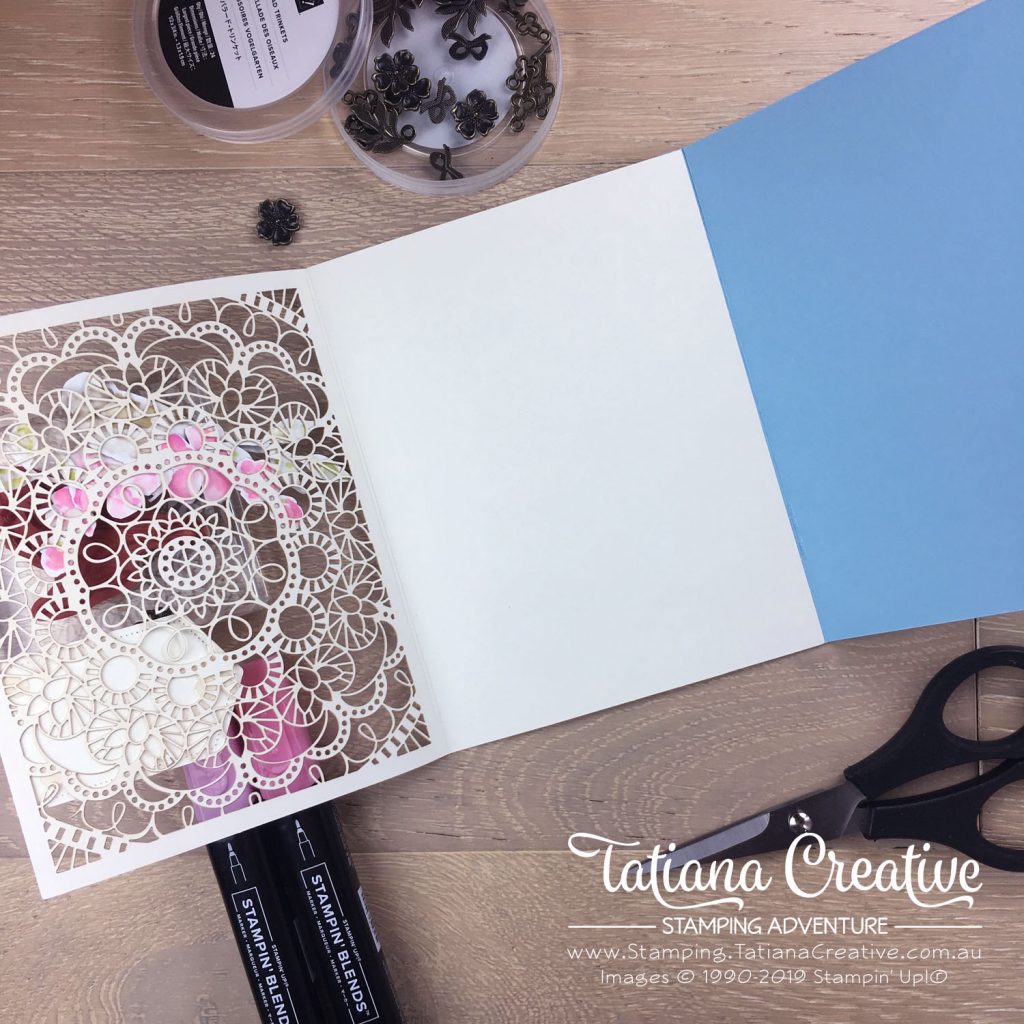
I decided it would be fun to make the card a tri-fold. I did this by cutting the piece of Balmy Blue card stock slightly bigger than the card front and then scoring 1/4″ which I used to attach to the back of the card on the right hand side. You can see the open card below:
This time I decided to decorate the front of the envelope as well as the back. I’m showing here the front:
Using pre-made cards and envelopes makes card making super easy. These Bird Ballad Laser-Cut Cards as super adorable and I’m looking forward to showing you some inspiration in using them this week.
Thank you so much for visiting my blog! I hope today’s project has inspired you to get creative and try something new.
Until next time,
Tatiana
- Join Stampin’ Up!® to start getting your products at 20% discount: CLICK HERE
- Request a Catalogue to see what products you can purchase: CLICK HERE
- Subscribe to my newsletter to keep up to date with the latest news: CLICK HERE
- Follow me on Facebook for regular updates and inspiration: CLICK HERE
- Go SHOPPING for clearance items and specials: CLICK HERE
If you’re in Australia, you can shop Stampin’ Up!® products through my online store. I’d love to be your demonstrator and help you find the perfect supplies for your next creative project!
Supplies:
You can purchase the of the supplies I used in this project. Please click on the image below to purchase. Thank you for your support.


