


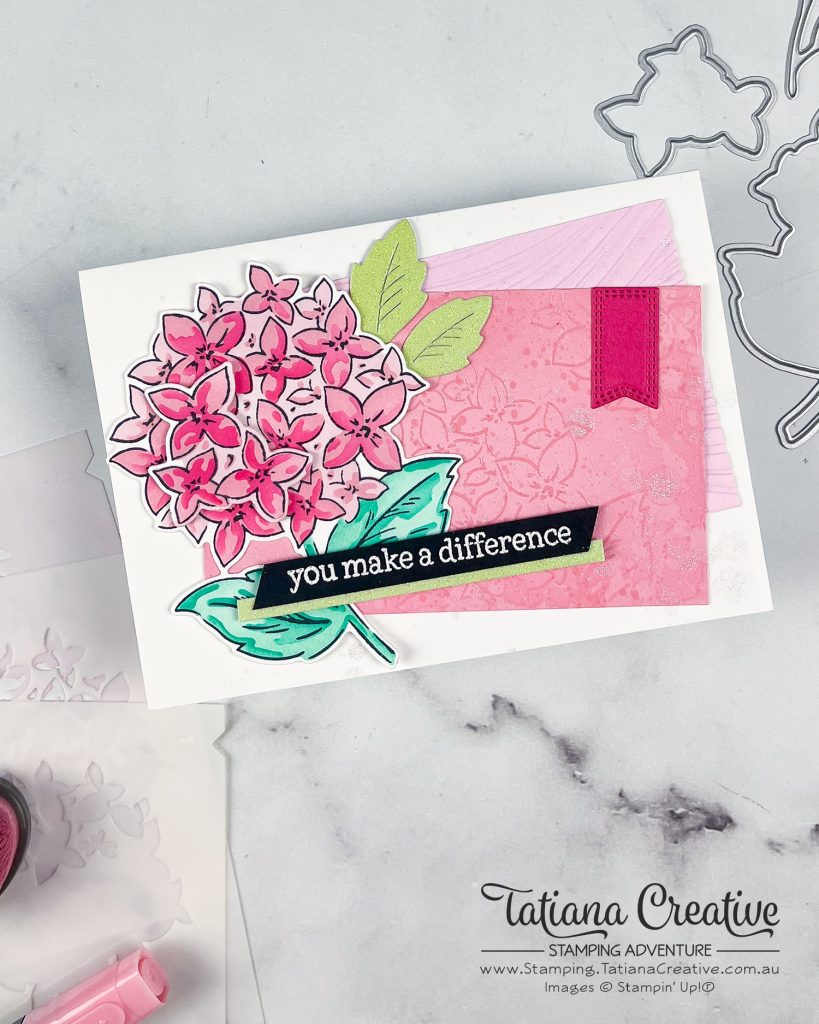
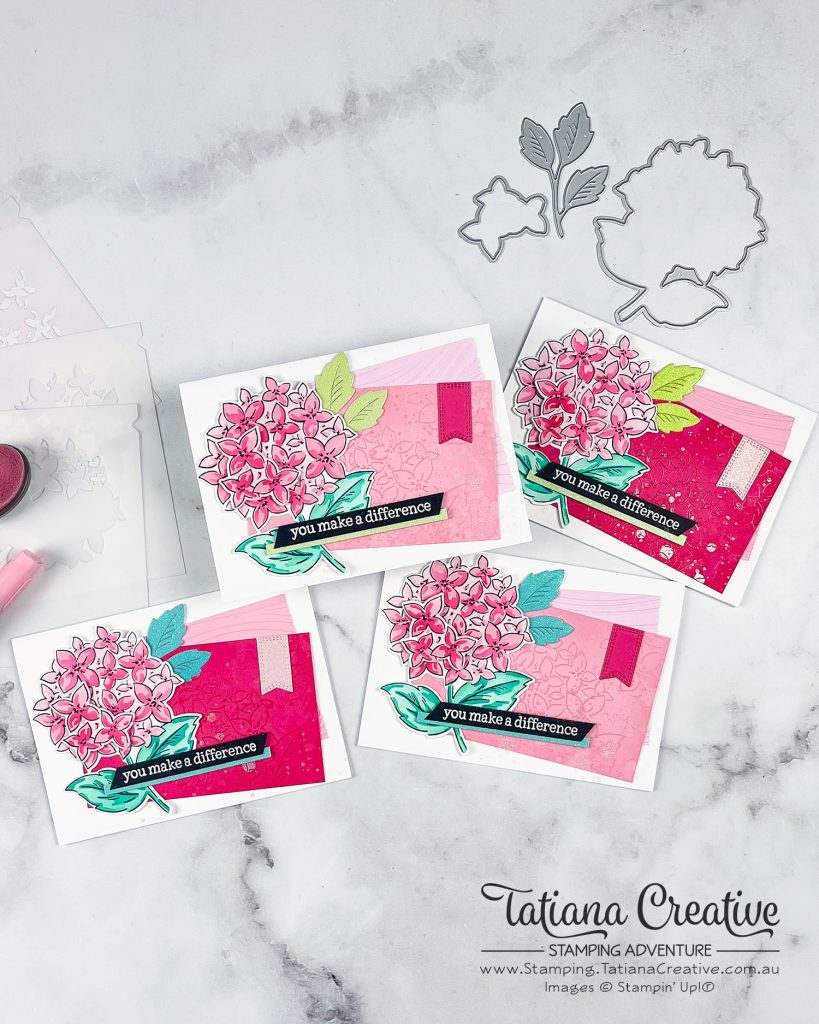
Hello Creative Friends! It’s been a while since I last shared here, but I’m excited to be back with a special project! Today, I’m showcasing a handmade card (well actually a collection of handmade cards) I created for OnStage 2025 as my swaps. OnStage is a fantastic event where Stampin’ Up!® Independent Demonstrators gather together to create, learn, connect with fellow crafters and exchange creative ideas through beautiful, handcrafted projects. For this design, I used the Thankful Garden bundle from the Online Exclusives collection, bringing together gorgeous floral elements and intricate details. If you love card making, stamping, and paper crafting, you won’t want to miss this!
[Want to recreate this project? You’ll find all the supplies I used at the end of this post, conveniently linked to my Stampin’ Up! online store. I’d love to be your demonstrator and appreciate your support—it means the world to me on this creative journey!]
Project Details:
- Card Base: Basic White Thick
- Card Front: Bubble Bath (11.8 cm x 7.5 cm) and Pretty in Pink (11.8 cm x 7.5 cm)
- Sentiment: Basic Black (9 cm x 1 cm)
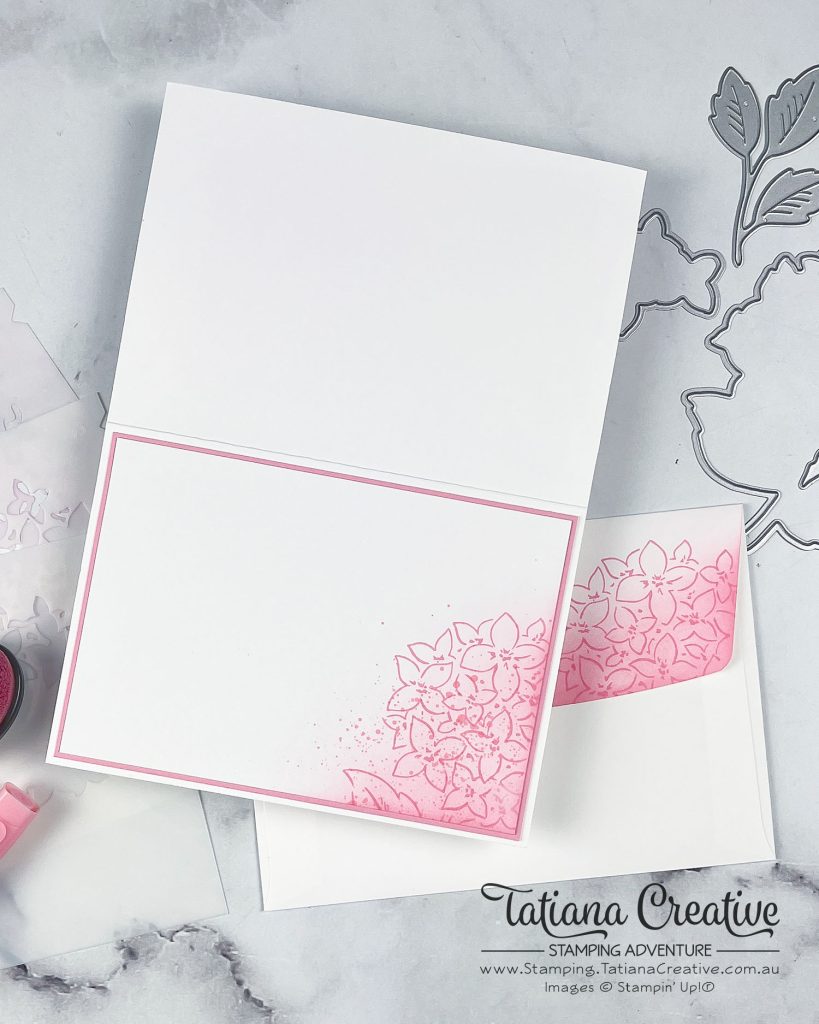
- Card Inserts: Pretty in Pink (14.35 cm x 10 cm) and Basic White (14.05 cm x 9.7 cm)
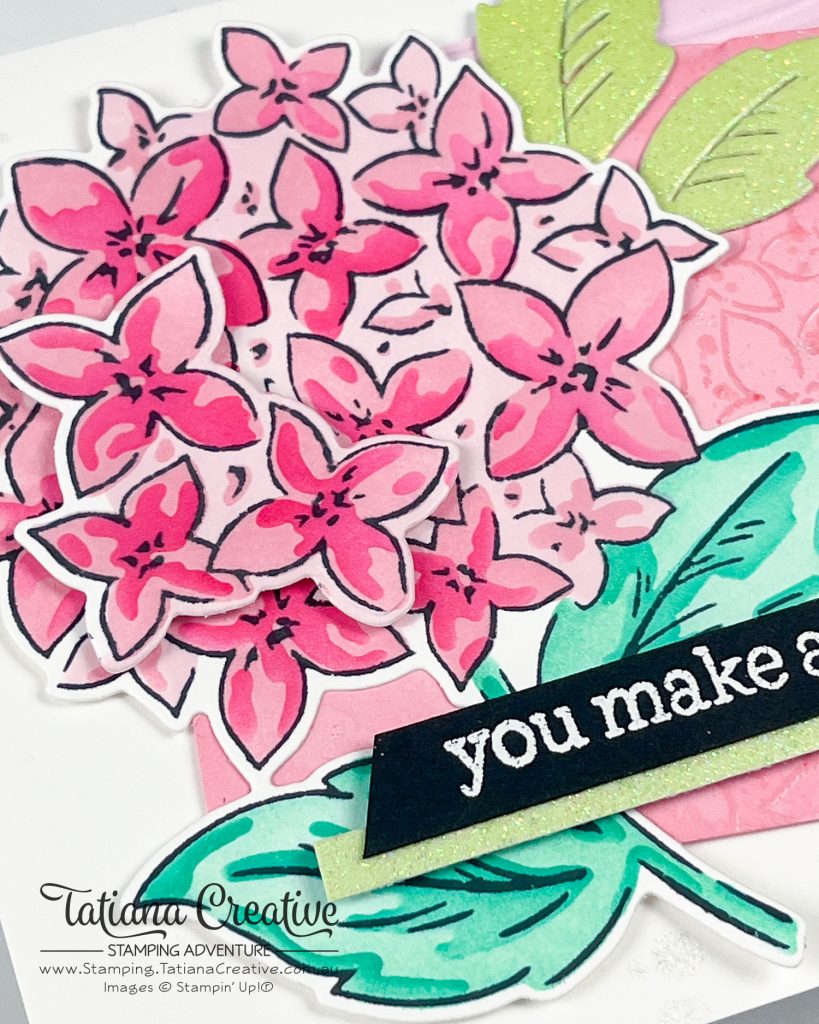
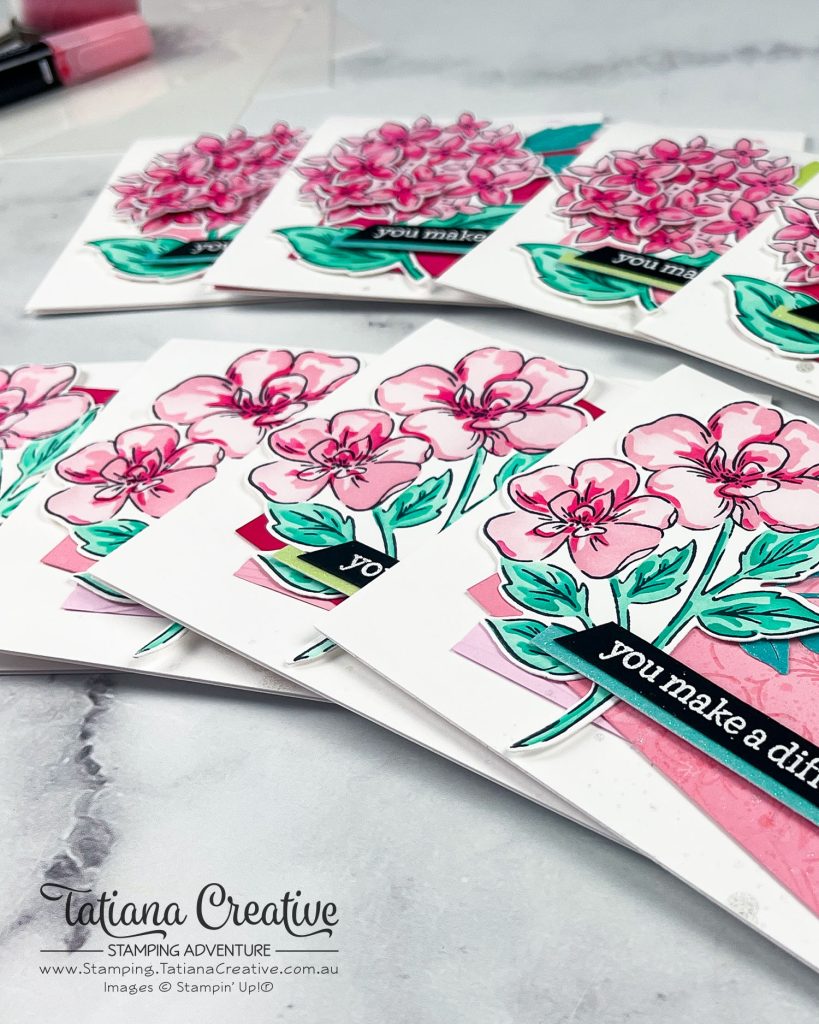
- Stamp the hydrangea floral image on some Basic White cardstock. Stamp a second, but for this one you can mask out the top and the bottom leaves/steam as you will only need the bottom of the flowers. Then using the Thankful Garden Decorative Masks, Blending Brushes and Classic Stampin’ Pads colour in the image.
- I used the following colours:
- Mask #1 Bubble Bath
- Mask #2 Pretty in Pink
- Mask #3 Melon Mambo
- Mask #4 Coastal Cabana
- Mask #5 Summer Splash
- Die cut out the hydrangea and the little trio of three hydrangea flowers from the second.
- I used the following colours:
- Emboss the Bubble Bath card front cardstock using the Soft Waves 3D Embossing folder.
- Clear heat emboss the hydrangea onto the Pretty in Pink card front cardstock. Then blend some Pretty in Pink ink around the edges of the cardstock. Splash some water to lift some of the ink that you have just blended in, drying with some paper towels. To really add some extra texture use the Dark Stampin’ Blends Marker (thick end) to splash some colour by flicking the marker with the lid. NOTE: This can damage the end of your Stampin’ Blend Marker.
- White heat emboss the sentiment onto the Basic Black cardstock for the sentiment. Cut the ends on an angle.
- From the Lemon Lime Twist Pastel Ombre Glimmer Specialty Paper, die cut out the leaves and cut a 9 cm x 0.5 cm strip.
- From a scrap of Melon Mambo cardstock die cut out the smallest banner from the Nested Essential Dies.
- Take the Basic White insert piece and stamp the hydrangea in Pretty in Pink one the bottom right corner. Using a Blending Brush, add some Pretty in Pink ink over the stamping. If you want, add some Dark Stampin” Blends Marker splashes by flicking the marker with the lid. NOTE: This can damage the end of your Stampin’ Blend Marker.
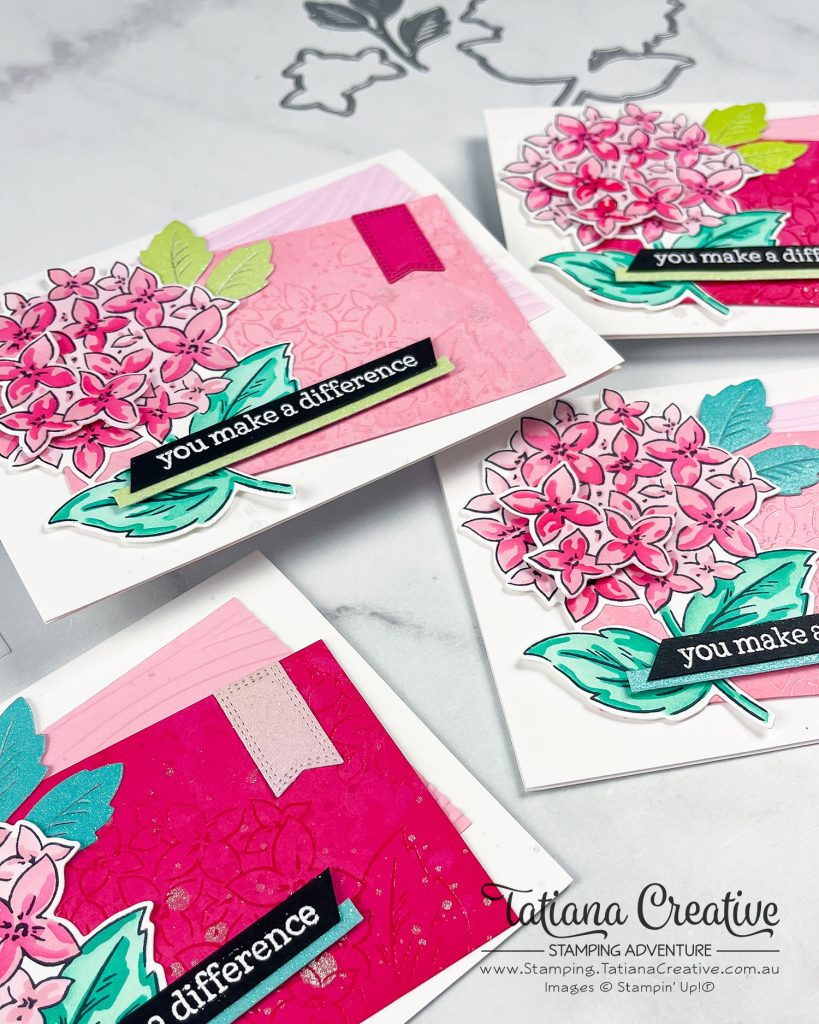
- To assemble the card:
- Fold and burnish the fold of the Basic White Thick card base.
- Adhere the Basic White card insert to the Pretty in Pink card insert. Then adhere these to the inside of the card base.
- On the card front, first adhere the Bubble Bath embossed card front on an angle.
- Adhere the Pretty in Pink card front over lapping the Bubble Bath one, and also on an angle.
- Add some Wink of Stella splashes over the top of the card front.
- Remove the bottom leave off the die cut leaves and adhere the remaining two to the back of the hydrangea on the right side.
- Adhere the hydrangea to the card front to the left. Add using stamping dimensionals the three little hydrangeas to the top of the big bunch.
- Flip the sentiment over to the back. Line up the strip of Lemon Lime Twist Pastel Ombre Glimmer Specialty Paper at the bottom edge and use Black Stampin’ Dimensionals to adhere the strip to the sentiment. Then adhere to the card front.
- Add the little Melon Mambo banner

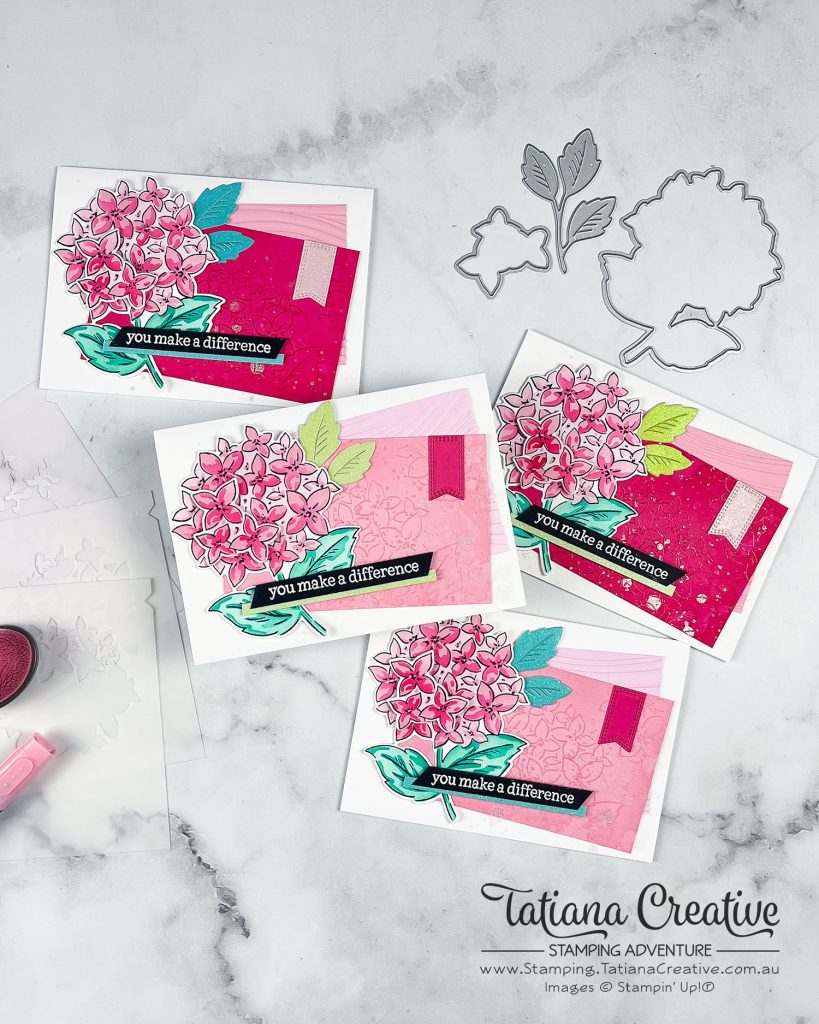
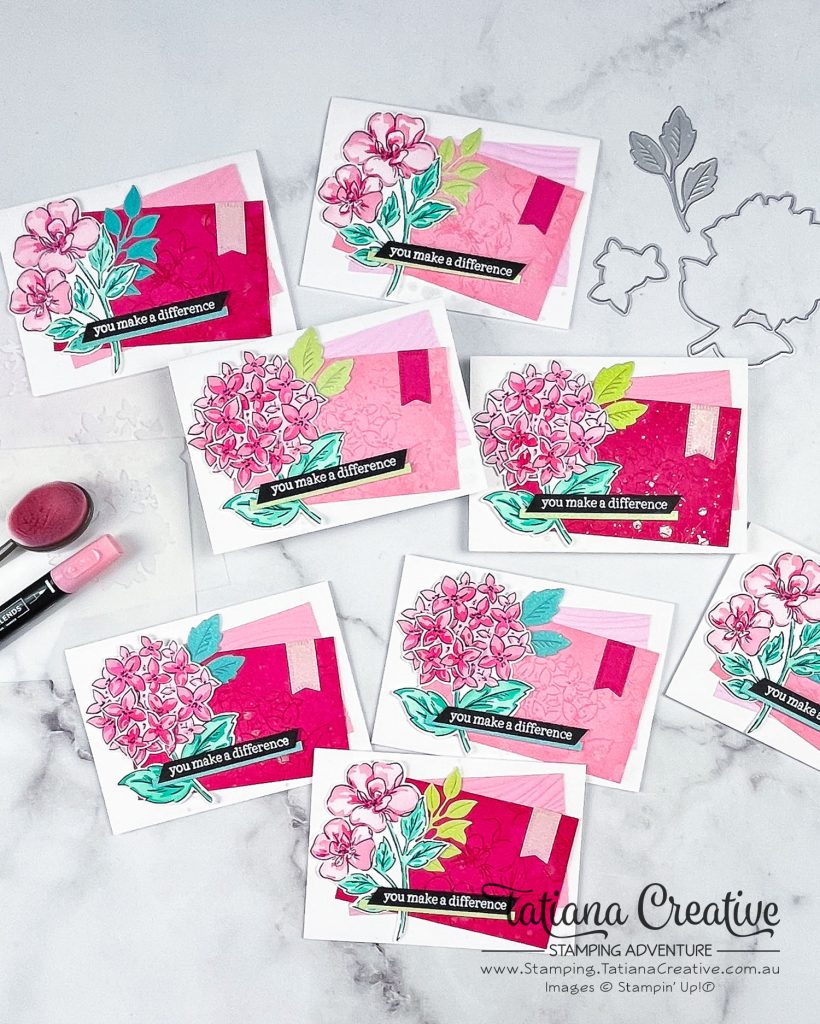
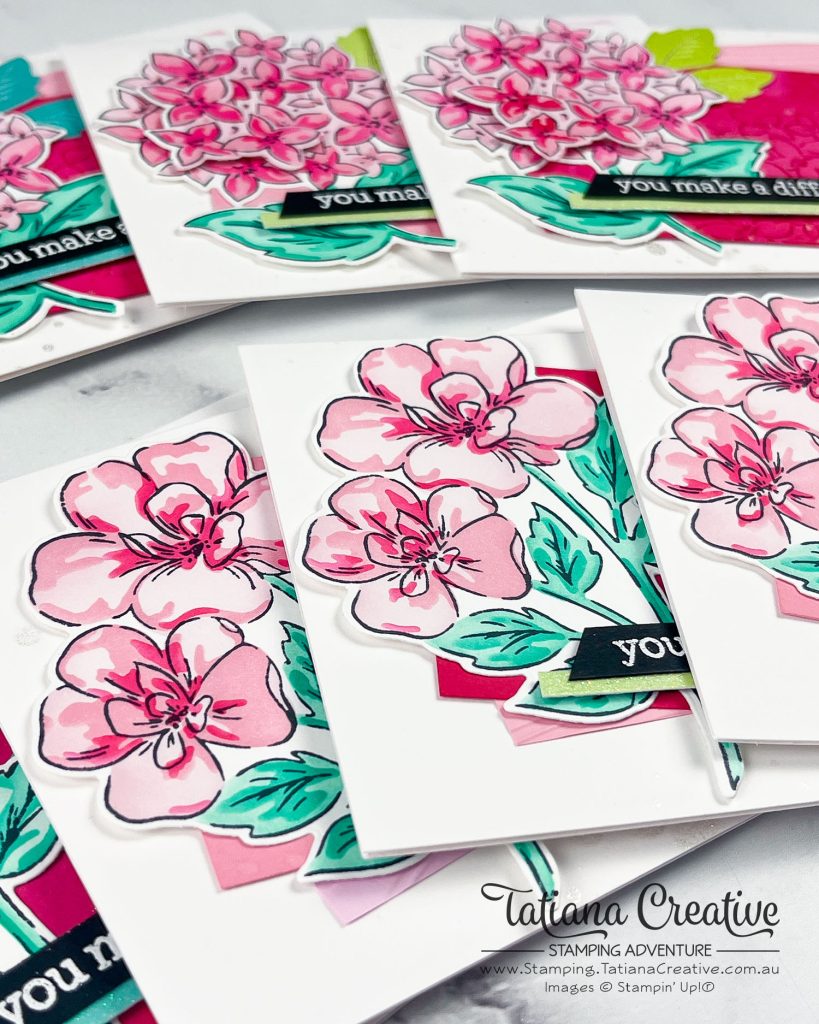
Other Cards:
I had so much fun ink blending that I made lots of variations of this same card. It was too hard to decide which flower from the Thankful Garden Bundle to use and which pink looked best on the card front. Also I used the Balmy Blue Pastel Ombre Glimmer Specialty Paper for the leaves. Which one is your favourite?

Thank you so much for visiting my blog! I hope today’s project has inspired you to get creative and try something new.
Until next time,
Tatiana
- Join Stampin’ Up!® to start getting your products at 20% discount: CLICK HERE
- Request a Catalogue to see what products you can purchase: CLICK HERE
- Subscribe to my newsletter to keep up to date with the latest news: CLICK HERE
- Follow me on Facebook for regular updates and inspiration: CLICK HERE
- Go SHOPPING for clearance items and specials: CLICK HERE
If you’re in Australia, you can shop Stampin’ Up!® products through my online store. I’d love to be your demonstrator and help you find the perfect supplies for your next creative project!
Supplies:
You can purchase the of the supplies I used in this project. Please click on the image below to purchase. Thank you for your support.
")


 Specialty Paper")


Basic Supplies:
I highly recommend the following basic supplies to make your paper crafting experience easier. I use this products in every project.


