


Hello Creative Friends!
Welcome to my blog. It has been a WHILE since I’ve posted. Kids, family life and health have been a priority. I do have to say I miss spending time being creative. And I miss sharing my creations with you.
The project I’m sharing today was created earlier this year for the Stampin’ Fancy Friday Technique Focus Challenge back in April 2024. I chose the showcase the Faux Suede technique. It’s super easy to do and creates wonderful texture that really adds charm to your projects.

[Want to recreate this project? You’ll find all the supplies I used at the end of this post, conveniently linked to my Stampin’ Up! online store. I’d love to be your demonstrator and appreciate your support—it means the world to me on this creative journey!]
Project Details:
- Card Base: Pool Party
- Card Front: Basic White (9 x 13.35 cm)
- Faux Suede Panel: Pool Party (7.5 x 13 cm)
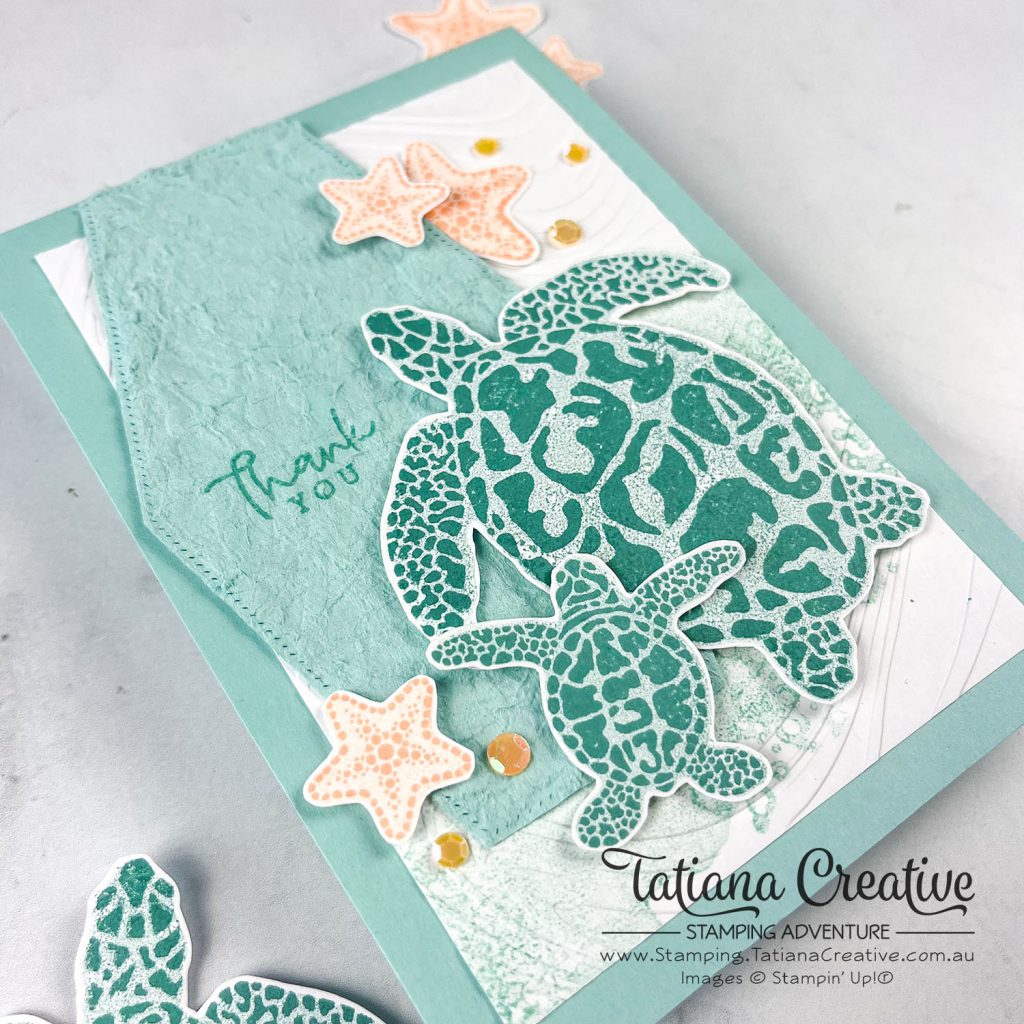
- Start by stamping the wave/bubbles image from the Sea Turtle stamp set in second generation Pool Party ink onto the Basic White card front.
- Then using the So Swirly Embossing Folder, emboss and then adhere to the card front.
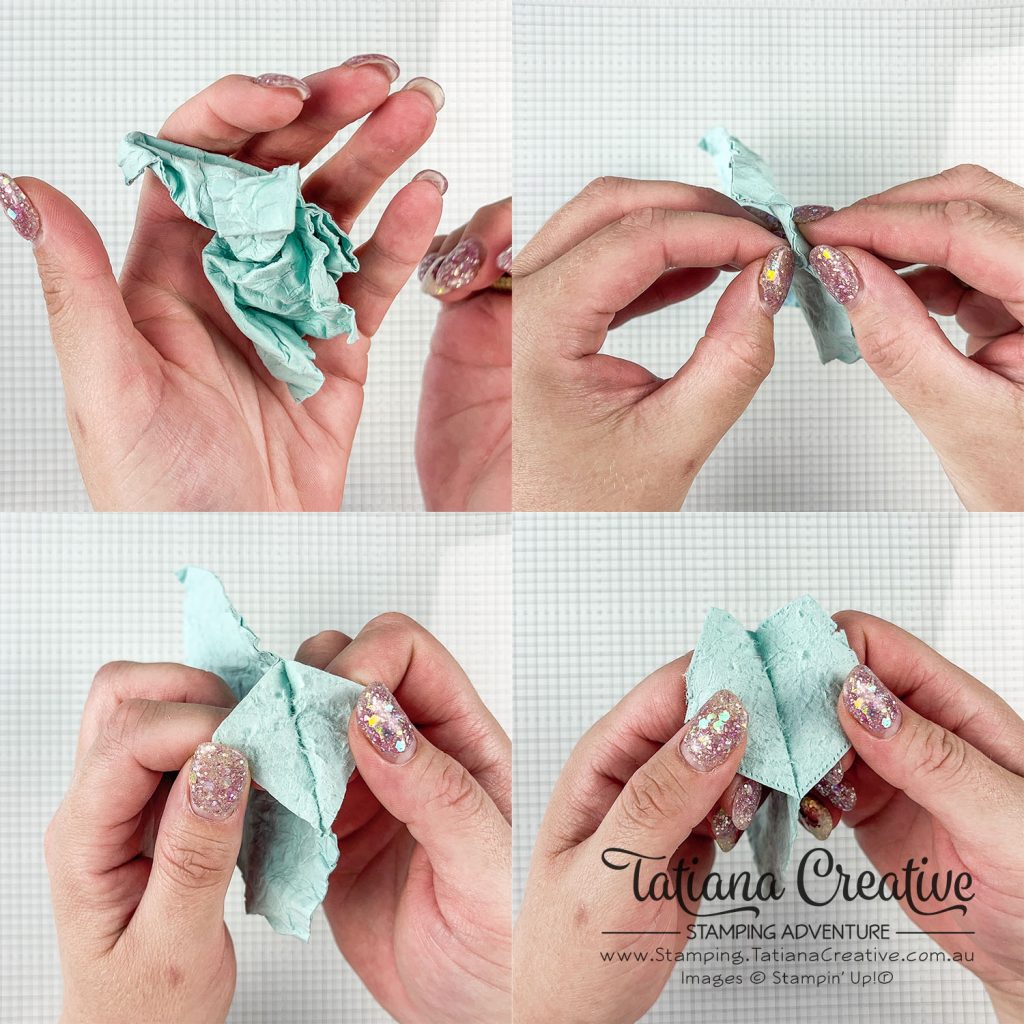
- Scrunch and curve your Pool Party cardstock with a bone folder till it is super soft. Die cut out using the irregular hexagon die from the Nested Essentials Dies and then carefully separate the layers! Adhere to the card front.
- On some scraps of Basic White cardstock, stamp the small and large turtles from the Sea Turtle stamp set. I stamped them in Lost Lagoon ink, the details in first generation and then solid shape in second generation ink. Fussy cut out.
- Also stamp the star fish from the Sea Turtle stamp set in Petal Pink ink. Again the details in first generation ink and the solid shape in second generation ink.
- Adhere the turtles and star fish onto the card front using Stampin’ Dimensionals.
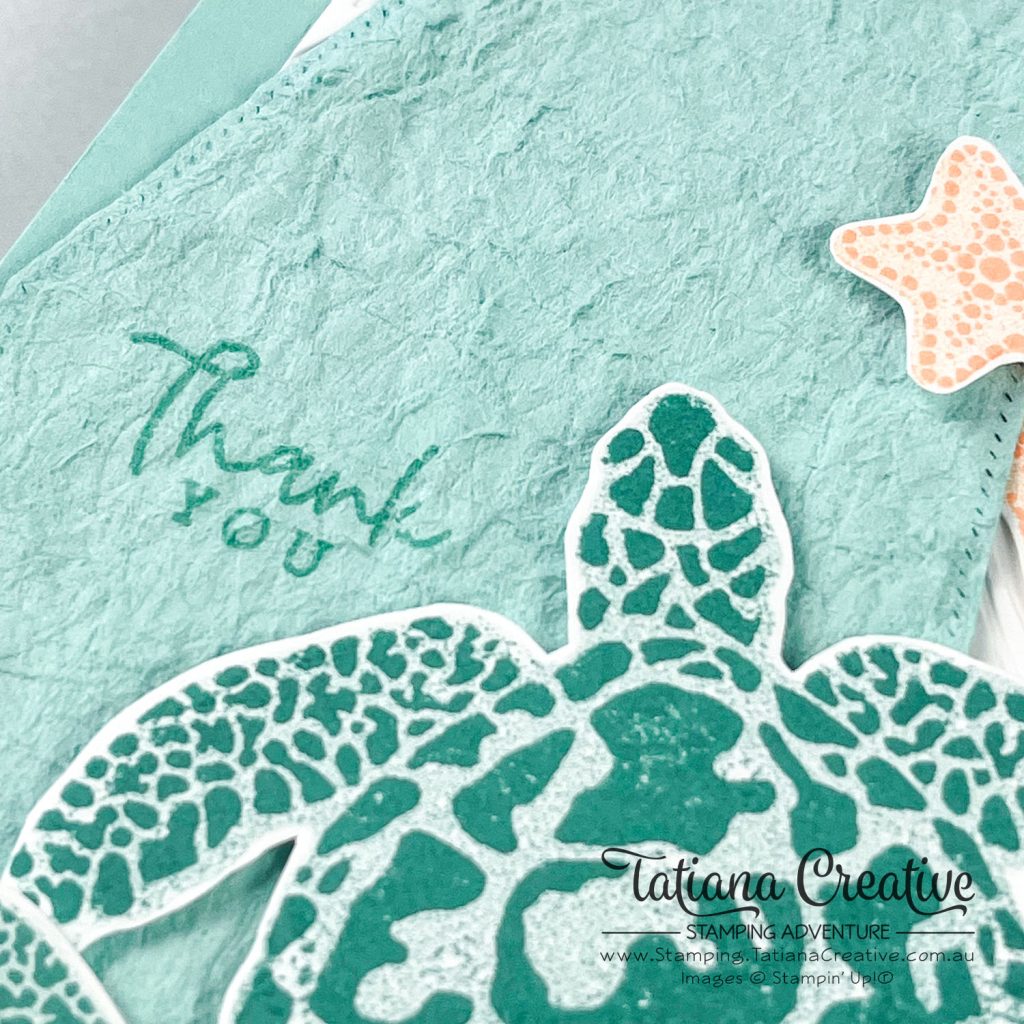
- Stamp the “Thank You” sentiment from the Darling Details stamp set to the Faux Suede panel in Pool Party ink.
- To finish off add some Adhesive Backed Shiny Sequins in Pumpkin Pie.
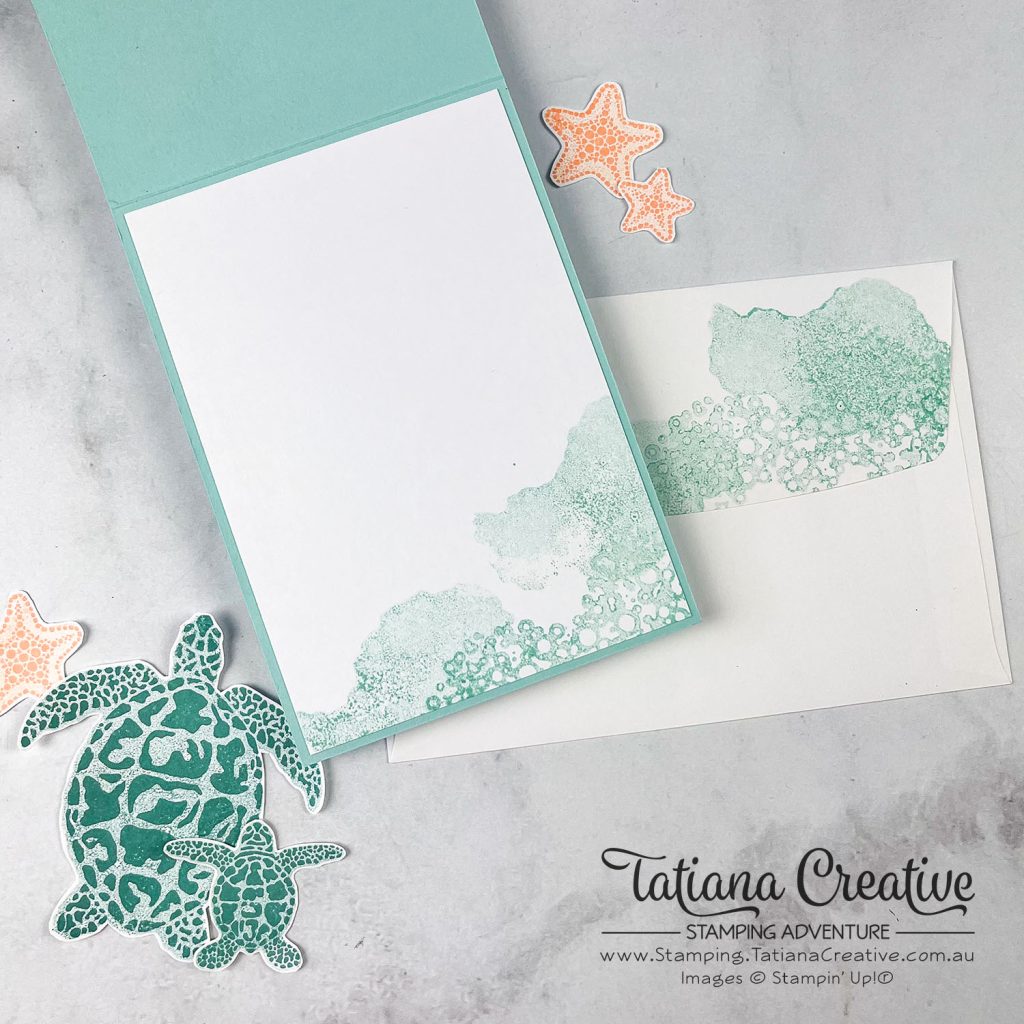
To really complete the card I love to decorate the inside Insert and the envelope. For both I stamped the bubble/wave image from the Sea Turtle stamp set.
Thank you so much for visiting my blog! I hope today’s project has inspired you to get creative and try something new.
Until next time,
Tatiana
- Join Stampin’ Up!® to start getting your products at 20% discount: CLICK HERE
- Request a Catalogue to see what products you can purchase: CLICK HERE
- Subscribe to my newsletter to keep up to date with the latest news: CLICK HERE
- Follow me on Facebook for regular updates and inspiration: CLICK HERE
- Go SHOPPING for clearance items and specials: CLICK HERE
If you’re in Australia, you can shop Stampin’ Up!® products through my online store. I’d love to be your demonstrator and help you find the perfect supplies for your next creative project!
Supplies:
You can purchase the of the supplies I used in this project. Please click on the image below to purchase. Thank you for your support.

")


Basic Supplies:
I highly recommend the following basic supplies to make your paper crafting experience easier. I use this products in every project.


