


Hello everybody!
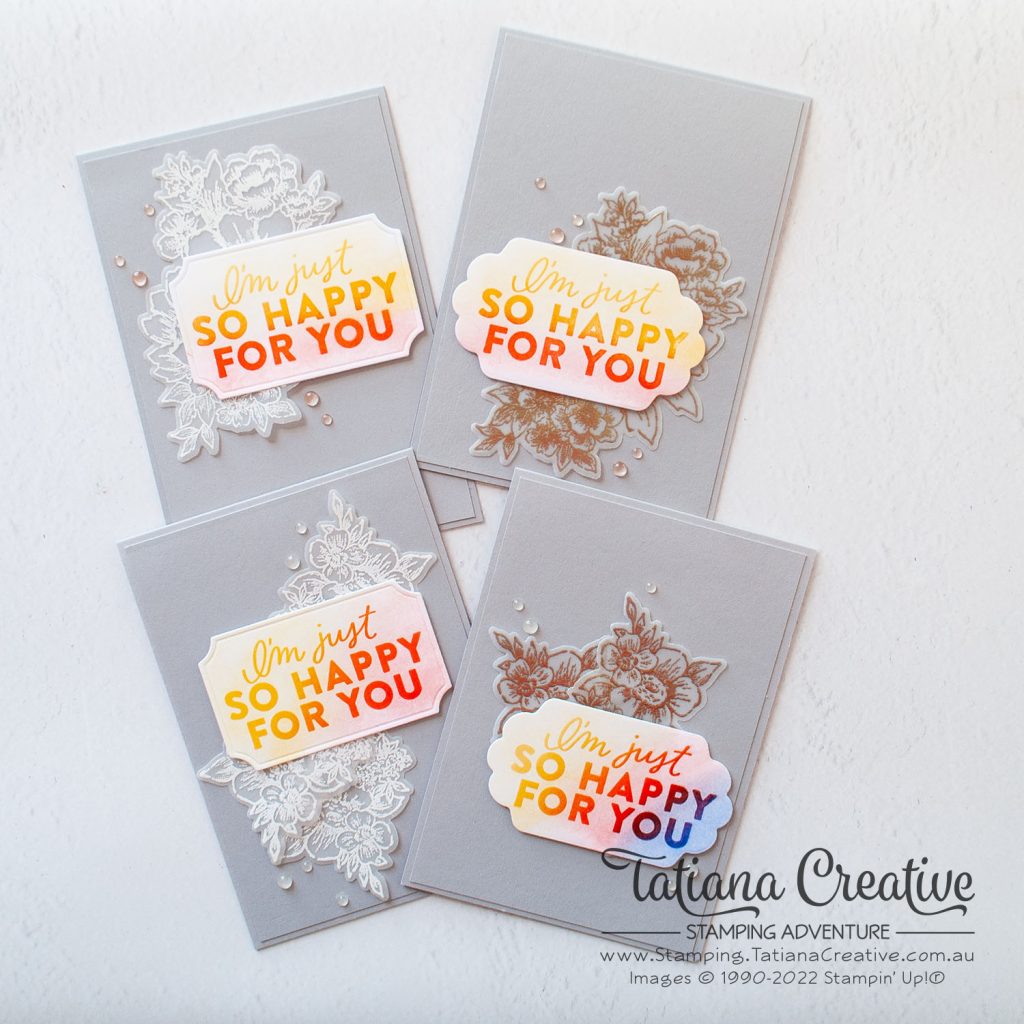
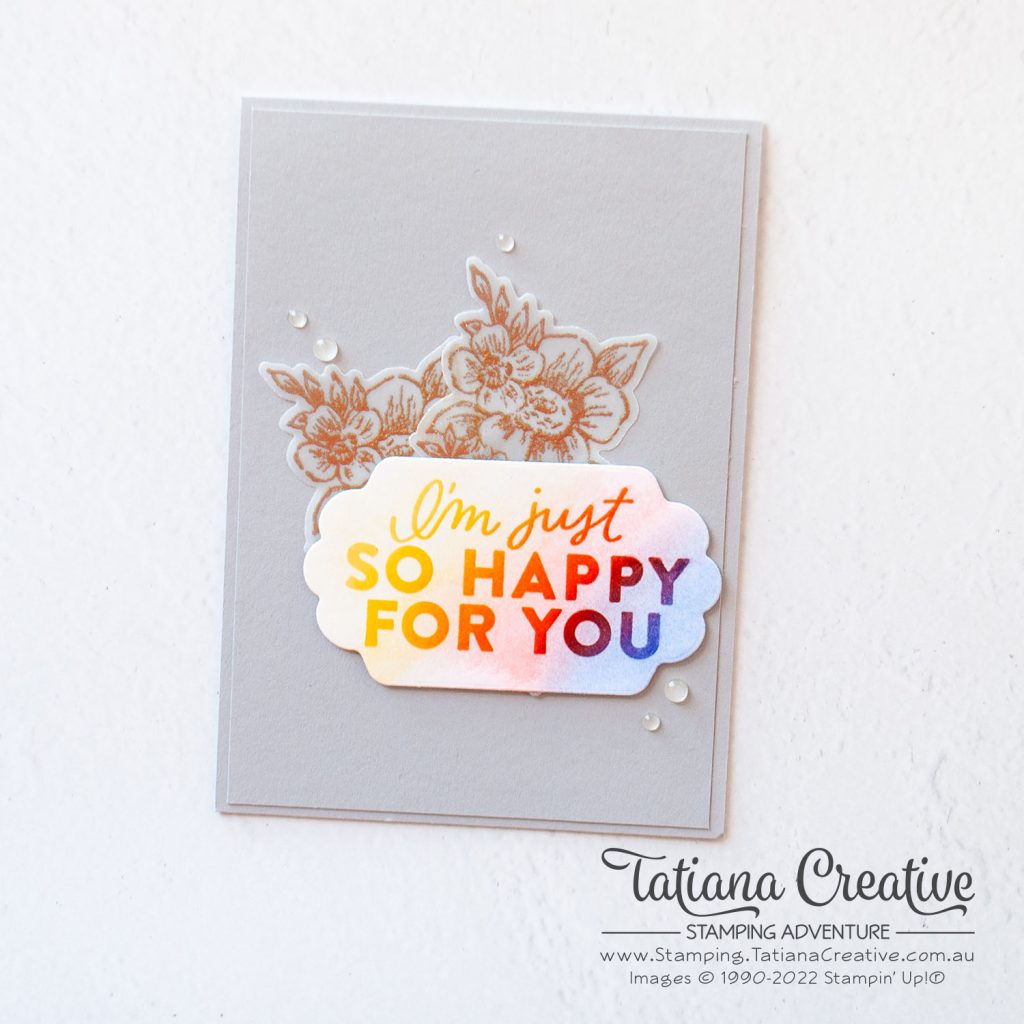
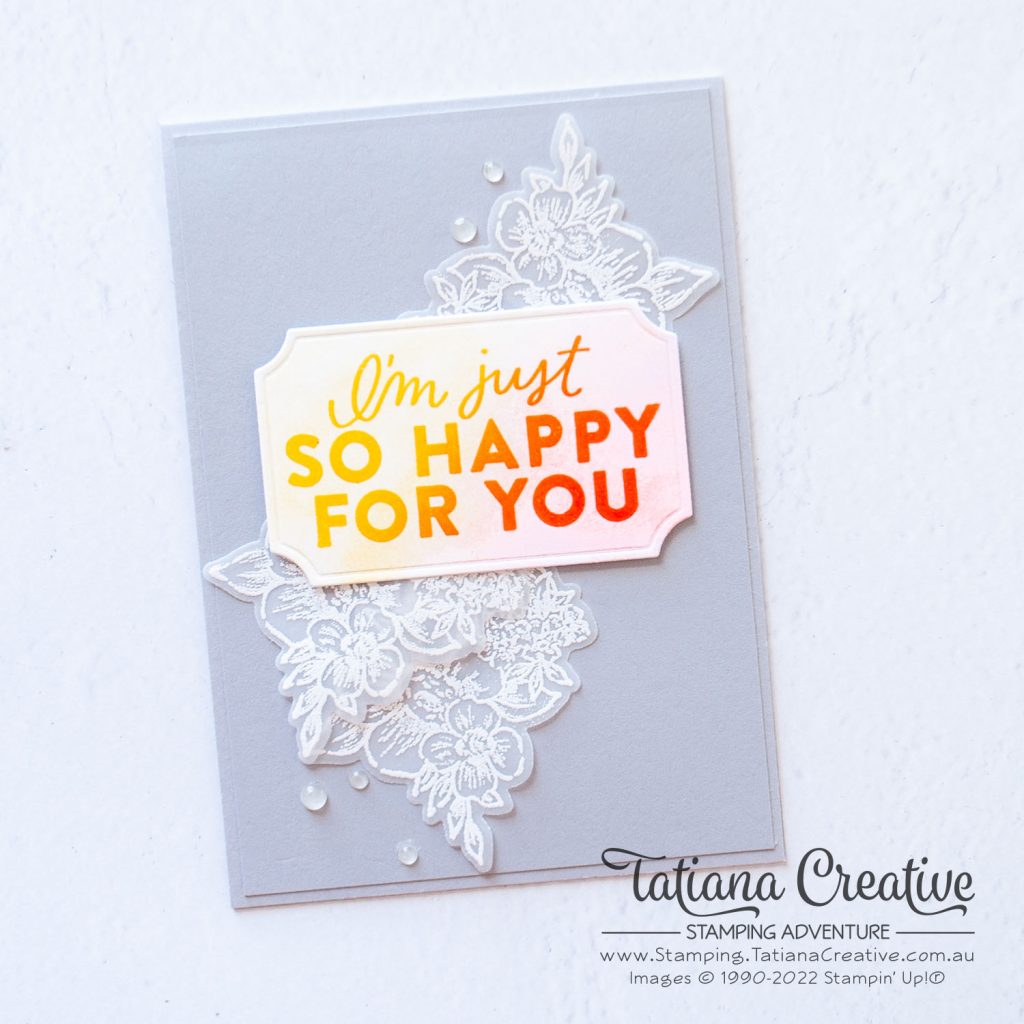
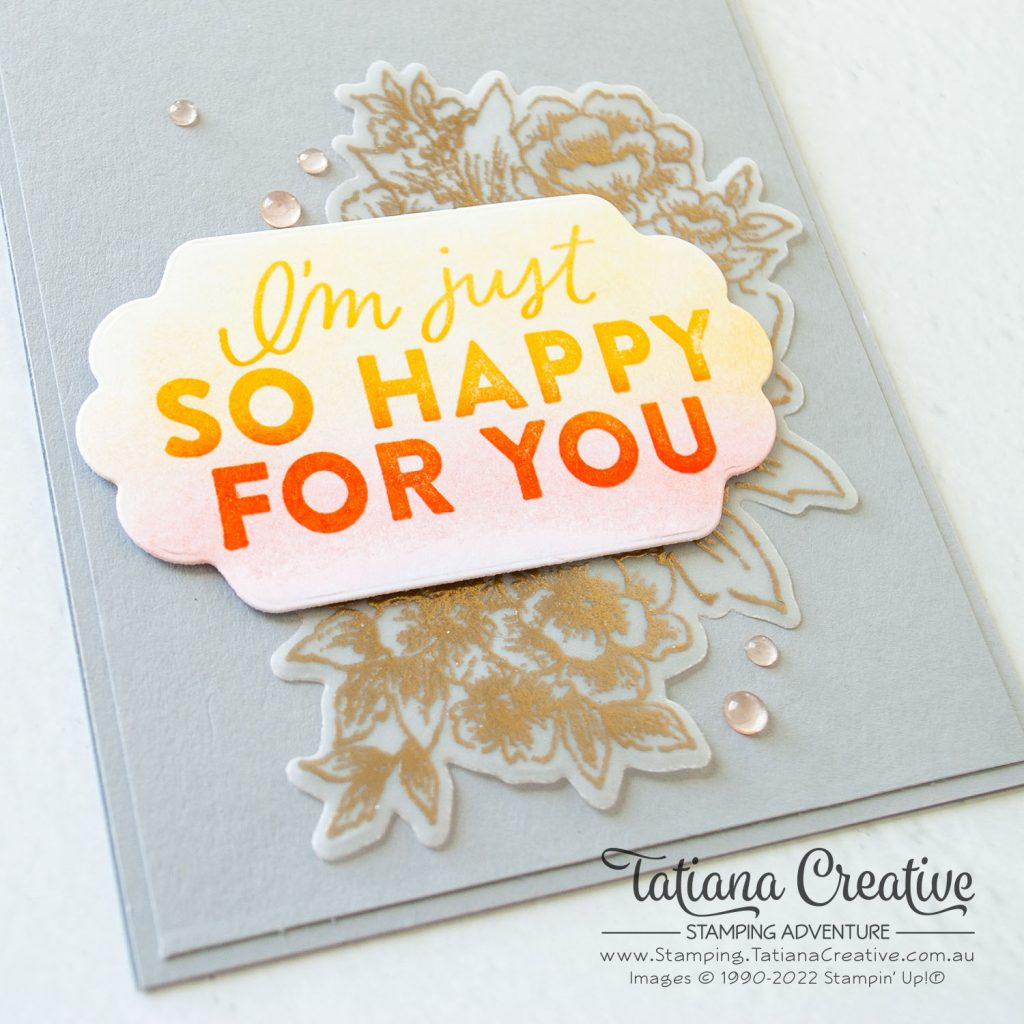
Welcome to my blog and first day of the 2022-2023 Annual Catalogue! It’s an exciting day. The cards I’m sharing with you today are using the new Good Feelings stamp set which I received from Stampin’ Up!® as part of my On Tour registration. On Tour was a Stampin’ Up!® Demonstrator virtual event held various dates last month, where we got to see presentations using the new products. Everyone received one of four stamp sets as part of the event and I got the Good Feelings. It’s a fantastic bold sentiment set. I coupled it with the Blessings Of Home to create the following cards:
[Want to recreate this project? You’ll find all the supplies I used at the end of this post, conveniently linked to my Stampin’ Up! online store. I’d love to be your demonstrator and appreciate your support—it means the world to me on this creative journey!]
Card Details:
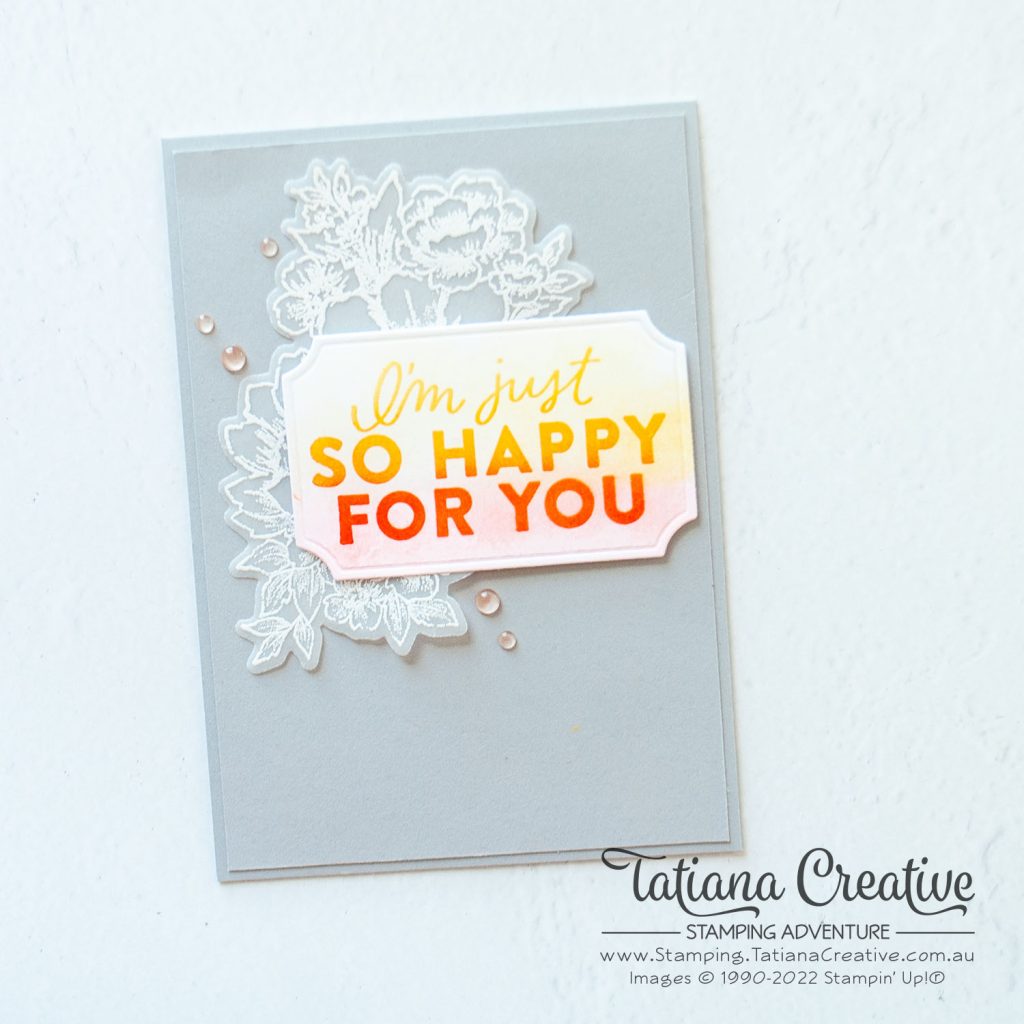
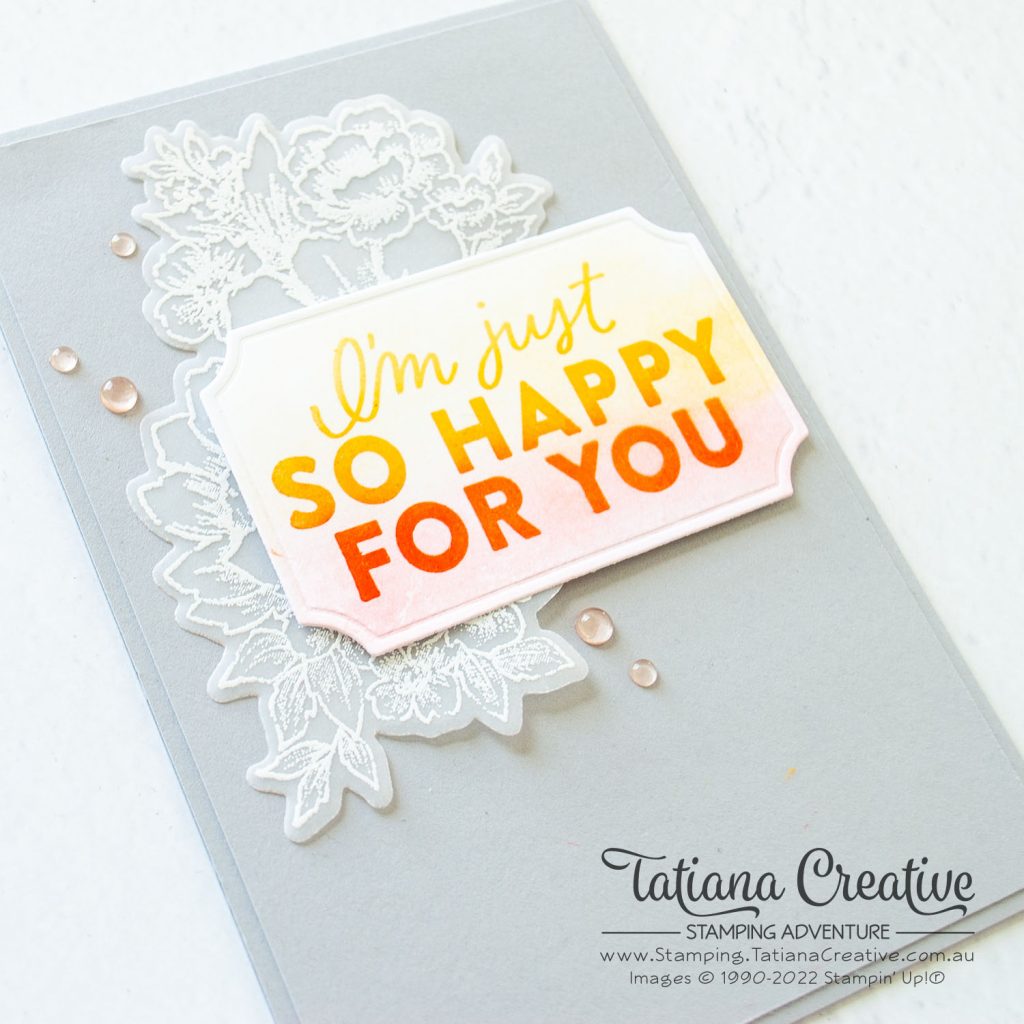
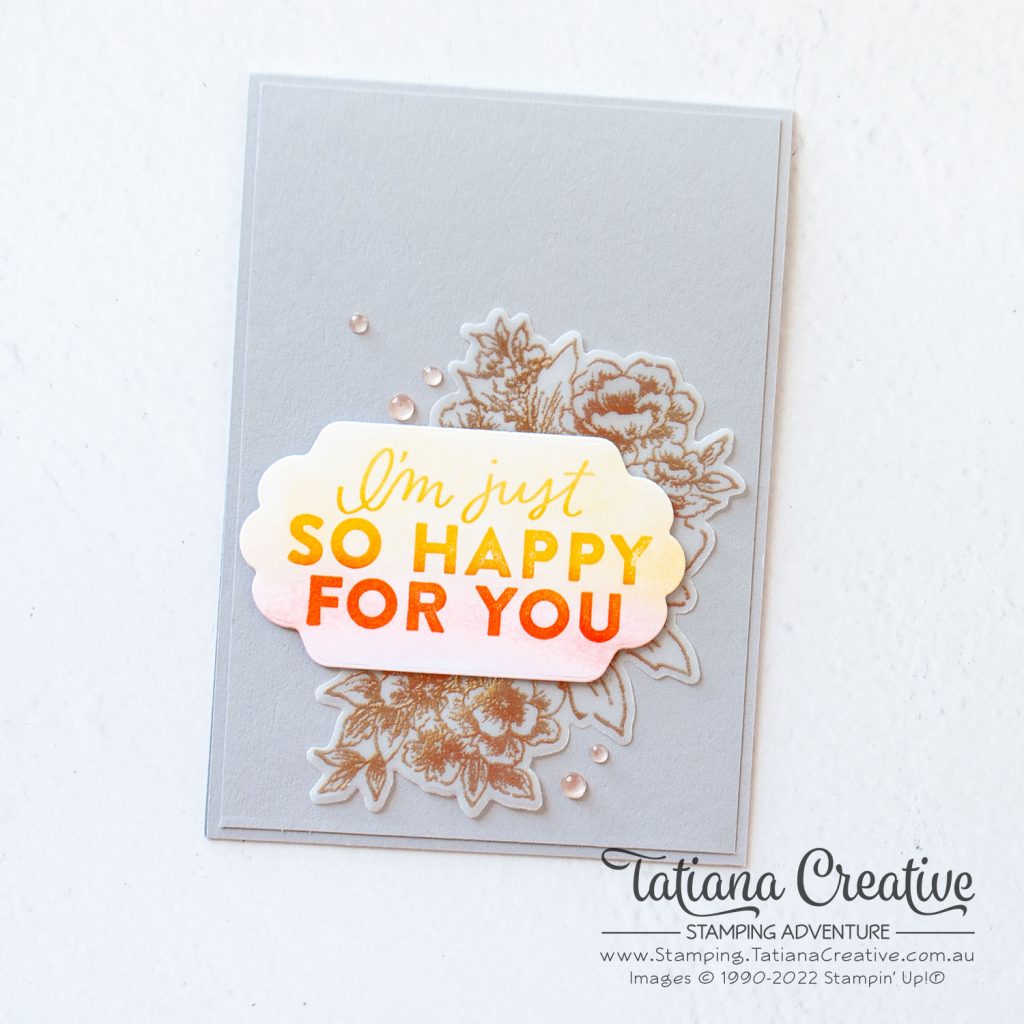
- Card Base: Smoky Slate cardstock
- Card Front: Smoky Slate cardstock (10 x 14.35 cm)
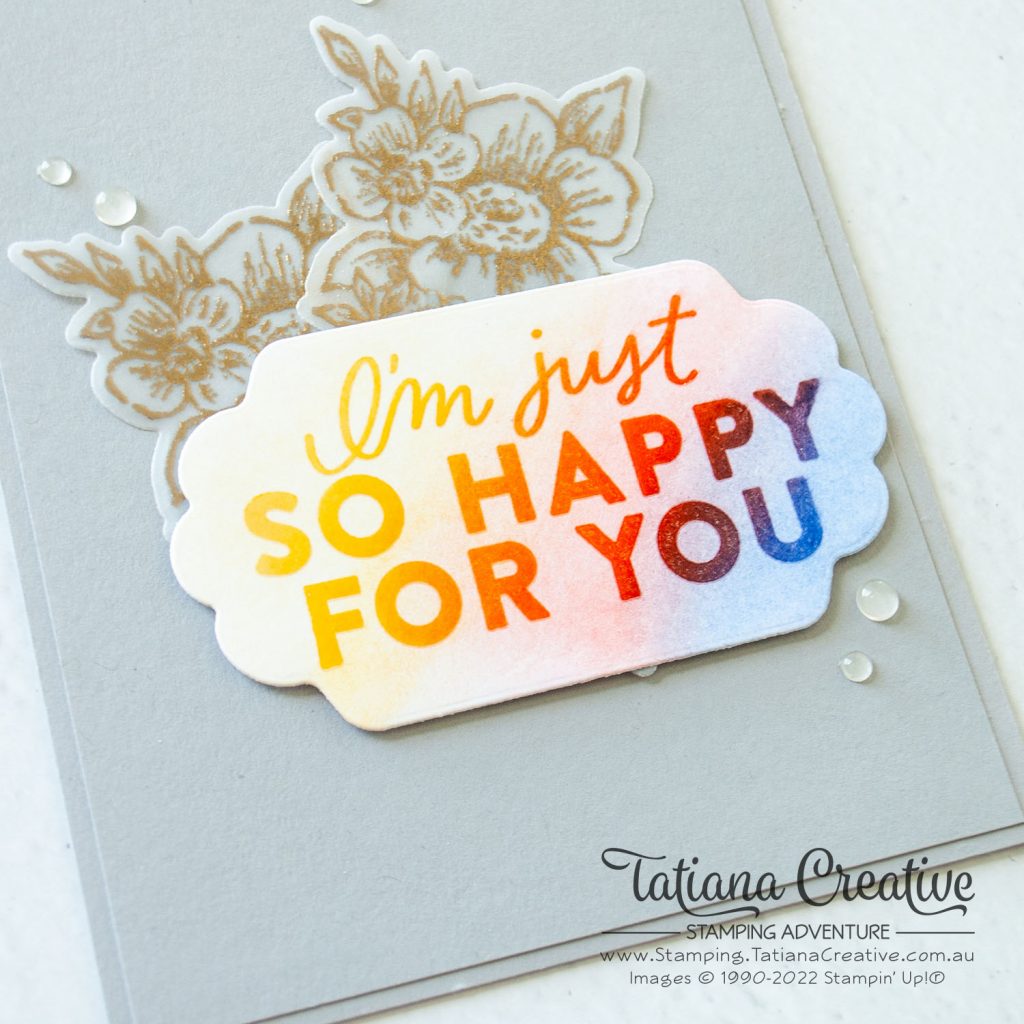
- Sentiment Label: Basic White cardstock
- Card Insert: Basic White cardstock (10 x 14.35 cm)
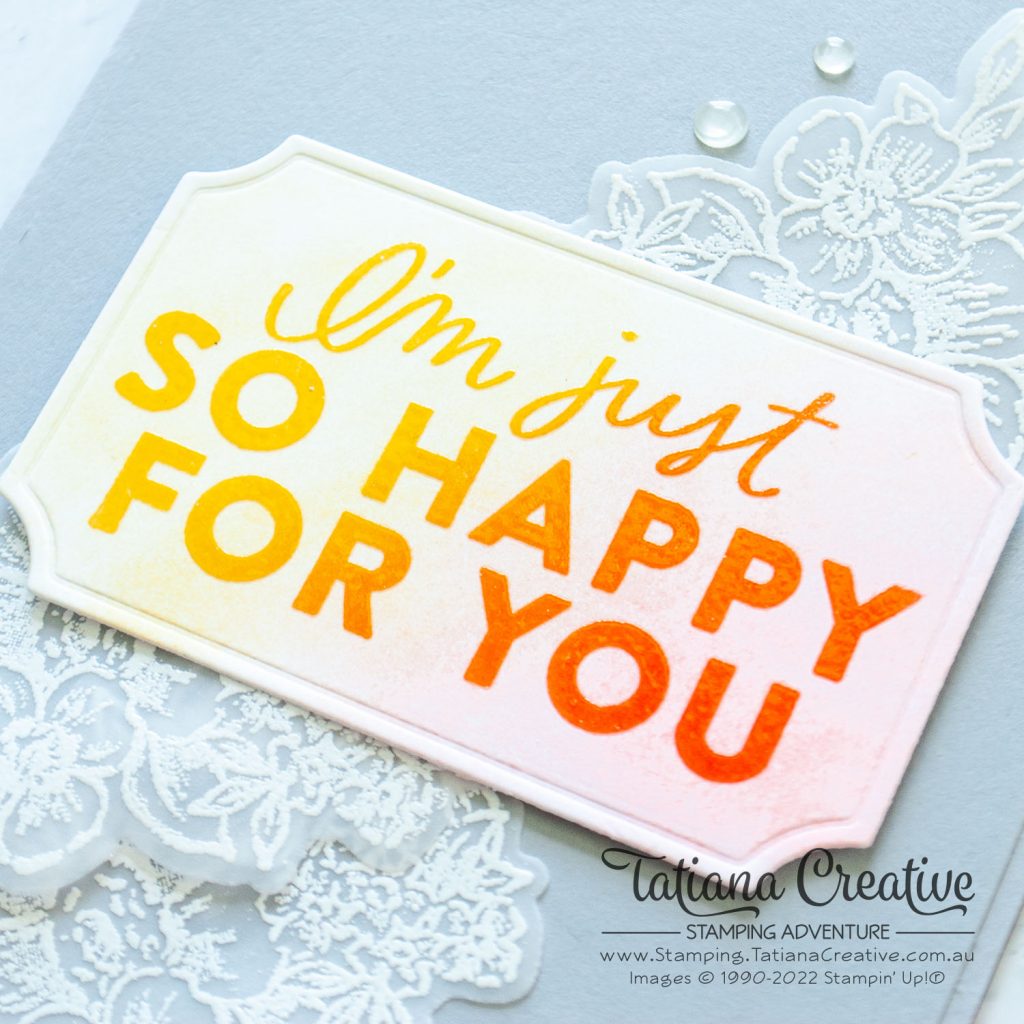
- Start by creating the sentiment. Prep your Soft Pastels by scratching some onto a clear block, you’ll have some pastel dust. Mount your sentiment from the Good Feelings stamp set onto the Stamparatus and stamp in Versamark ink onto Basic White cardstock. Using a Sponge Dauber rub the pastel dust over the sentiment and it will stick to the Versamark ink. Then ink the stamp again in Versamark ink and add Clear embossing power from the Basics Embossing Powers over it and heat set with the Heat Tool. This will help the sentiment set and make it shiny.
- Die cut the sentiment out with a label die. I couldn’t choose so used two different ones. The one with the cut out corners is from the Painted Labels Dies and the other is from the Seasonal Labels Dies.
- How White or Gold heat emboss the flowers from the Blessings Of Home stamp set onto Vellum and die cut out with the coordinating Flowers Of Home Dies.
- Adhere the card front to the card base and then add the flowers. Add the sentiment overlapping the flowers using Stampin’ Dimensionals.
- To finish off the card add some Polished Dots.
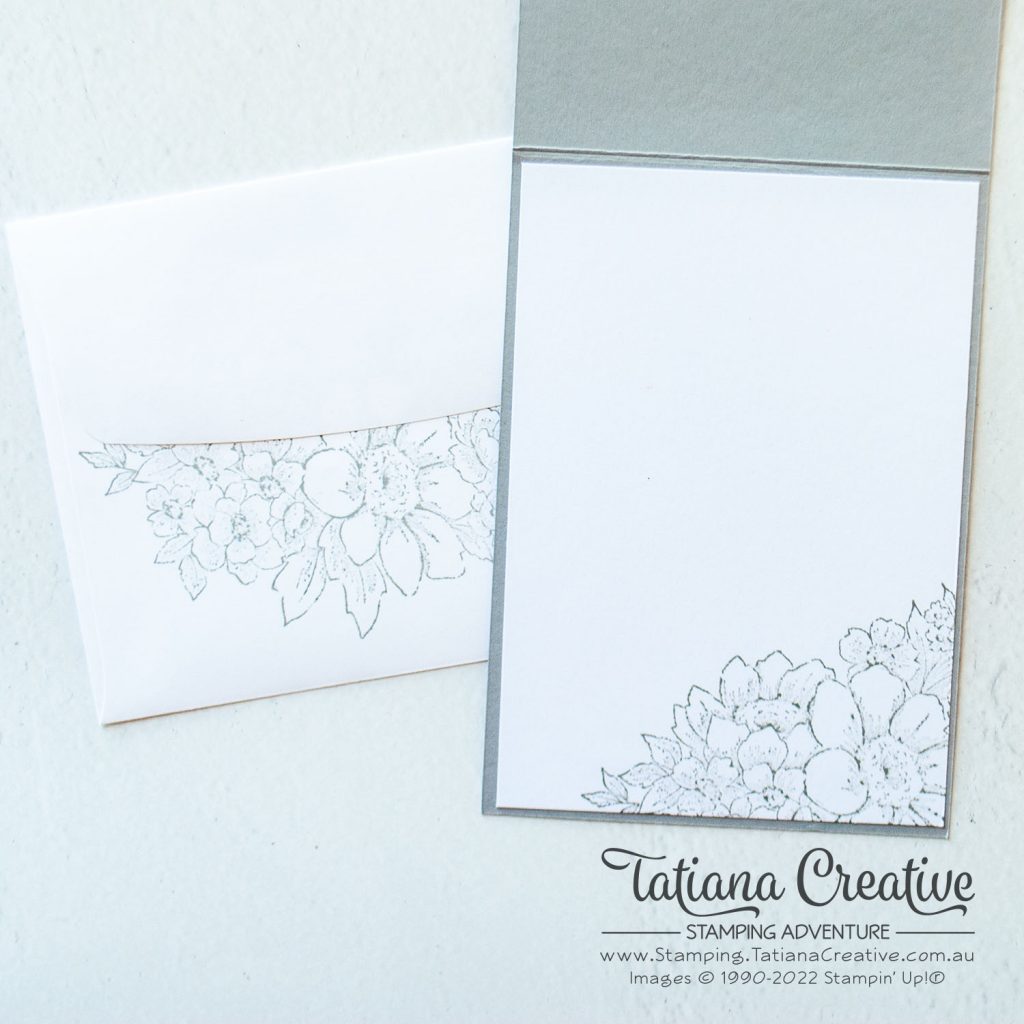
To finish it all off, I stamped the floral image from Blessings Of Home stamp set in Smoky Slate ink both underneath the envelope flap and inside the card on the card insert.
Thank you so much for visiting my blog! I hope today’s project has inspired you to get creative and try something new.
Until next time,
Tatiana
- Join Stampin’ Up!® to start getting your products at 20% discount: CLICK HERE
- Request a Catalogue to see what products you can purchase: CLICK HERE
- Subscribe to my newsletter to keep up to date with the latest news: CLICK HERE
- Follow me on Facebook for regular updates and inspiration: CLICK HERE
- Go SHOPPING for clearance items and specials: CLICK HERE
If you’re in Australia, you can shop Stampin’ Up!® products through my online store. I’d love to be your demonstrator and help you find the perfect supplies for your next creative project!
Supplies:
You can purchase the of the supplies I used in this project. Please click on the image below to purchase. Thank you for your support.
")
")


