Welcome to the Go For Greece Blog Hop. You are visiting Tatiana in Australia. We are a group of demonstrators from all around the world that are taking part in training organised by fellow demonstrator Kylie Bertucci. The aim of the group is to learn from top demonstrators who have had success with Stampin’ Up!®. Our goal is to achieve the incentive trip, this time to Greece in July 2019. The group is filled with so many wonderful demonstrators and I have loved being a part of this supporting community. It can be challenging when you want to turn Stampin’ Up!® into a business that supports your family and not knowing where to start and that you are going about things the right way can be confusing and overwhelming on your own. Part of our training is blog hopping!
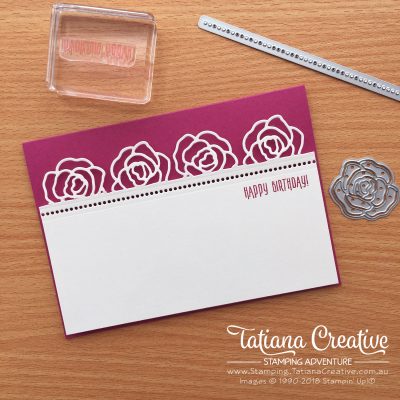
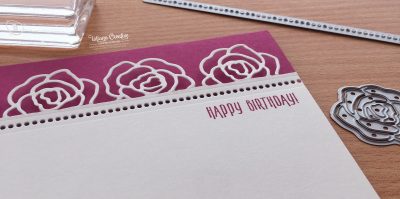
Today my card inspiration came from card maker Jennifer McGuire’s you tube video. I loved how she created a floral cutout that was still attached to the cardstock. I thought the rose from the Sweet Cake Framelits by Stampin’ Up!® would be so cute with this technique. I’m so thrilled with how this card turned out!

To create this card:
- Prepare landscape card base. I like mine to be top folding. I used Berry Burst.
- Cut Shimmery White card stock 146.5mm x 103mm
- With a pencil draw a light line 35mm down from the top.
- Using the rose die from the Sweet Cake Framelits place it so that a small part of the die goes below the pencil line. Use washi tape to hold into place. TIP: I recommend having the washi tape on top half of the die (or to word this differently on the part of the die that is above the line).
- Place the card stock and die onto the cutting plate so that the pencil line is on the edge of the plate. The idea is that we do not cut out the entire die, only the top part.
- Run through the big shot and remove the die. The rose should only be partially cut out.
- Repeat steps 4-6 again three more times (or as many times as you desire to complete the row of roses.
- To remove all the pieces of card stock from the inside of the rose and between the roses cut along the pencil line with a craft knife. This then leaves roses coming out from the solid two thirds of card stock.
- Using the line of dots die from eh Swirly Snowflakes Thinlits align underneath the roses and run though the Big Shot. This gives just a bit more of a border look. You can skip this step.
- Stamp the “Happy Birthday” sentiment from the Picture Perfect Birthday stamp set.
- Mount the Shimmery White card stock onto the card base using the Foam Adhesive Strips. The reason why I used the strips in this case was that I wanted a solid lift of the card so that when it went into the mail it would remain flat. I used the Foam Adhesive Strips on four sides and in the middle. You can use Stampin’ Dimensionals instead.

Below you will find the list of demonstrators who are blogging with me today. They all have wonderful projects to share with you. Happy Blog Hopping! You have been visiting Tatiana Tobin in Australia!
Thank you so much for visiting my blog! I hope today’s project has inspired you to get creative and try something new.
Until next time,
Tatiana
- Join Stampin’ Up!® to start getting your products at 20% discount: CLICK HERE
- Request a Catalogue to see what products you can purchase: CLICK HERE
- Subscribe to my newsletter to keep up to date with the latest news: CLICK HERE
- Follow me on Facebook for regular updates and inspiration: CLICK HERE
- Go SHOPPING for clearance items and specials: CLICK HERE
If you’re in Australia, you can shop Stampin’ Up!® products through my online store. I’d love to be your demonstrator and help you find the perfect supplies for your next creative project!
Supplies:
You can purchase the of the supplies I used in this project. Please click on the image below to purchase. Thank you for your support.


Wonderful Tania … thanks for sharing! xxx
Thank you Cheryll!
Beautiful card, thank you for sharing
Thank you Gloria!
Such a beautiful and inspirational card, Tania! Such a pleasure to be hopping with you. xx
Thank you Angie! Welcome to the blog hop! It’s a pleasure to be hopping with you too! xx
So pretty – how have I not noticed that rose thinlet?!
Haha I’m not sure. It’s a lovely thinlet!!
Such a beautiful card and great idea Tatiana….thank you so much for sharing
Thank you so much Vicki xx
Lovely card Tatiana
Thank you Libby!
Lovely card Tatiana x
Thank you Shelly
Absolutely love this project, Tania!
Awe, thanks Jenny! x
Wow, what a clever idea! Thanks for sharing!
Thanks for visiting! I’m so pleased you liked my card!