


Hello Everybody! Welcome to my blog!
I have another episode of Fantastic Fun Folds for you today. This time we are building on last week and creating a Double Z Fold. This is simply one version of the Double Z Fold card. I plan on showing you another version next week.

[Want to recreate this project? You’ll find all the supplies I used at the end of this post, conveniently linked to my Stampin’ Up! online store. I’d love to be your demonstrator and appreciate your support—it means the world to me on this creative journey!]
To see how to make this Double Z Fold card, watch the recording of the live video:
Measurements for this Double Z Fold card:
- Metric (A4):
- Card Base:
- Cut A4 card stock in half at 14.8cm (you get a piece that’s 21cm wide by 14.8cm high)
- Score at 5.25cm and at 10.5cm
- Second Z:
- Cut a piece of card stock to be 21cm wide by 5cm high (it can be any hight you like, the bigger it is less space you’ll have to write in the card).
- Score at 5.25cm and at 10.5cm
- DSP:
- 9.8cm x 14.3cm (for the card base front)
- 10cm x 5cm plus two 4.8cm x 5cm (for the second z)
- Card Base:
- Imperial (Letter):
- Card Base:
- Cut Letter card stock in half at 5.5″ (you get a piece that’s 8.5″ wide by 5.5″ high)
- Score at 2.25″ and 4.5″
- Second Z:
- Cut a piece of card stock to be 8.5″ wide by 2″ high (it can be any hight you like, the bigger it is less space you’ll have to write in the card).
- Score at 2.25″ and 4.5″
- DSP:
- 2″ x 5.25″ (for the card base front)
- 4.25″ x 1.75″ plus two 2″ x 1.75″ (for the second z)
- Card Base:
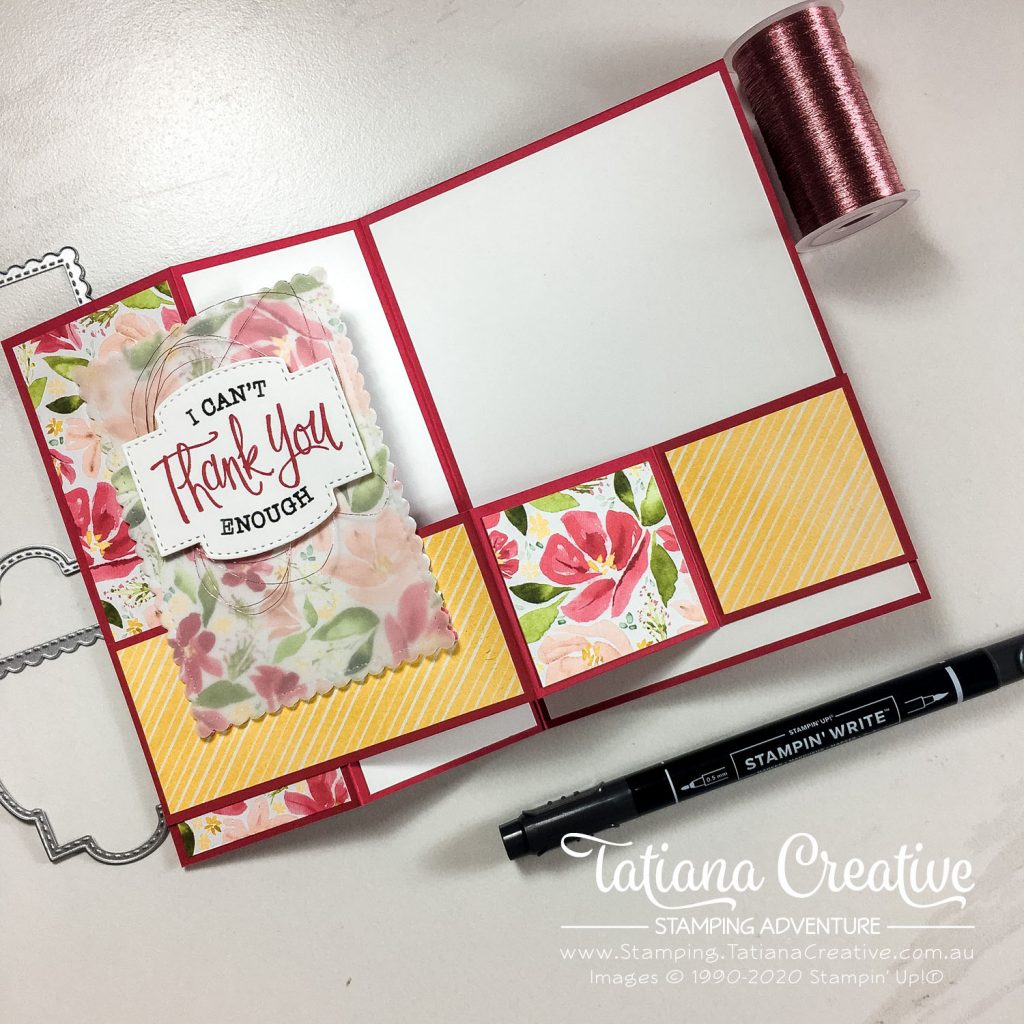
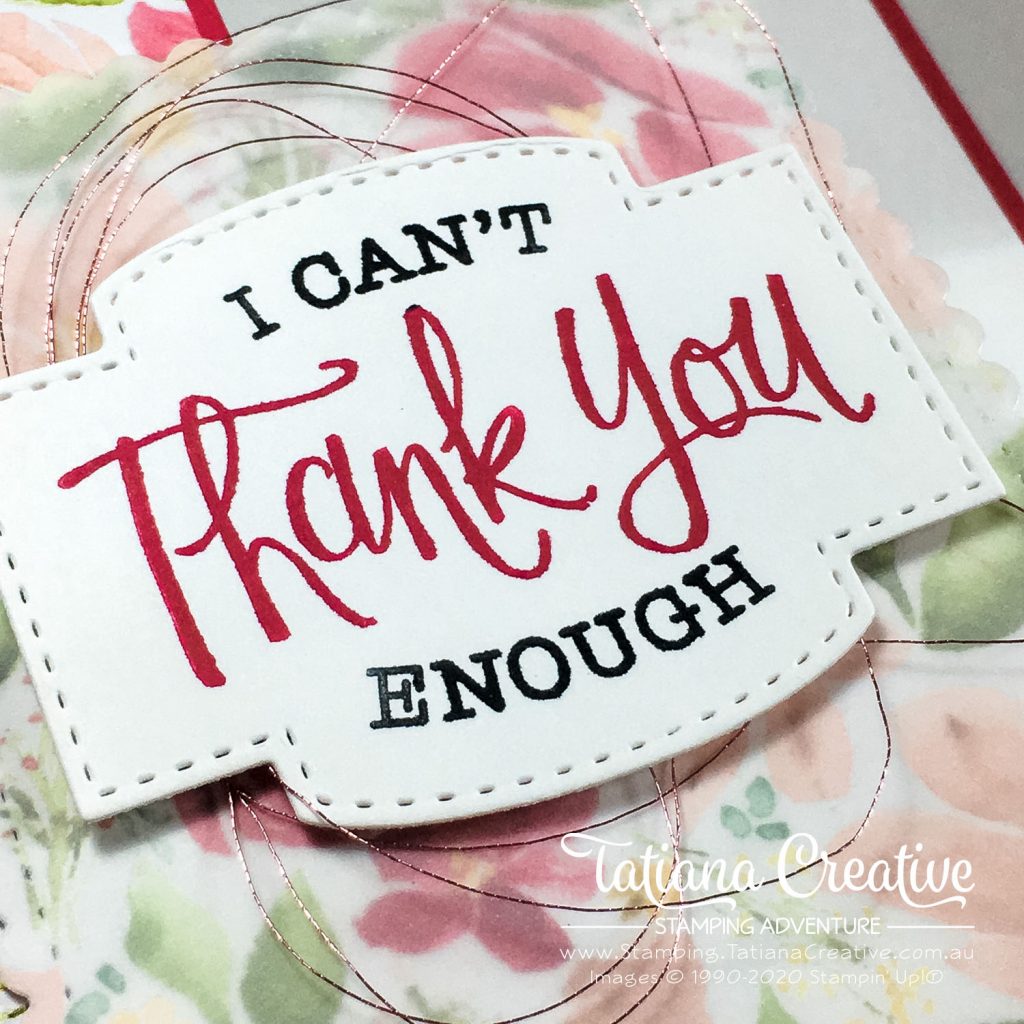
Here are some photos of the Double Z fold card from the video:

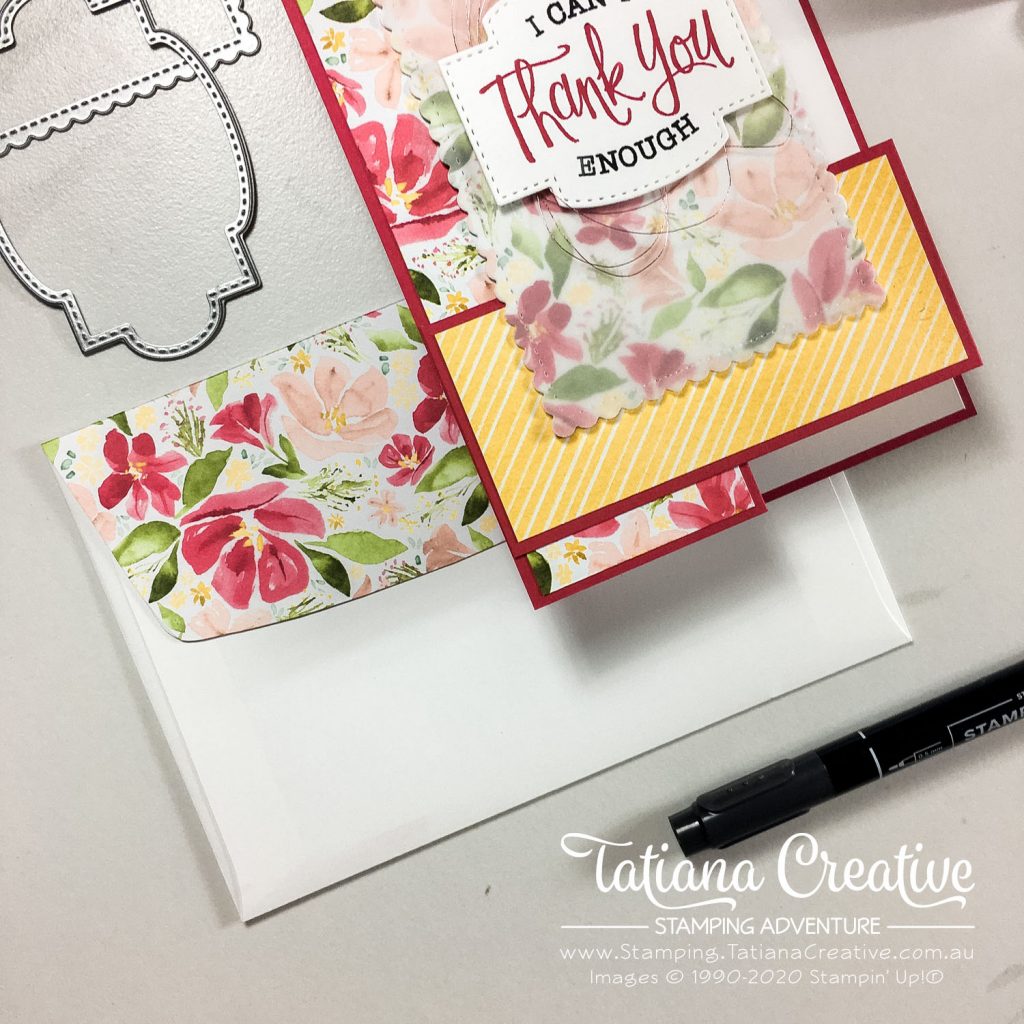
It’s always fun to decorate the envelope too. Using DSP on the envelope really has a big WOW factor!
I’m taking a pause on my Facebook Lives for the first two weeks in November 2023. Make sure you like my Facebook Page so that you can get notifications on when I will be going live. The lives will resume and will become Mystery Stamping! Looking forward to you joining me.
Thank you so much for visiting my blog! I hope today’s project has inspired you to get creative and try something new.
Until next time,
Tatiana
- Join Stampin’ Up!® to start getting your products at 20% discount: CLICK HERE
- Request a Catalogue to see what products you can purchase: CLICK HERE
- Subscribe to my newsletter to keep up to date with the latest news: CLICK HERE
- Follow me on Facebook for regular updates and inspiration: CLICK HERE
- Go SHOPPING for clearance items and specials: CLICK HERE
If you’re in Australia, you can shop Stampin’ Up!® products through my online store. I’d love to be your demonstrator and help you find the perfect supplies for your next creative project!
Supplies:
You can purchase the of the supplies I used in this project. Please click on the image below to purchase. Thank you for your support.
")

")


 Designer Series Paper")


