


Hello everybody! Welcome to my blog!
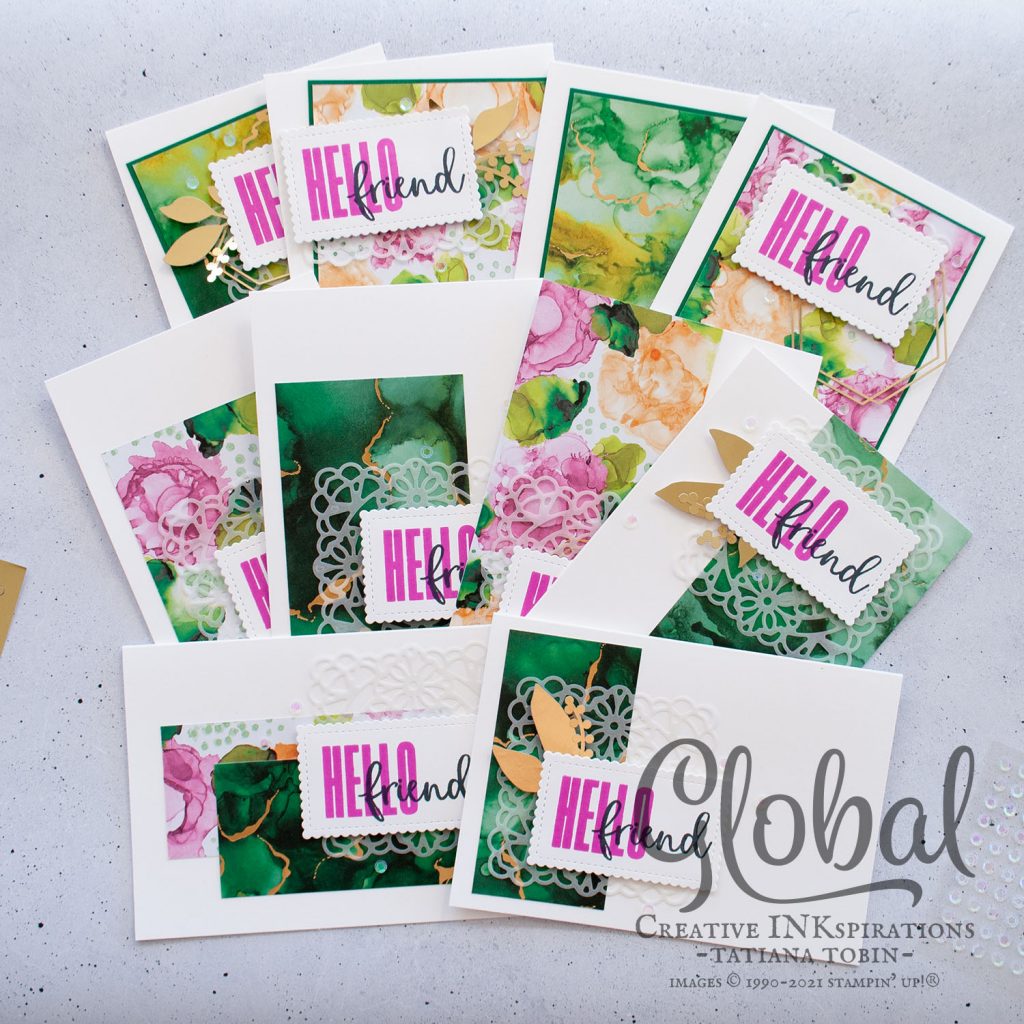
Today I’m blog hopping with my friends to bring you some Creative INKspiration. This month our theme is the 2021-2022 Annual Catalogue. When I first saw this catalogue I fell in love with the Expressions of Ink Suite. The paper particularly is the standout product from this suite. I want to make sure I use every squared mm of this paper. So I have created a 12″x12″ One Sheet Wonder for the A4 market. I have found a lot of One Sheet Wonders are great for the North American market and don’t quite work with card bases made using A4 cardstock. So here’s one with no waste!!! I was able to create 10 cards in total with 6 basic layout designs:
[Want to recreate this project? You’ll find all the supplies I used at the end of this post, conveniently linked to my Stampin’ Up! online store. I’d love to be your demonstrator and appreciate your support—it means the world to me on this creative journey!]
One Sheet Wonder Basic Supplies:
- One 12″x12″ DSP (I used the Expressions In Ink DSP)
- Eight portrait card bases and two landscape card bases (1/2 A4 sheet folded in half, I’ve used Basic White Thick)
- Four card fronts cut to 8.8 x 13.1 cm (I used Shaded Spruce)
- Sentiment Labels:
- Dies (I used Stitched So Sweetly Dies and Basic White)
- Sentiment stamp set (I used Biggest Wish)
- Ink pad/s (I used Magenta Madness & Tuxedo Black)
- Embellishments of your choice (I used Square Vellum Doilies and Expression In Ink Ephemera Pack)
- Adhesive recommendations: Stampin’ Dimensionals, Multipurpose Liquid Glue and Mini Glue Dots
Cutting the One Sheet Wonder:
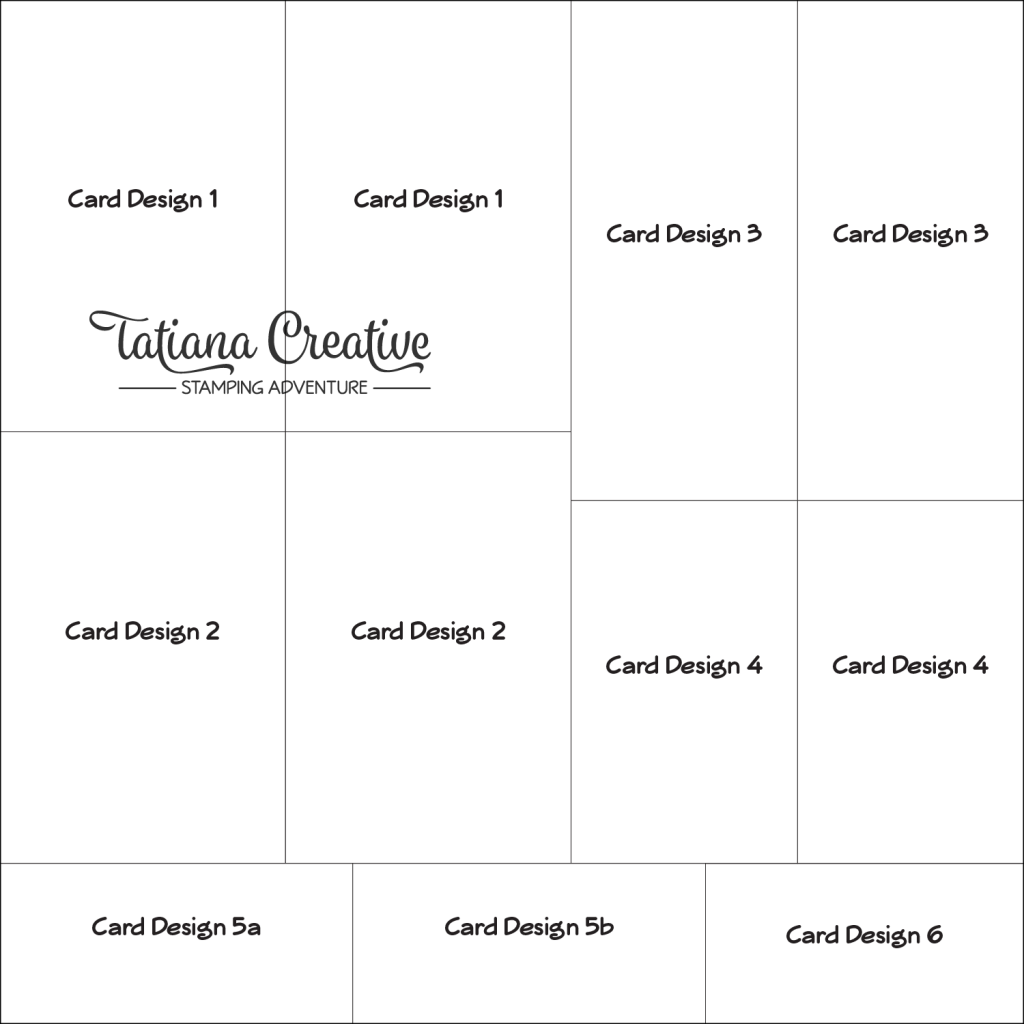
There aren’t exact measurement for each panel in my design and that’s because I didn’t want any waste so left over parts where used as what size they remain. I will walk you through the cutting:
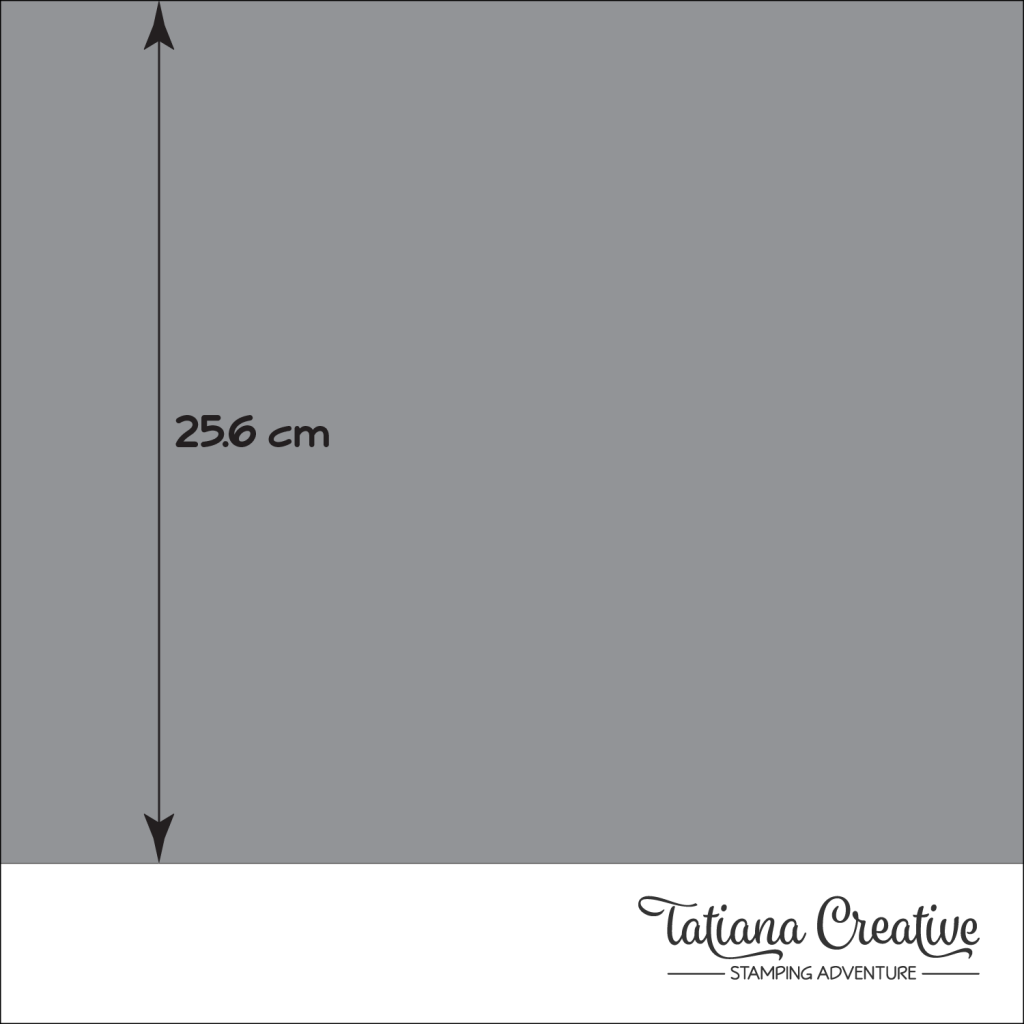
Cut 1:
Cut the top half of the DSP at 25.6 cm
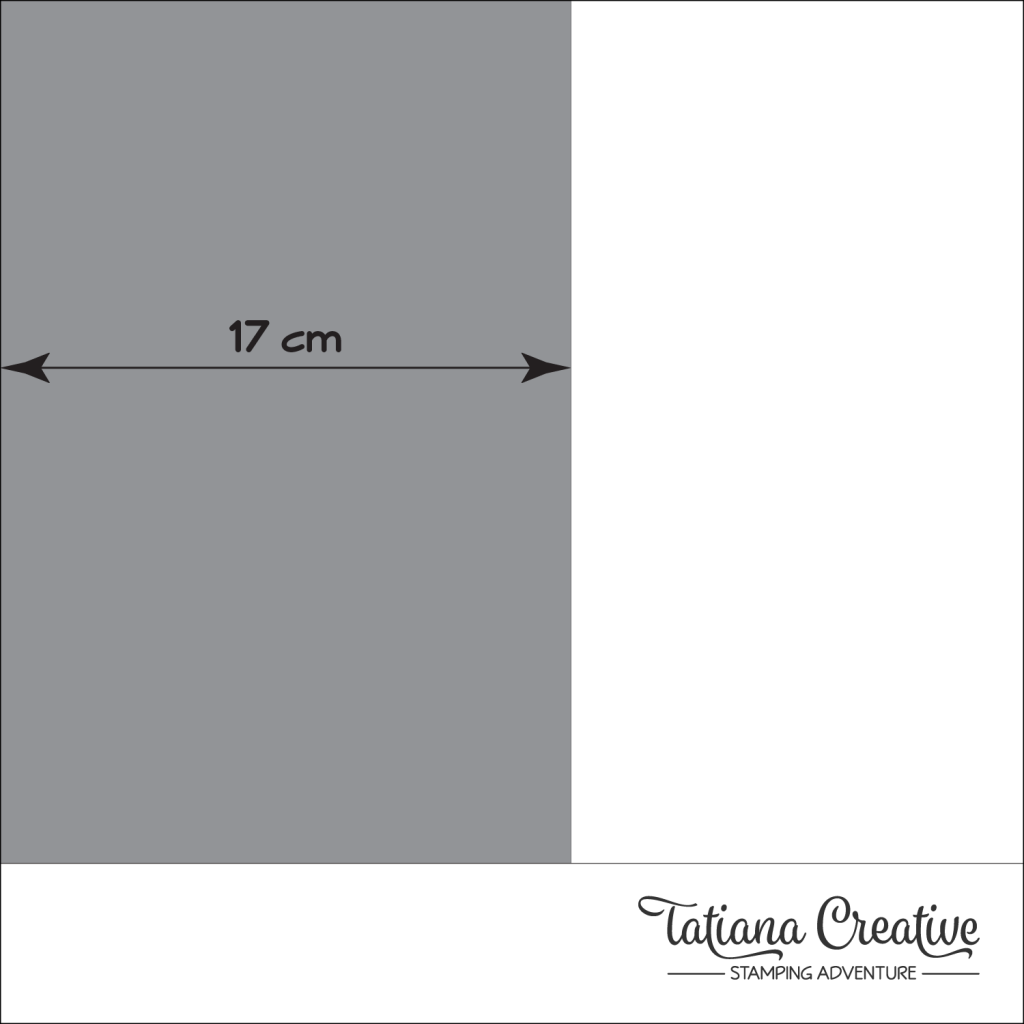
Cut 2:
Then cut a piece off 17 cm wide (so it’s 17 x 25.6 cm)

Cut 3:
Cut the piece in half lengthways at 8.5 cm
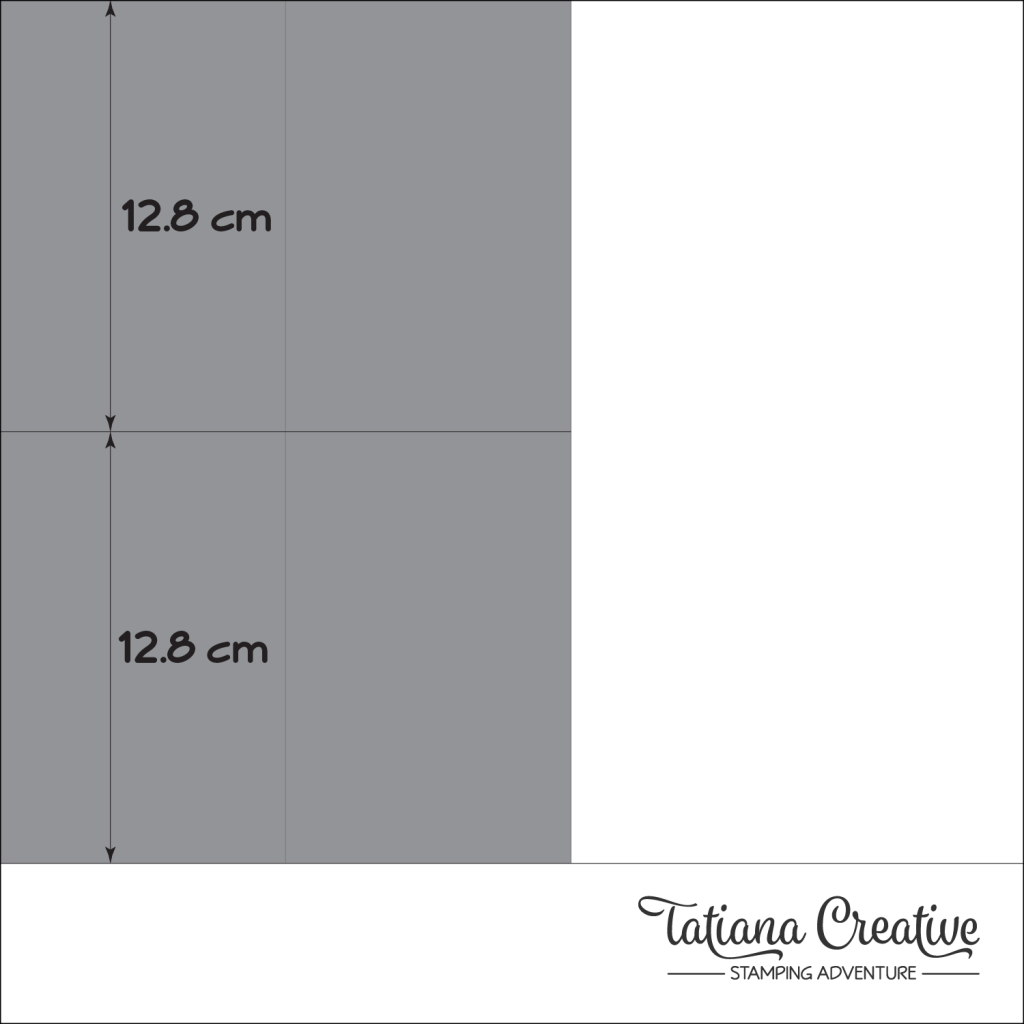
Cuts 4 & 5:
Cut the two pieces in half at 12.8 cm. You now have four panels for card designs 1 &
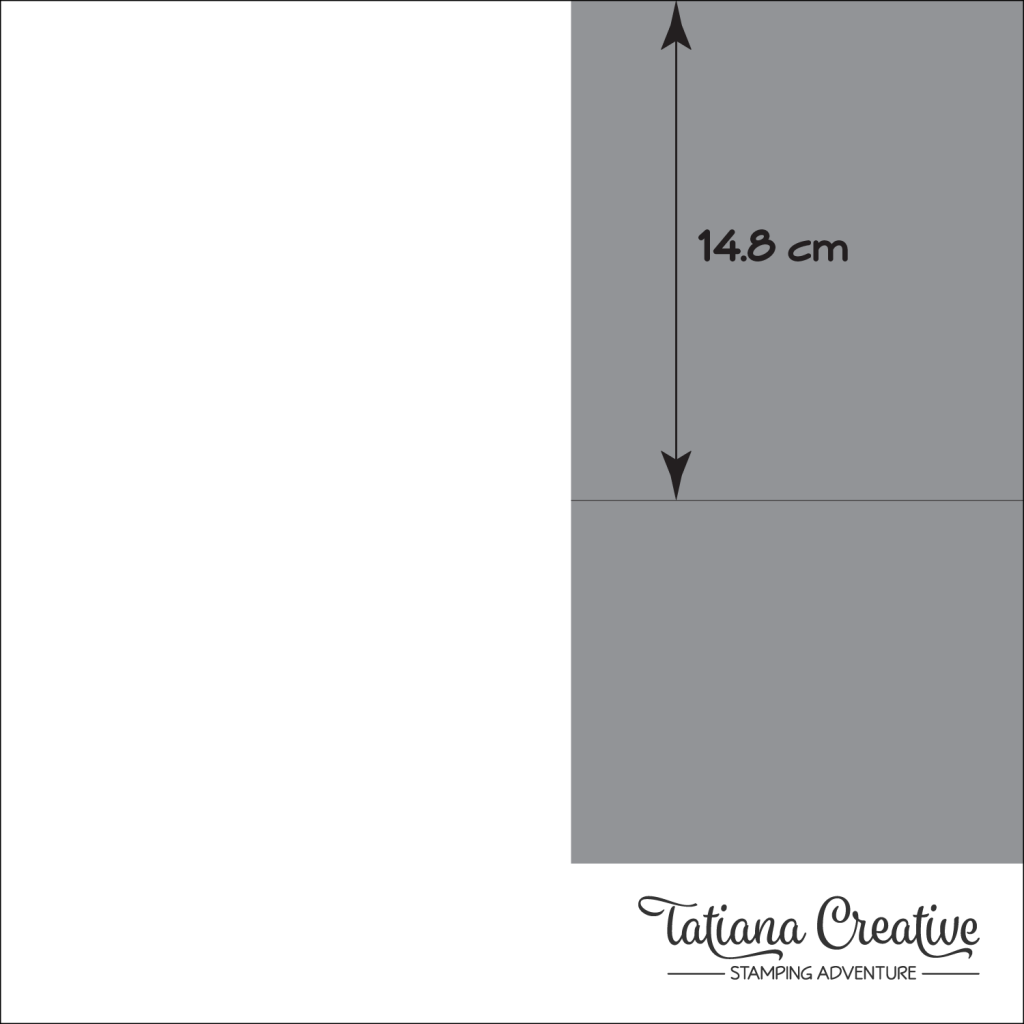
Cut 6:
Take the other sheet and cut off 14.8 cm from the top
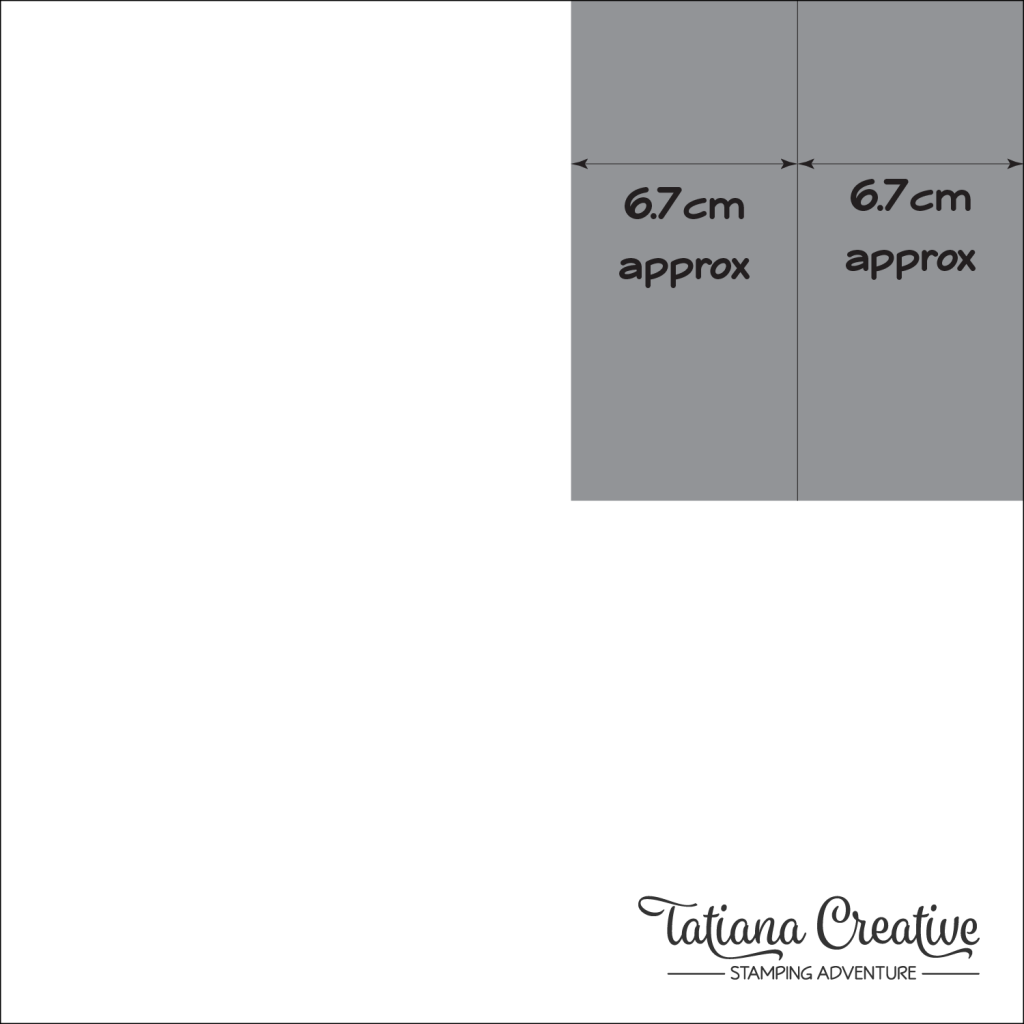
Cut 7:
Cut this in half at approximately 6.7 cm – it doesn’t matter if its not equally half as these both go onto two different cards for the third card design
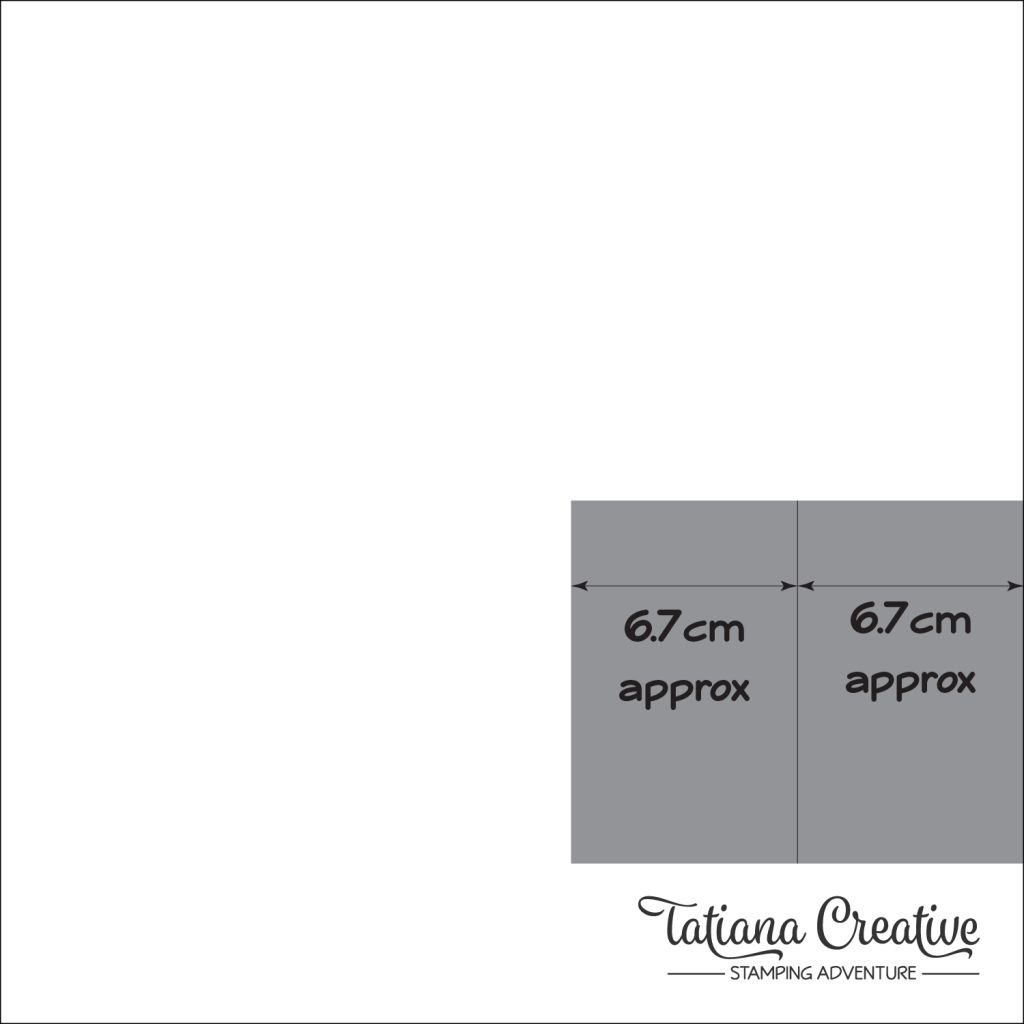
Cut 8:
Cut this left over piece in half too for card design 4. Cut in half at approximately 6.7 cm
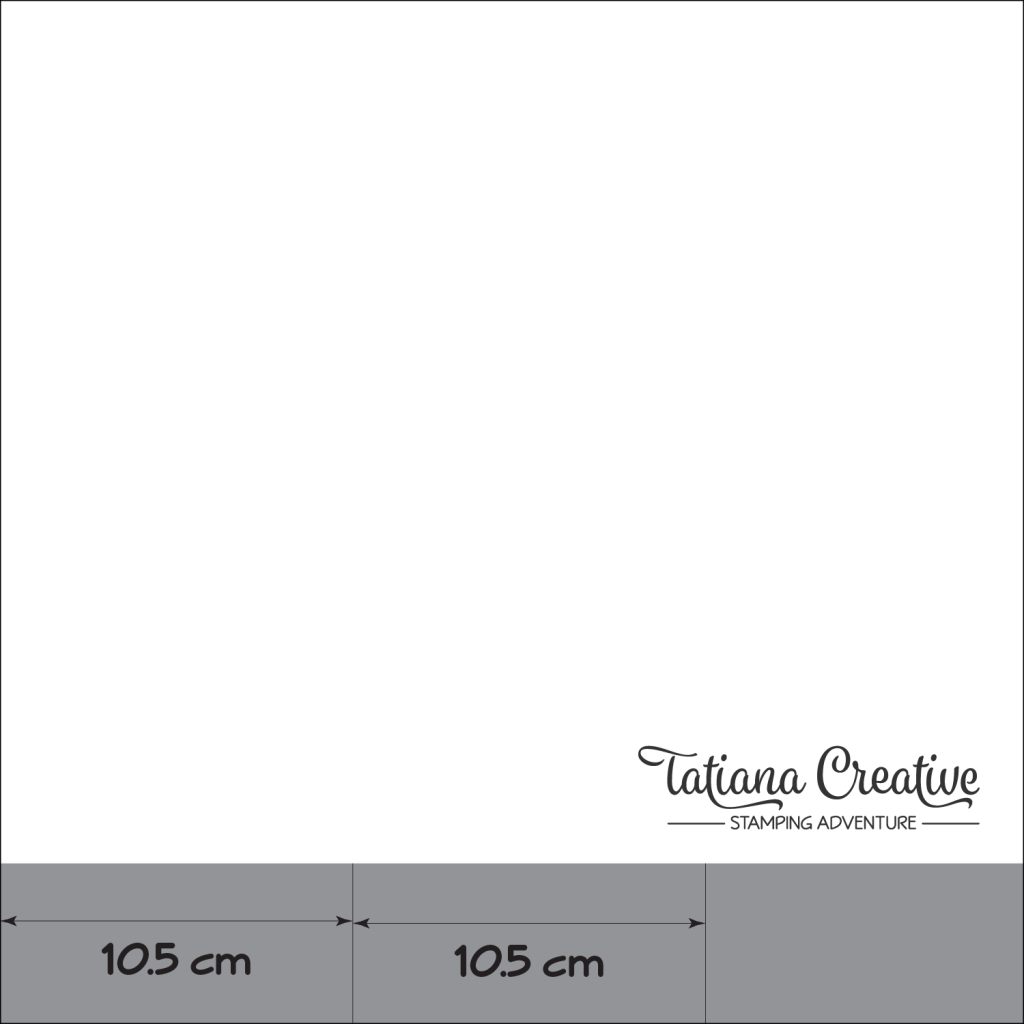
Cuts 9 & 10:
Take the long strip and cut two pieces 10.5 cm wide. These are for card design 5 and the remainder is for card design 6
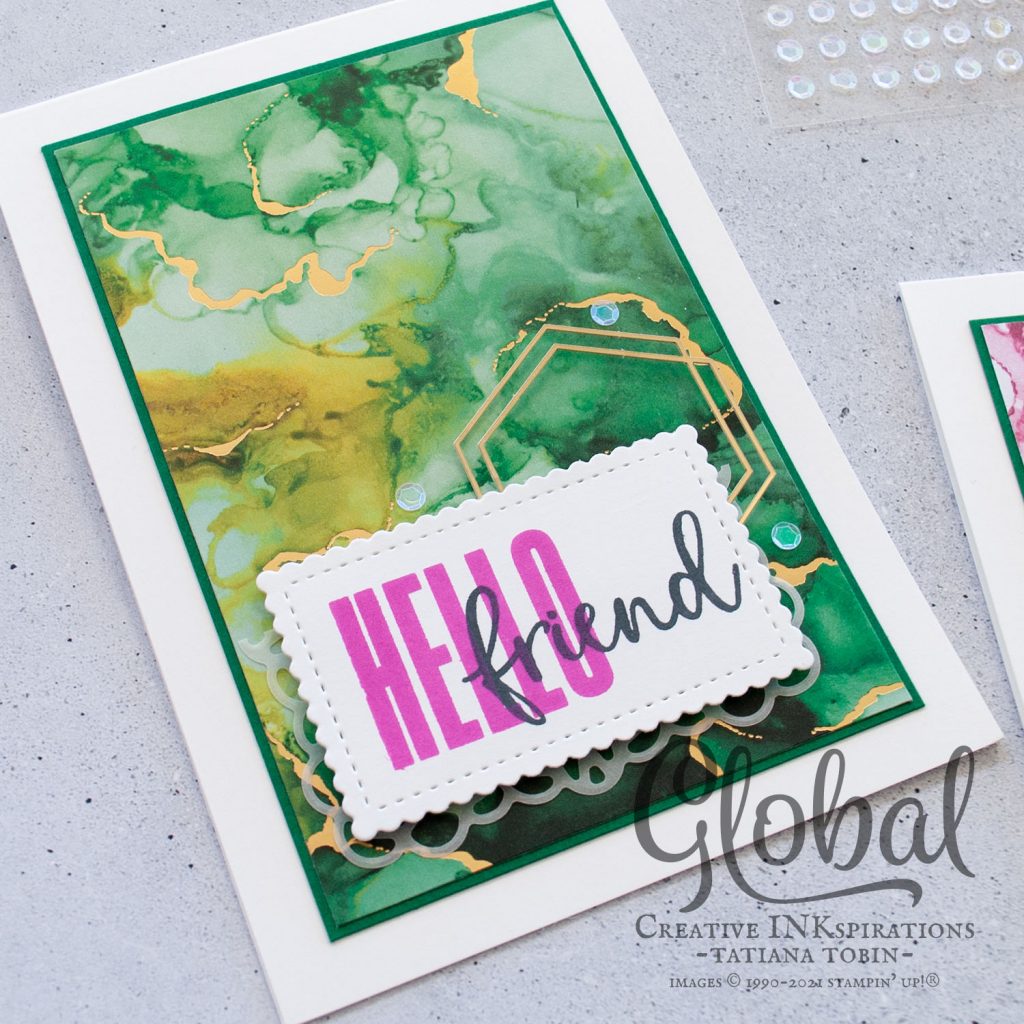
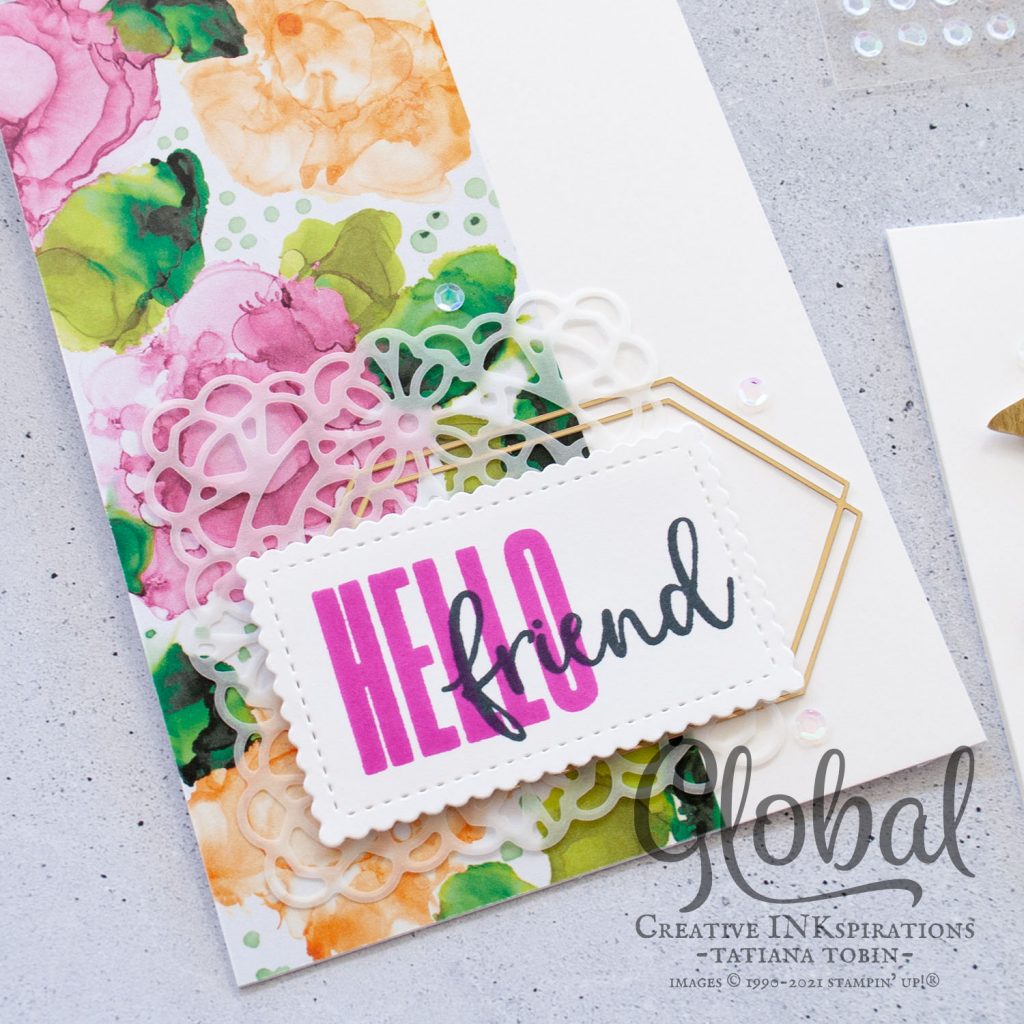
Card Design 1:
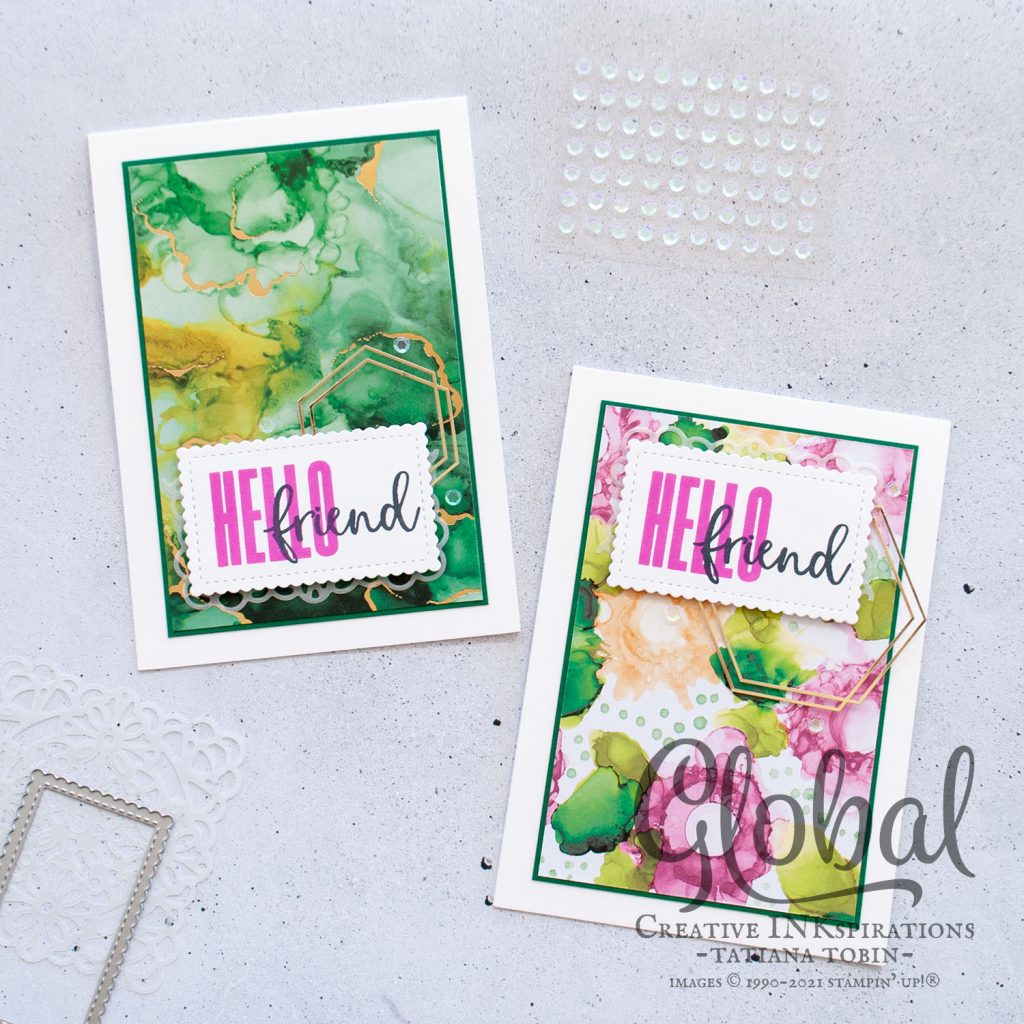
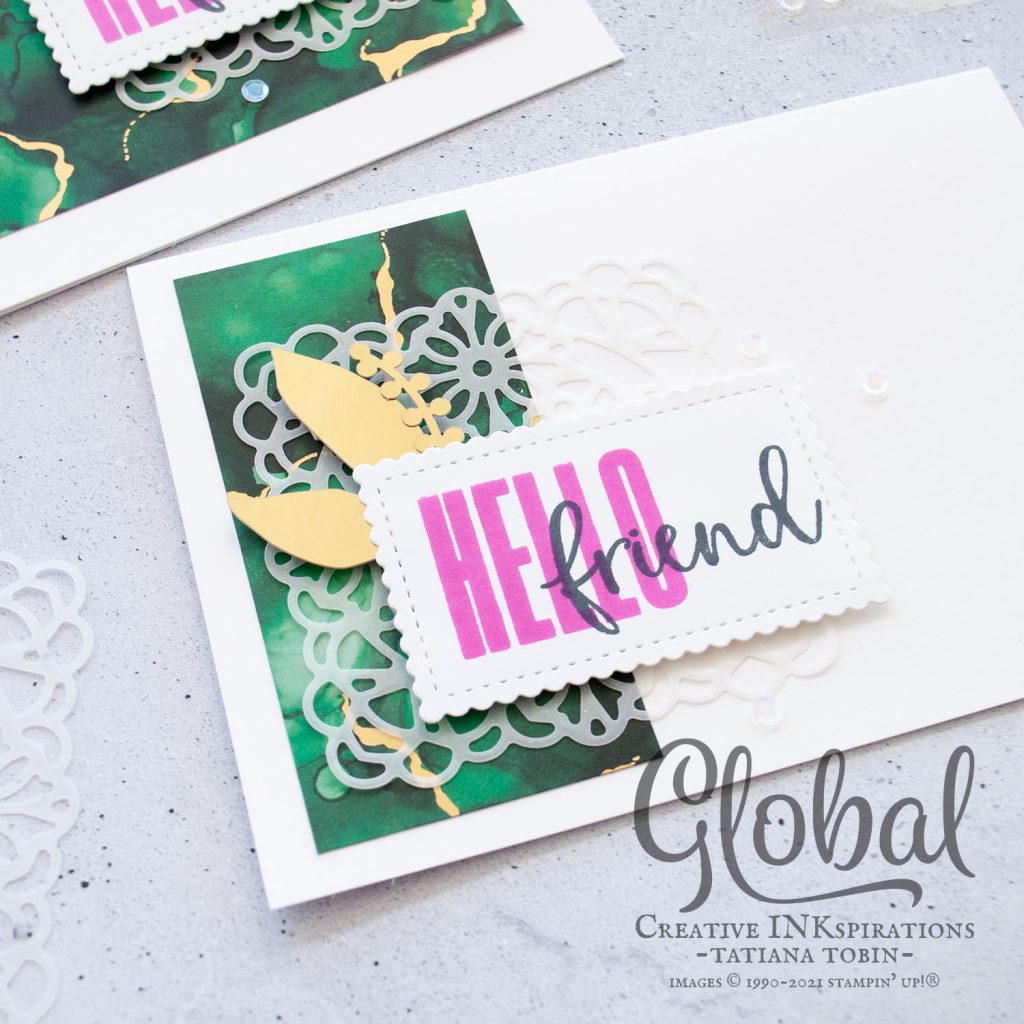
These are mounted on the Shaded Spruce and I’ve used both sides of the DSP. Adhered to a portrait card base in the centre.
Card Design 2:

These are again mounted on Shaded Spruce but adhered to the portrait card bases on an angle just for fun really. You could create four of card design 1 or 2 if you’d like.
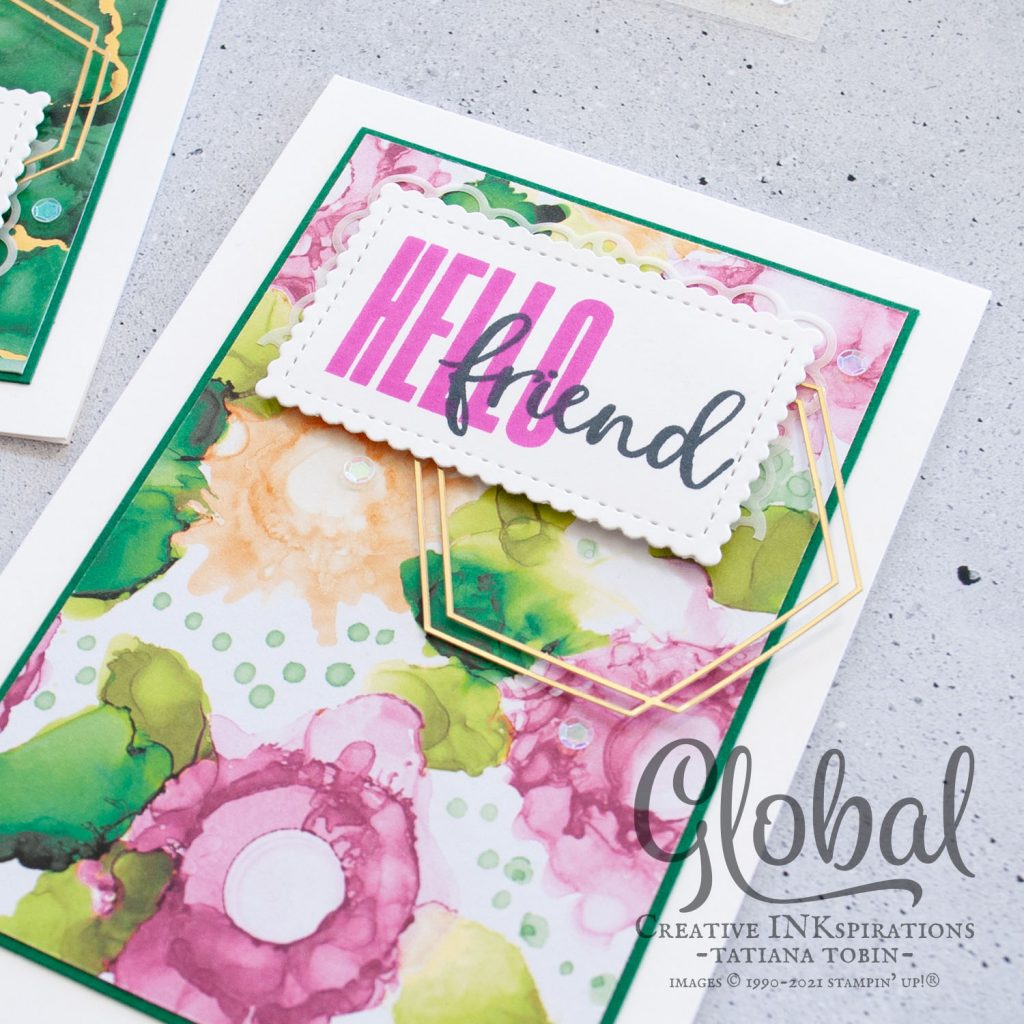
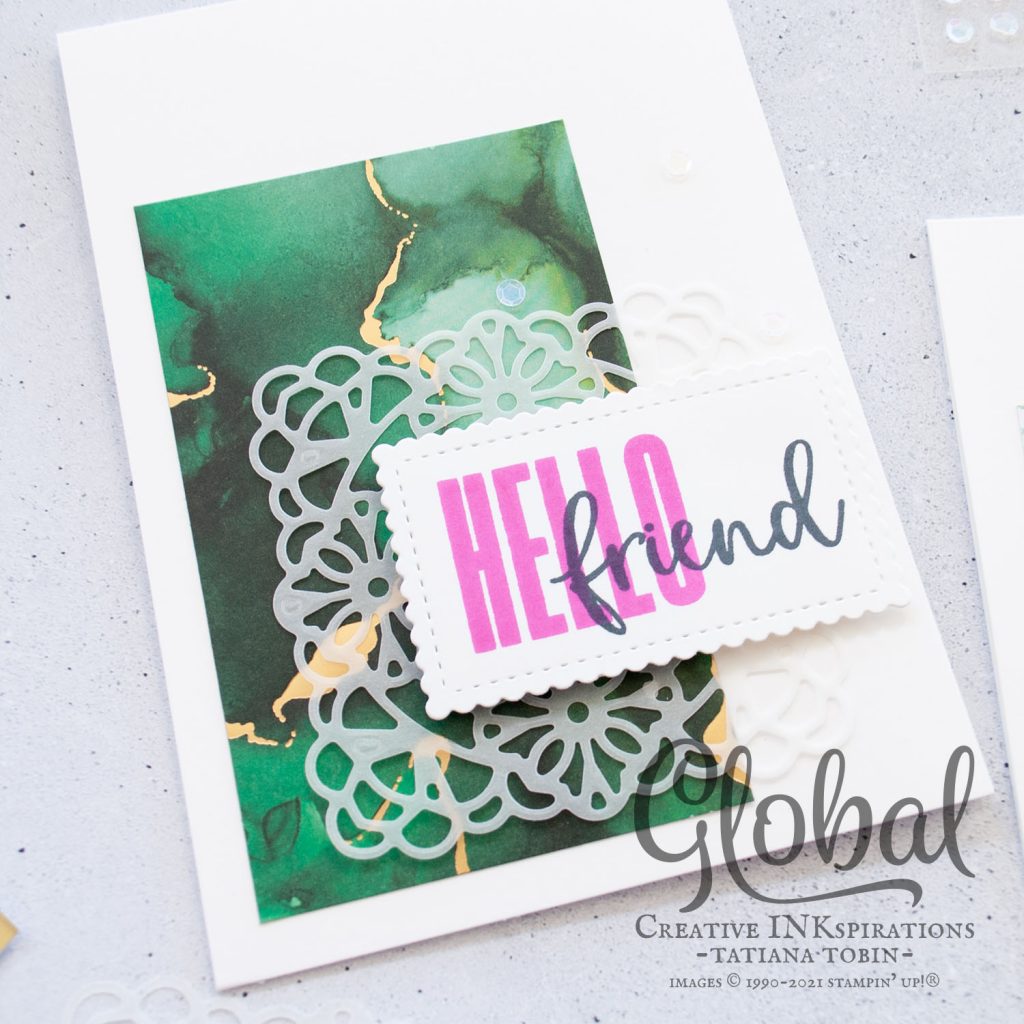
Card Design 3:
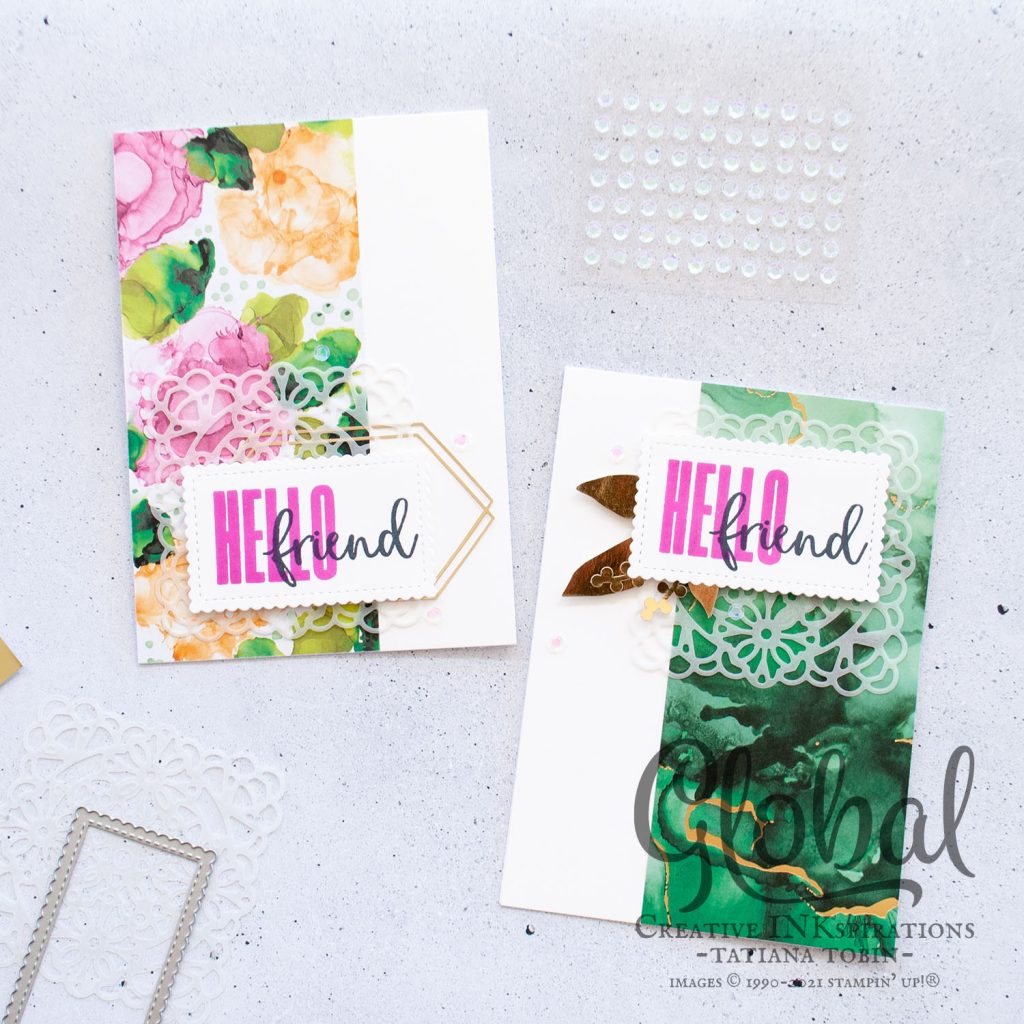
The DSP here covers about 2/3 of the card. You could place it to the left or the right. The height matches the card base.
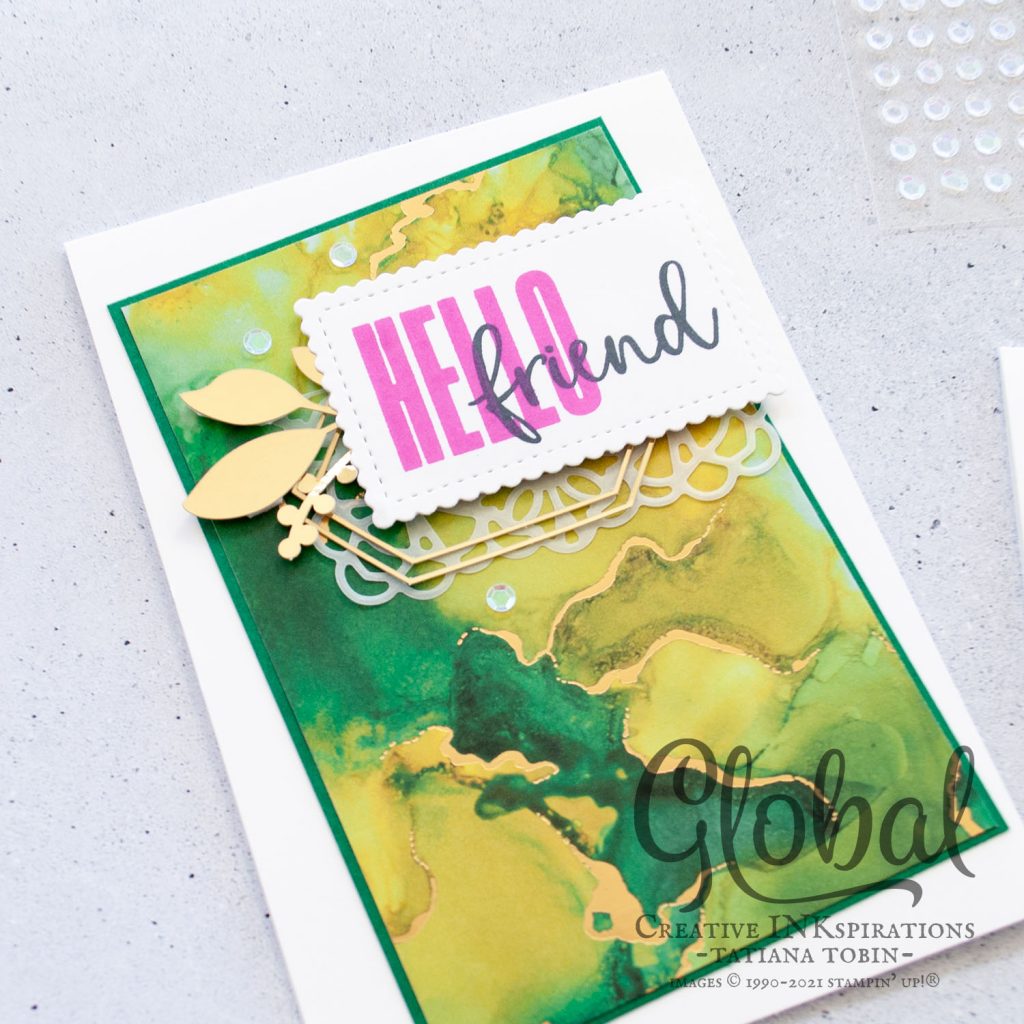
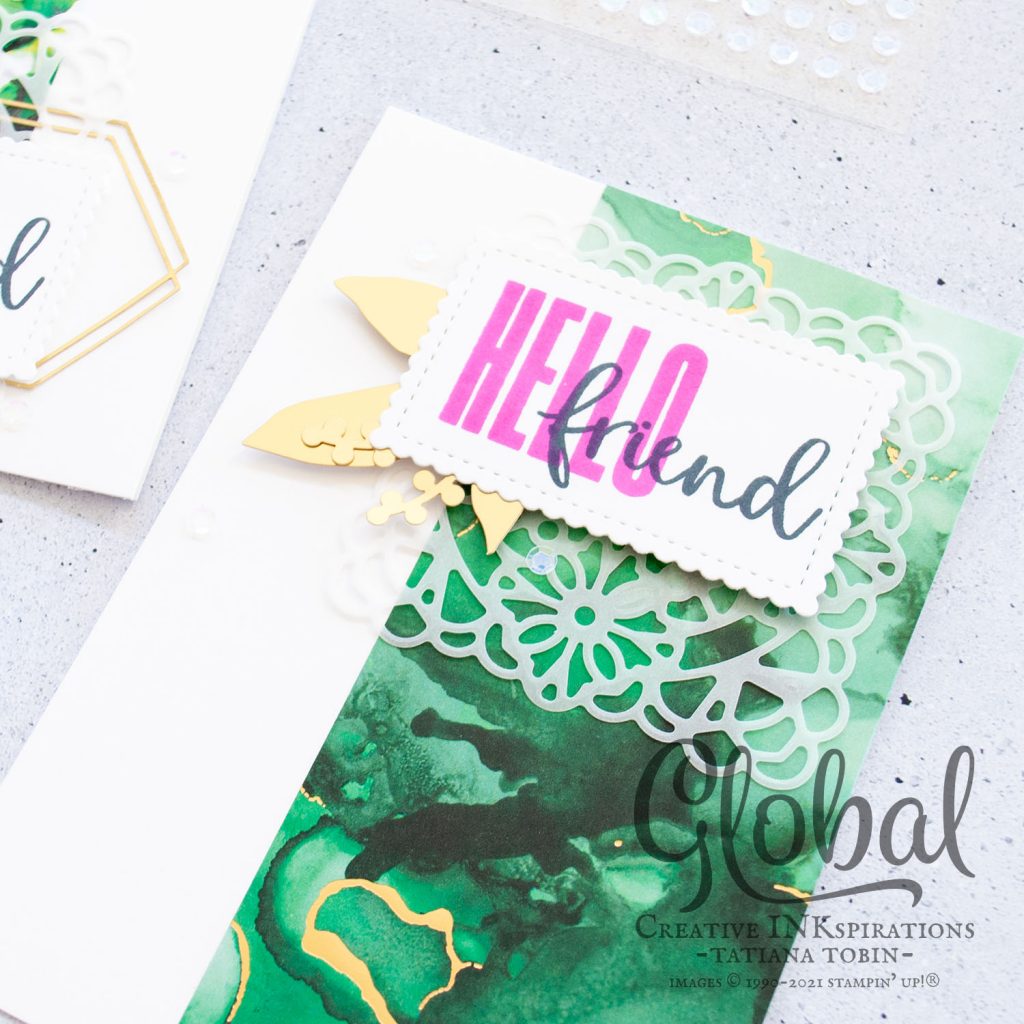
Card Design 4:

I’ve adhered the DSP to the bottom left corner for both cards, but you could have it towards any corner you’d like.
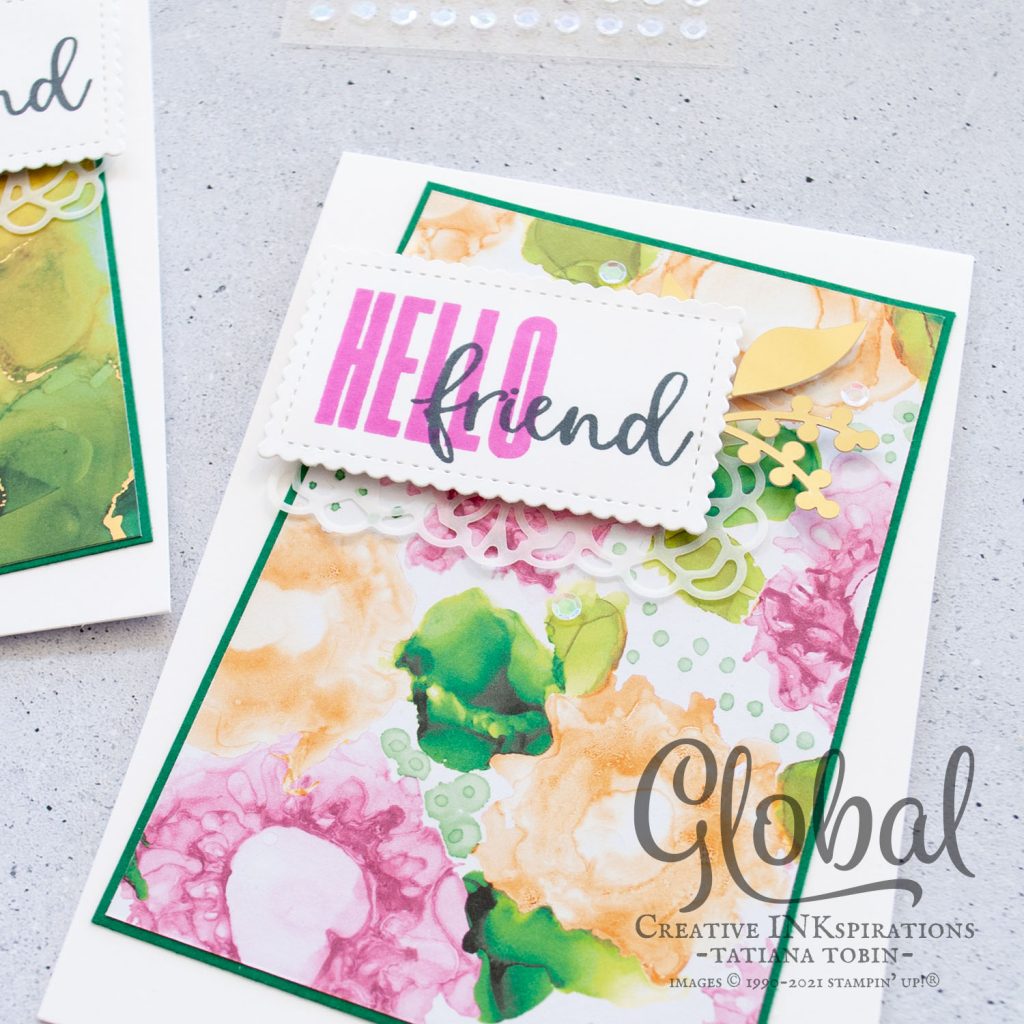
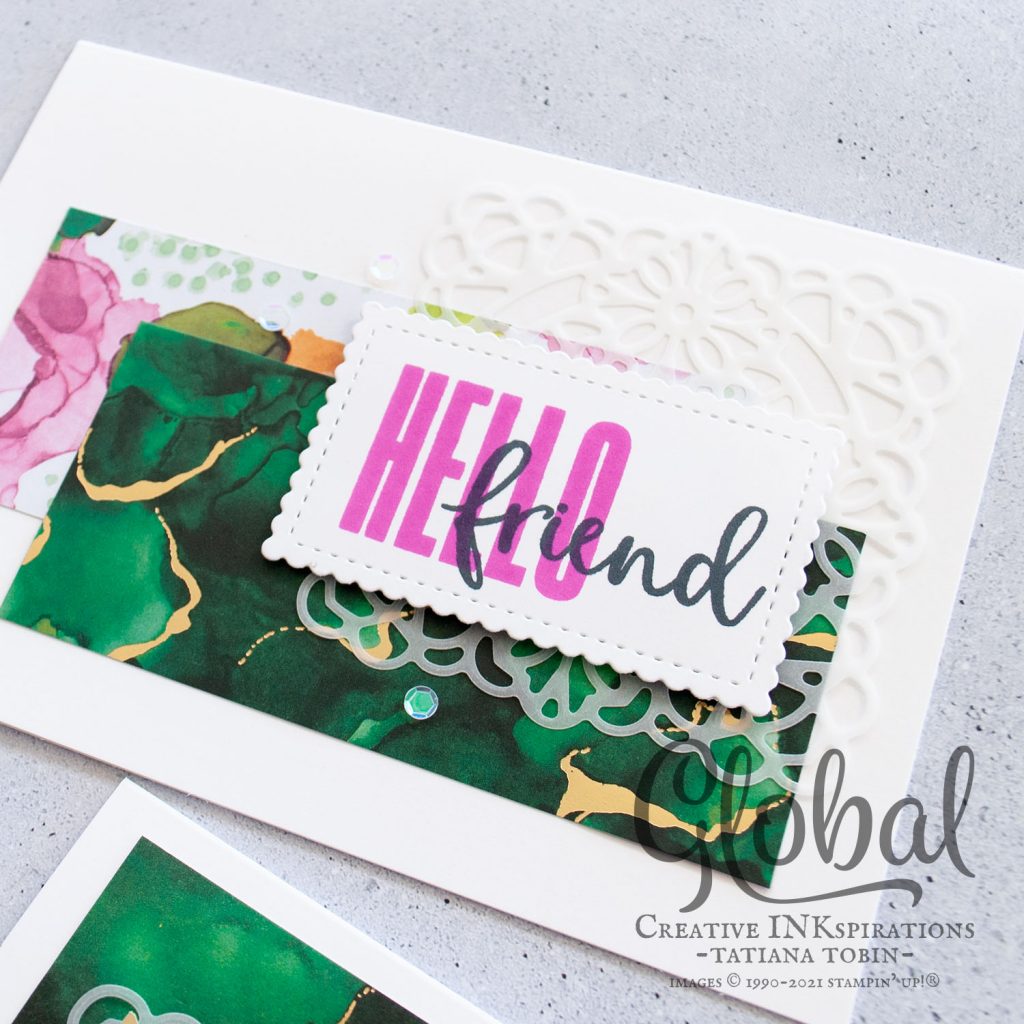
Card Design 5 & 6:
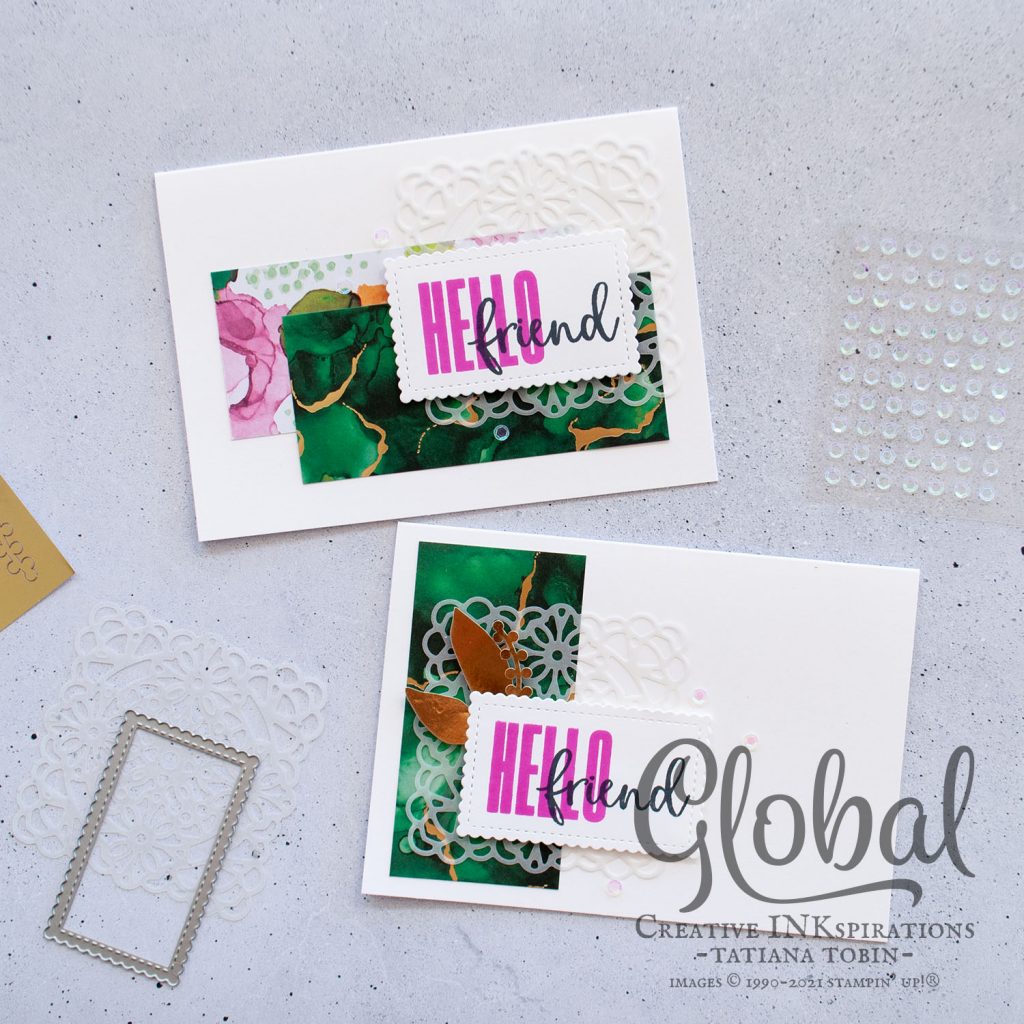
Last two card designs use landscape card bases. I have two DSP pieces on card 5 and then one on card 6. You could place the DSP how ever you’d like.
Decoration:
To finish my cards off I did the same concept on all 10 cards. I cut a sentiment label from Basic White using Stitched So Sweetly. Stamped and then added them to the cards using Stampin’ Dimensionals with either a whole or half of a Square Vellum Doilies. I added extra interest with the stunning Expressions In Ink Ephemera Pack.

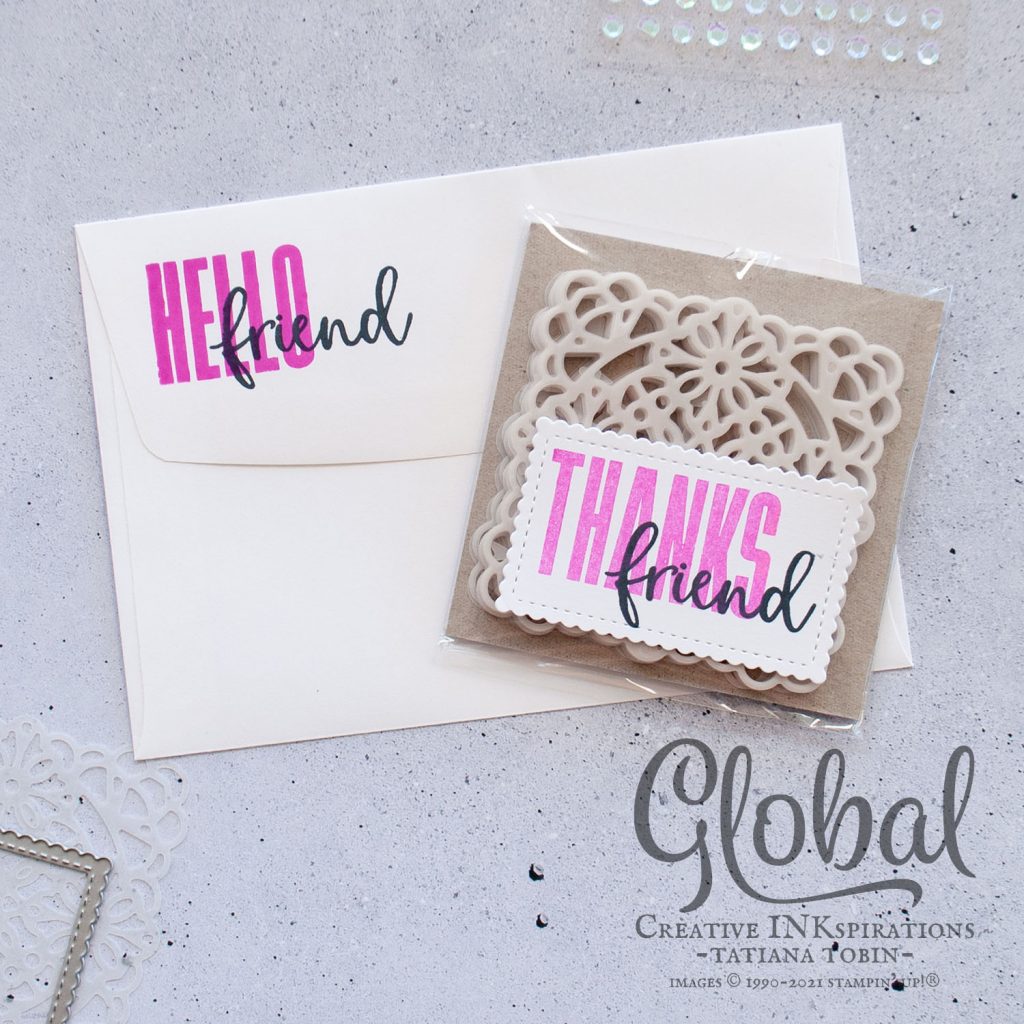
These cards I created for my customers who shopped with me in April 2021. I like to include a small thank you gift for supporting me. I also decorated this gift to coordinate with the cards (as well has the envelope):
Now for more INKspiration from the 2021-2022 Annual Catalogue from Danielle Kassing.
Blog Hop List:
Tatiana Tobin <— You are here
Danielle Kassing
Angie McKenzie
Thank you so much for visiting my blog! I hope today’s project has inspired you to get creative and try something new.
Until next time,
Tatiana
- Join Stampin’ Up!® to start getting your products at 20% discount: CLICK HERE
- Request a Catalogue to see what products you can purchase: CLICK HERE
- Subscribe to my newsletter to keep up to date with the latest news: CLICK HERE
- Follow me on Facebook for regular updates and inspiration: CLICK HERE
- Go SHOPPING for clearance items and specials: CLICK HERE
If you’re in Australia, you can shop Stampin’ Up!® products through my online store. I’d love to be your demonstrator and help you find the perfect supplies for your next creative project!
Supplies:
You can purchase the of the supplies I used in this project. Please click on the image below to purchase. Thank you for your support.
")


 Specialty Designer Series Paper")


Thank you so much for the one sheet wonder! With this DSP your cards are amazing! I am going to save your one sheet wonder, so I can make it myself! Thank you so much for sharing.
Thanks Danielle! I can’t wait to see your One Sheet Wonder cards