


Hello Everybody! Welcome to my blog.
I cannot believe this this the last month I’ll be blog hopping with this particular group of wonderful demonstrators. Our year long training is coming to an end!

The training group is filled with so many wonderful demonstrators from all over the world. I am loving being a part of this supporting community. It can be challenging when you want to turn Stampin’ Up!® into a business that supports your family and not knowing where to start and that you are going about things the right way can be confusing and overwhelming on your own. This training gives us ideas a pointers on how to build our business. Part of our training is blog hopping!
Today I used the Leave A Little Sparkle stamp set. I dedicate this card to all my fellow demonstrators to believe in themselves and to keep working on working towards their goals – big or small:

[Want to recreate this project? You’ll find all the supplies I used at the end of this post, conveniently linked to my Stampin’ Up! online store. I’d love to be your demonstrator and appreciate your support—it means the world to me on this creative journey!]
Details about this card:
- Card Base: Petal Pink
- Card Front: Shimmery White (100 x 143.5mm)
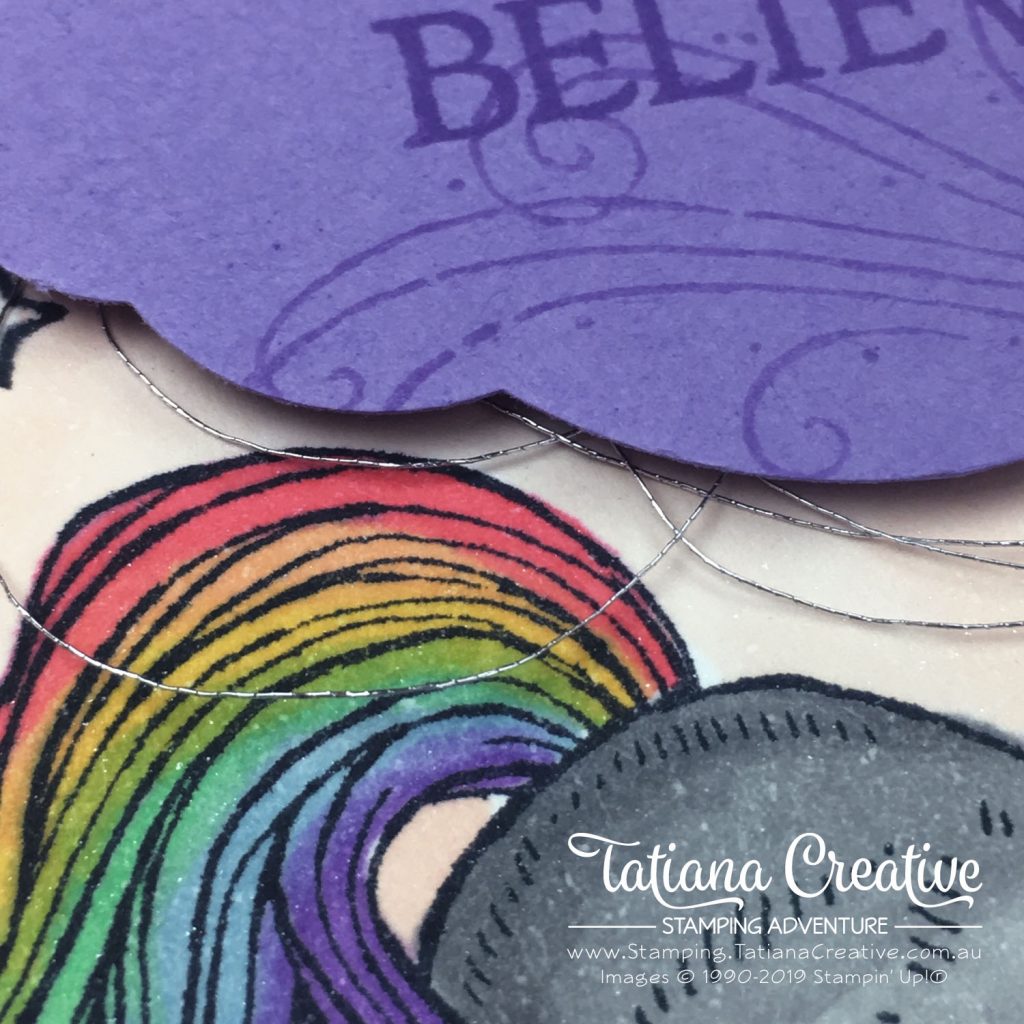
- Sentiment Label: Highland Heather using the Pretty Label Punch. Punch out the label and then stamp the sentiment in Highland Heather. Then stamp the swirls onto the label, but first stamp off.
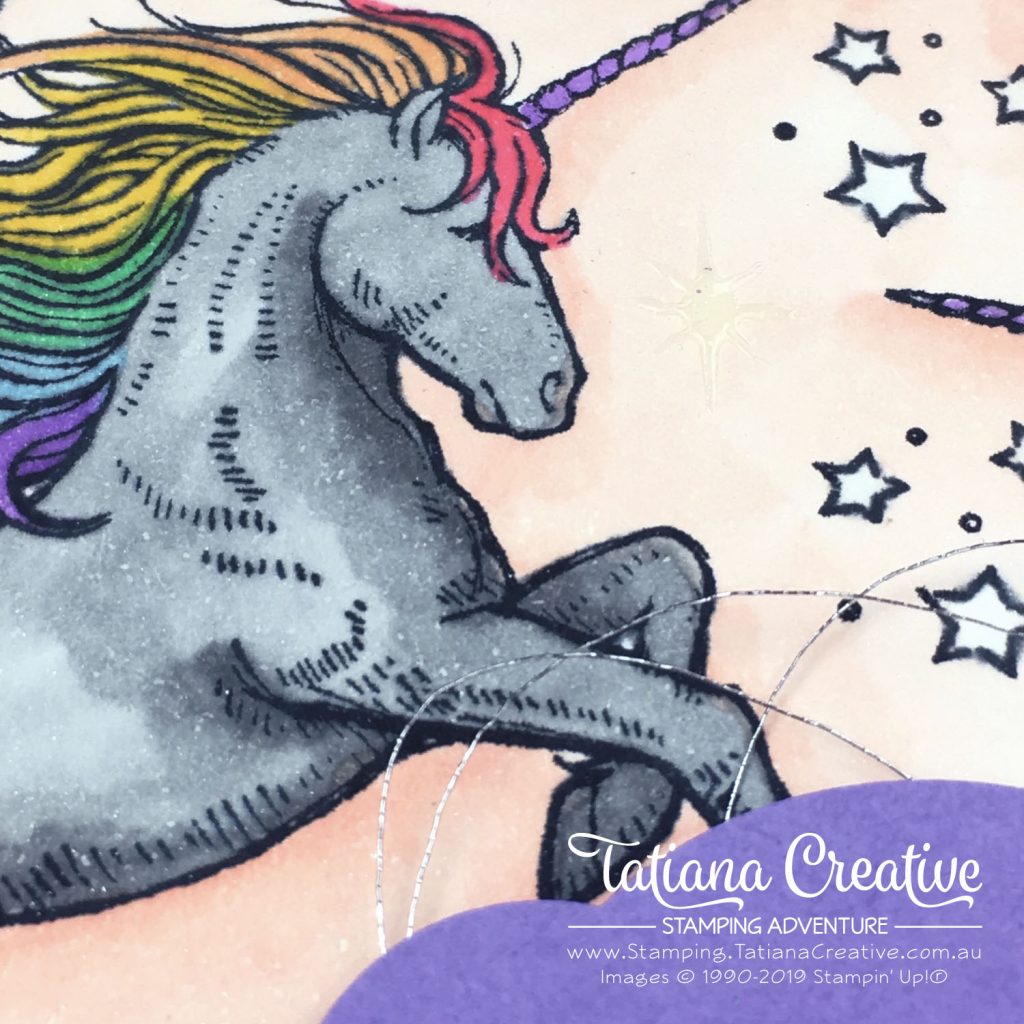
- Stamp the unicorn and the stars on the card front using Tuxedo Black Memento Ink.
- Colour the unicorns. The colours I used are listed below, though if I was do repeat this card I would have used Gray Granite as it is a lighter grey. Then colour the background (I used Petal Pink) and added some shadows underneath the unicorns. I then used the Color Lifter to remove colour from the inside of the stars.
- Add some metallic thread behind the sentiment by adding some Tear & Tape adhesive onto the card front where the label will go. Then cover this with the sentiment label.
- Add some star sparkles by adding a drop of the Shimmery Crystal Effects and using the poke end of the Take Your Pick tool to create the drop into a star burst like shape. (See picture below).

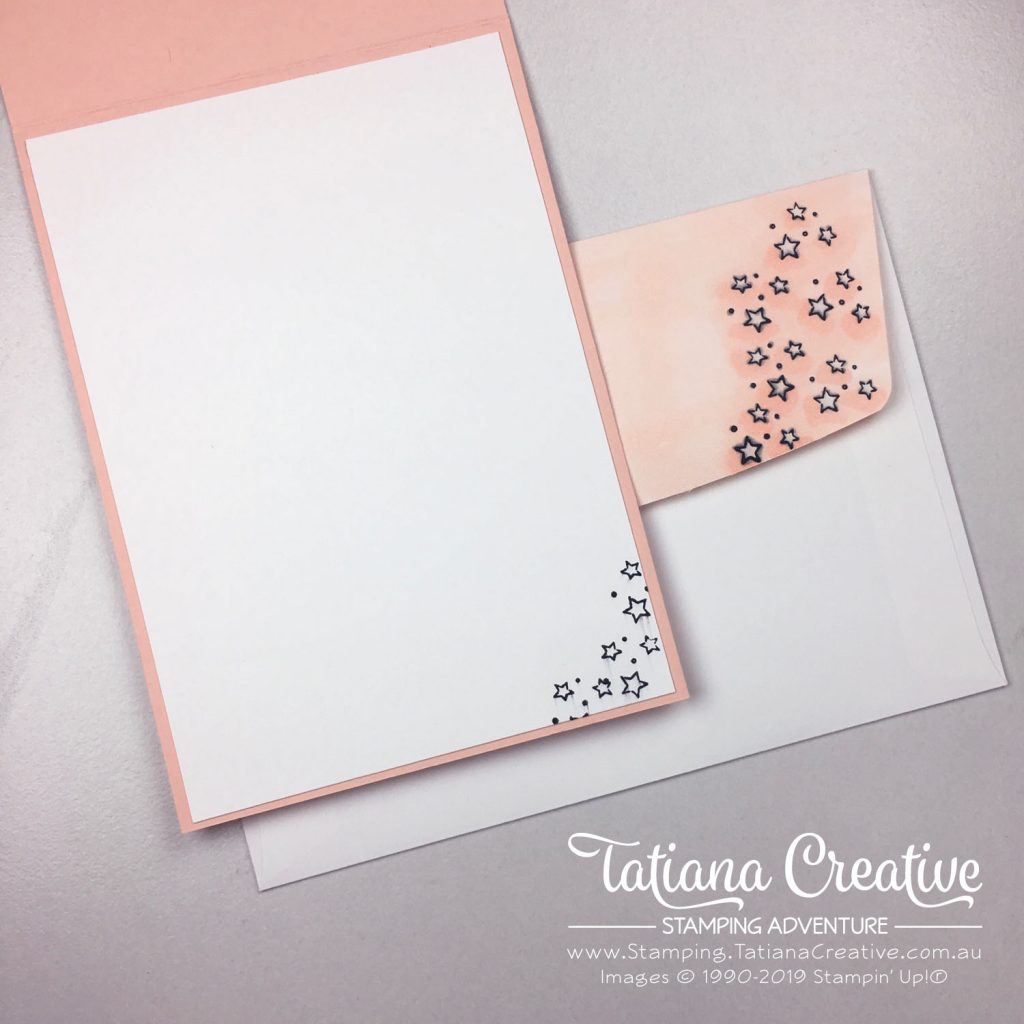
I love to decorate the inside of the card and the envelope. I used the stars stamp.
Please visit the other blogs. You will find so much wonderful inspiration there. Happy blog hopping:
Thank you so much for visiting my blog! I hope today’s project has inspired you to get creative and try something new.
Until next time,
Tatiana
- Join Stampin’ Up!® to start getting your products at 20% discount: CLICK HERE
- Request a Catalogue to see what products you can purchase: CLICK HERE
- Subscribe to my newsletter to keep up to date with the latest news: CLICK HERE
- Follow me on Facebook for regular updates and inspiration: CLICK HERE
- Go SHOPPING for clearance items and specials: CLICK HERE
If you’re in Australia, you can shop Stampin’ Up!® products through my online store. I’d love to be your demonstrator and help you find the perfect supplies for your next creative project!
Supplies:
You can purchase the of the supplies I used in this project. Please click on the image below to purchase. Thank you for your support.


Wow….another stunning creation!
Aw! Thank you Vicki!
Love your card Tatiana. And how sweet are you dedicating it to us Demonstrators, what a sweetie
Thank you Melinda! xx
Just magical. Love it
Thank you Helen!
Wow!! I would not have thought to colour this unicorn grey..Just Love how Sparkly you have made him!!
Thank you Annette! I’m not sure why I decided on grey but it works well
Super fun card! Love that rainbow mane and how you finished the inside and envelope!
Thank you Christy! I had fun creating it!
Wow, a seriously wonderful card, Tatiana and thanks so much for being the sparkle to my day
Thank you Libby! That’s so sweet of you! We all bring sparkle to each other xx
Such a great card. I love the colouring and all the sparkle. Thanks for sharing
Thank you Vickie!