


Hello everyone! Welcome to my blog!
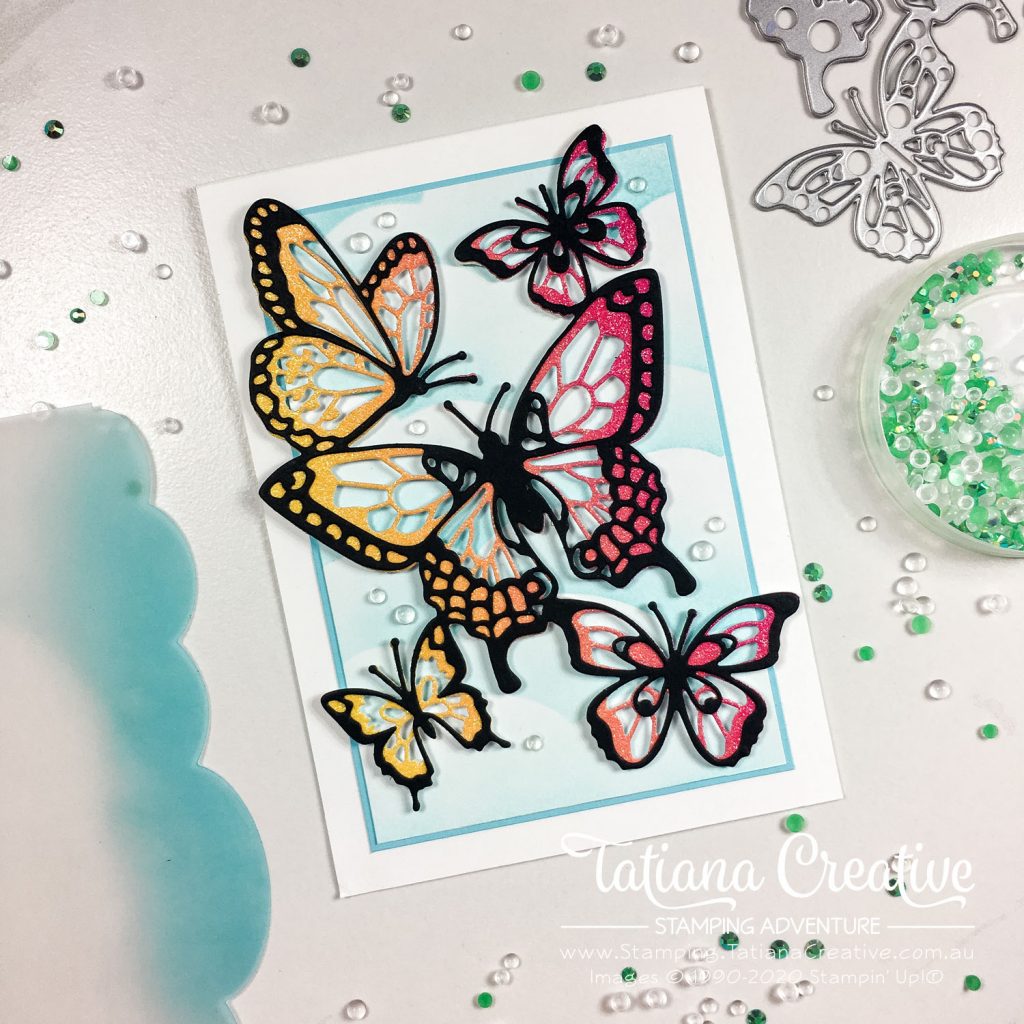
You are currently visiting Tatiana in Australia and I’m thrilled to have you here. Today I’m blog hopping with a group of Independent Stampin’ Up!® demonstrators from all around the globe. We are all taking part in Kylie’s Demonstrator Training Program where we have learnt so much from the guest speakers as well as each other. But it’s not all work and no play around here, the blog hop gives us an opportunity to share our creative skills. Today I’m sharing with you a butterfly card:
[Want to recreate this project? You’ll find all the supplies I used at the end of this post, conveniently linked to my Stampin’ Up! online store. I’d love to be your demonstrator and appreciate your support—it means the world to me on this creative journey!]
I had a lot of fun creating this card and it blends some older products (the Butterfly Beauty Dies) with new products such as the Rainbow Glimmer Paper.
Card Details:
- Card Base: Whisper White Thick
- Card Front: Balmy Blue (8.8 x 13.1 cm) and Whisper White (8.5 x 12.8 cm)
- To create the butterfly I first took a 10.5 x 14.8 cm piece of the Rainbow Glimmer Paper.
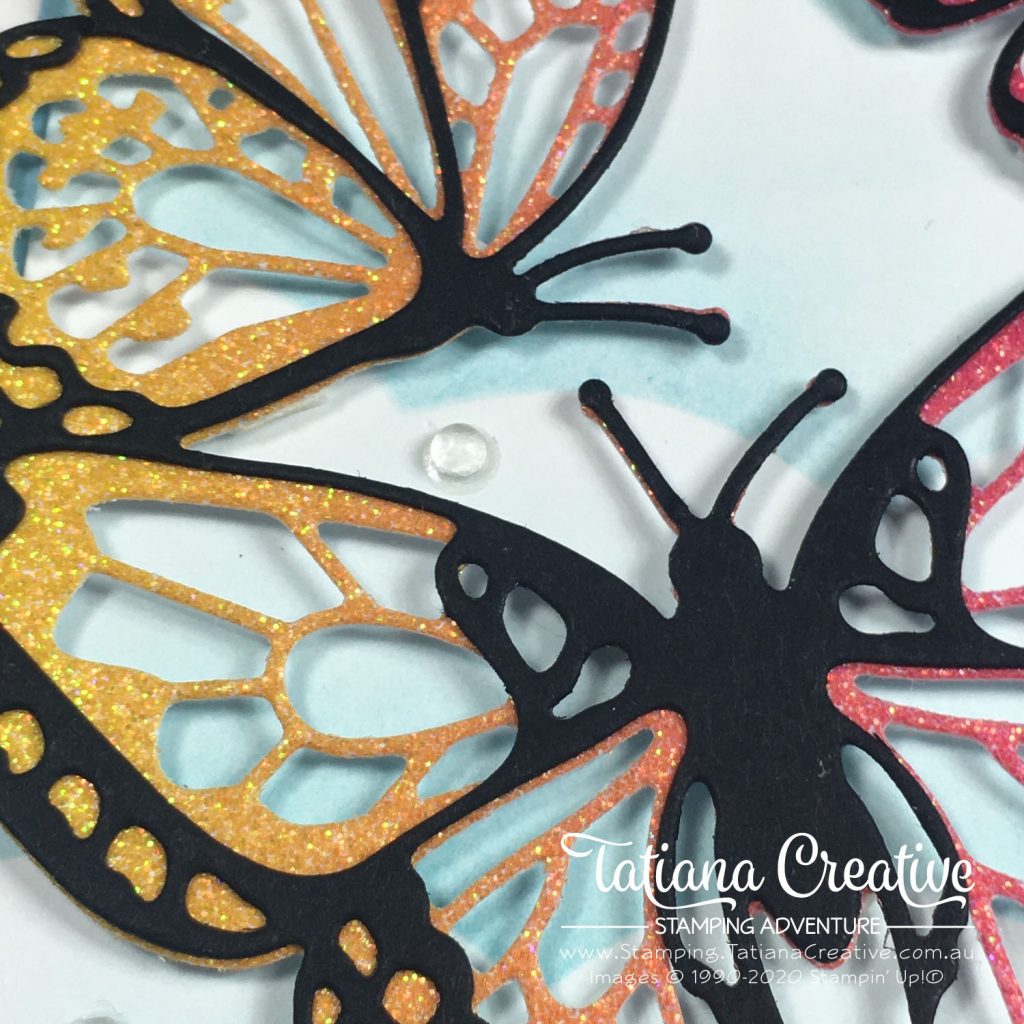
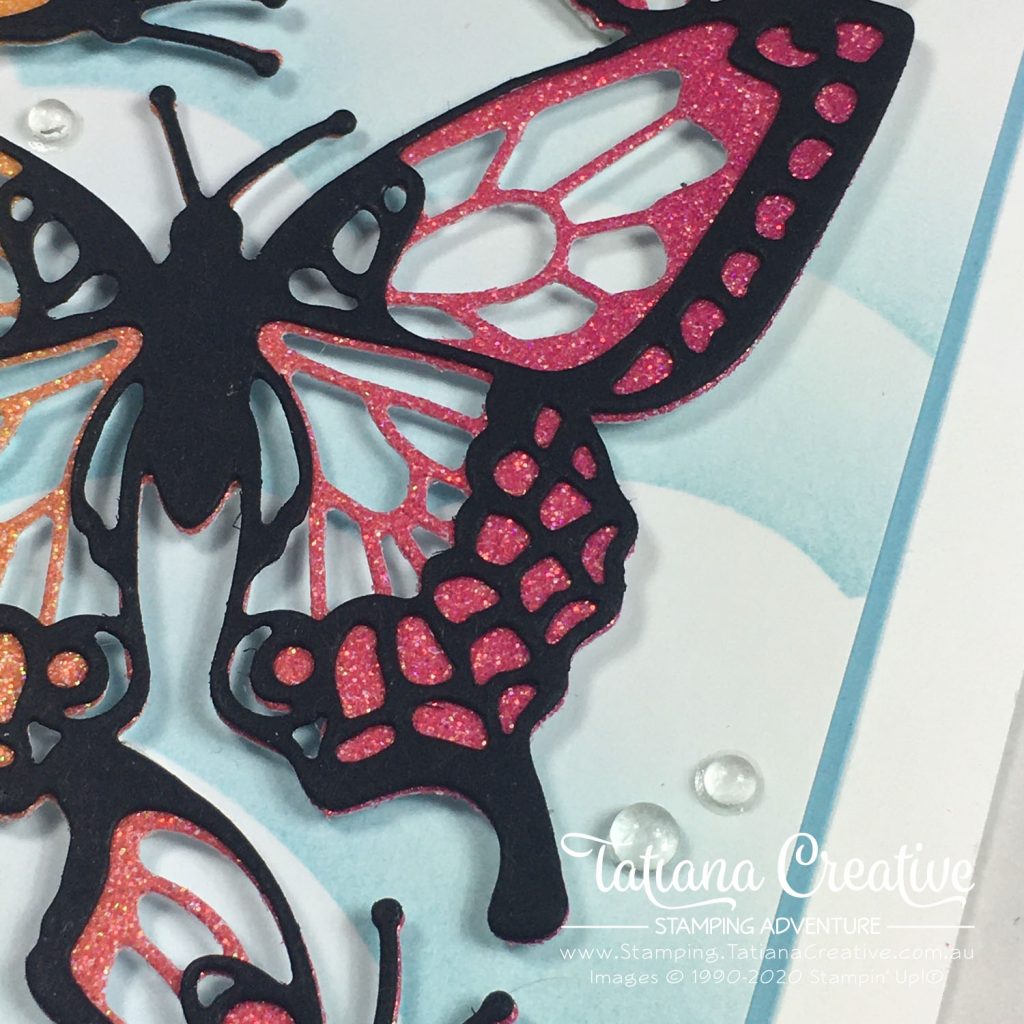
- From this glimmer paper I die cut the bottom layer of the butterflies using the die from the Butterfly Beauty Die set. I kept all the pieces that came out for another project (will share in the future) as well as the negative space. I didn’t want to waste the stunning glimmer paper.
- Die cut the top layer for butterflies from Basic Black cardstock.
- Adhere using Multipurpose Liquid Glue. Note: I could have used the Adhesive Sheets of the back of the Basic Black before die cutting but I wasn’t sure how well it would adhere to the glimmer paper and decided that the Multipurpose Liquid Glue would be better in this case.
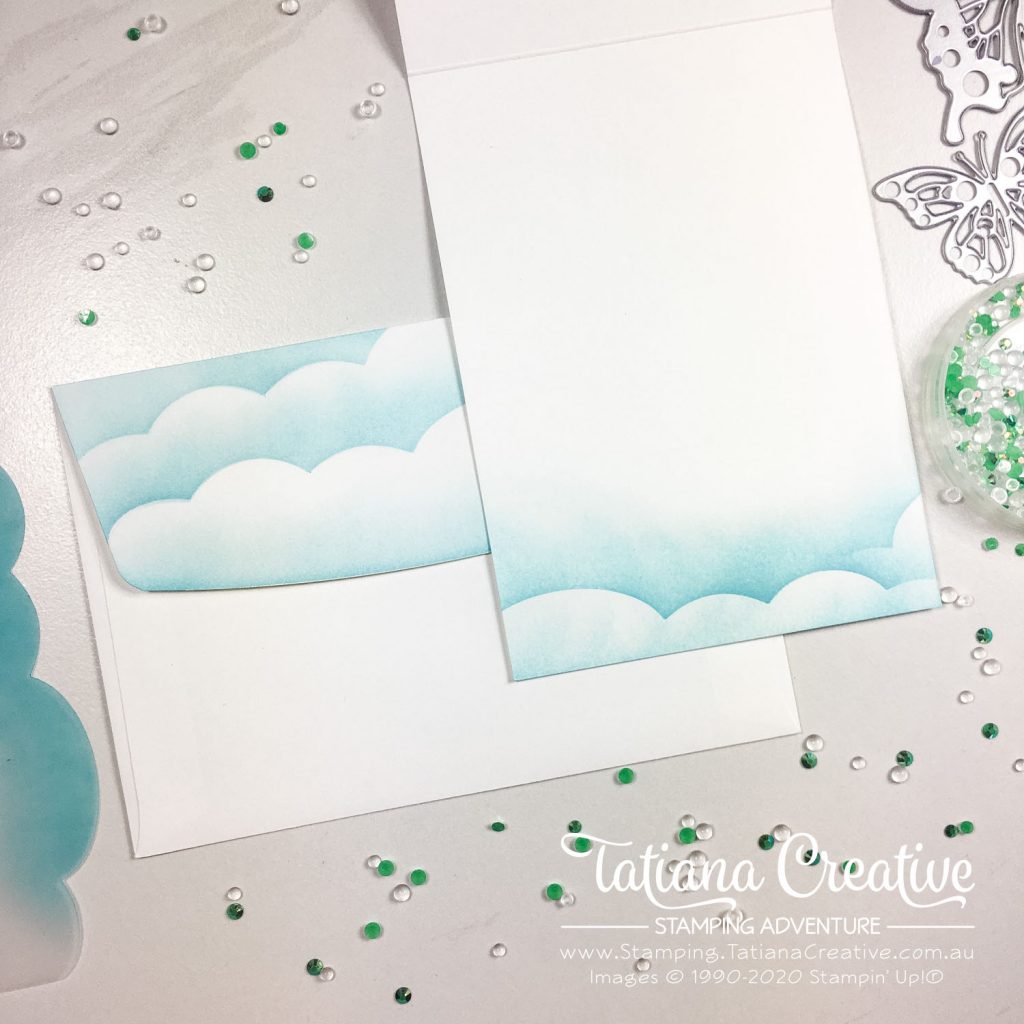
- To create the cloud sky background:
- Die cut from vellum the clouds using the Happy Dies cloud die. This is a great die because you can make the hight of the cardstock anything that works for you. In this case I was going to use it as a template so I made is as big as I could. TIP: Vellum works really well as a template for sponging as it as a nice smooth surface to work from.
- I used a make up blending brush for this next part but you can use a wedge of Stamping Sponge dipped in Balmy Blue ink pad. First blend some ink on the bottom edge of the Whisper White card front. Then place the cloud template just covering the bottom of the page and blend more Balmy Blue up. TIP: start of the vellum and work in circular motion working your way over the edge of the template. Do not go too far past the edge of the template.
- Move the template up and over to create the next “row” of clouds and repeat the blending process.
- Repeat moving the template up till you’ve covered the whole card front in clouds.
- TIP: If you want less clouds make large gaps between each “row” of clouds. If you want more clouds do the opposite.
- TIP: Move the cloud template around and even flip it to create the clouds so that they don’t all line up.
- Mount the clouds onto the Balmy Blue cardstock and then onto the card front. Add the butterflies on top using Mini Stampin’ Dimensionals.
- To complete the card I adde the clear gems from the Flowers For Every Season Gems. I adhered them using glue dots from a kit but you can use the Multipurpose Liquid Glue as it dies clear. The Mini Glue dots are too big for these gems.
To complete the project I did some more blending (I love blending) on the envelope flap and the inside of the card:
Don’t forget that this is a blog hop. Please “hop” on over and see what other inspiration you can find from my fellow demonstrators:
Thank you so much for visiting my blog! I hope today’s project has inspired you to get creative and try something new.
Until next time,
Tatiana
- Join Stampin’ Up!® to start getting your products at 20% discount: CLICK HERE
- Request a Catalogue to see what products you can purchase: CLICK HERE
- Subscribe to my newsletter to keep up to date with the latest news: CLICK HERE
- Follow me on Facebook for regular updates and inspiration: CLICK HERE
- Go SHOPPING for clearance items and specials: CLICK HERE
If you’re in Australia, you can shop Stampin’ Up!® products through my online store. I’d love to be your demonstrator and help you find the perfect supplies for your next creative project!
Supplies:
You can purchase the of the supplies I used in this project. Please click on the image below to purchase. Thank you for your support.

")


I absolutely love your card! Great idea to use the black with the Rainbow Glimmer Paper. Very pretty!
Thank you Theresa!
I really like your project! Congratulations! Sally Millians
Thank you Sally!
Beautiful card.
Thank you Helen!
Ahhh Tatiana you’ve done it again! I love your style so much.
Thanks for the tip about the vellum!
Awe! Thank you Melinda!
Fabulous card Tania! I love the glimmer paper and have made a couple of cards using the same die – they always look great!
Thank you Deb! I love the dies and the Rainbow Glimmer Paper!
Oh wow, Tatiana! This is gorgeous!! Love it!
Thank you Kylie!
Love this card. Thanks for sharing.
Thank you Krissi! My Pleasure!
Wow, What a beautiful card.
Thank you Kylie!
Gorgeous card!
Thank you Christy!
Love it. I never thought of using that paper with the Butterflies
Thank you Diane! Love this paper with the butterflies!
Wow, this is gorgeous. I love all the elements and the background just makes those butterflies pop. Great work, Tatiana. Thanks for sharing.
Thank you Libby!
Tatiana thank you for sharing your beautiful card. I especially like your tips for making the background and the use of the rainbow glimmer paper. I’ll have to give that a try when making cards this week
Thank you Susan! Hope you have fun creating?
Very pretty card!
Thank you Rhonda!
Beautiful card Tatiana, love this design
Beautiful card Tania.
Tatiana, Your card is absolutely beautiful. I was just wondering what kind of birthday I was going to make for a special friend. She loves butterflies, so this will make her happy.
Thank you for sharing your card.
Awe! Thank you Beth! I’m sure your friend will love it! Happy creating!