Hello everybody!
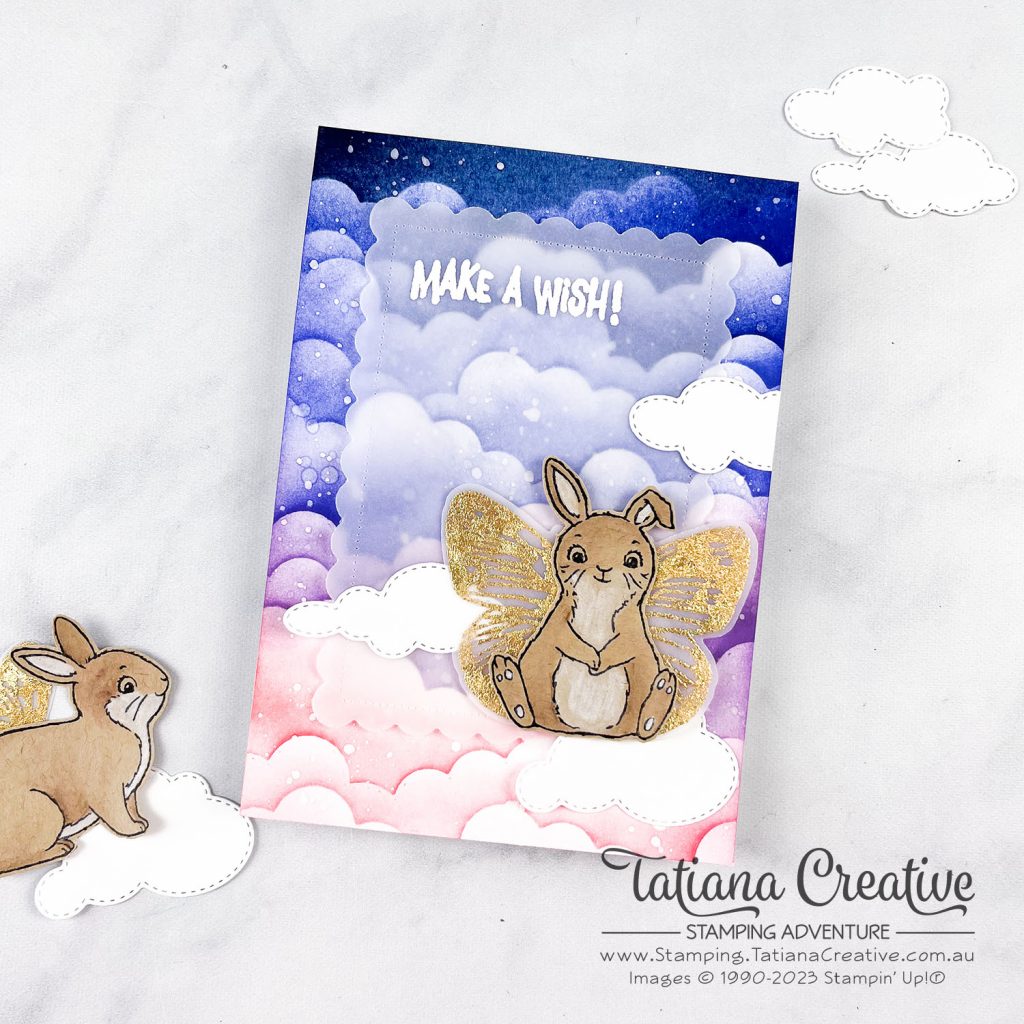
Welcome to my blog. Today I’m sharing a project I created for the Stampin’ Fancy Friday Challenge. This month the challenge is a Character Challenge, this could be an animal or person or something with a face or head. I absolutely LOVED the Easter Bunny stamp set in the January – April 2023 Mini Catalogue and had to use it. I combined it with Butterfly Brilliance to create a Bunny Fairy. I added a background inspired by one of my evening walks.

[All supplies used in this project are shown at the end of this post and are linked to my Stampin’ Up! online store. You can purchase them and create this project too! Thank you for your support of my stamping adventure]
Card Details:
- Card Base: Basic White Thick
- Card Front: Basic White (11.5 x 15.85 cm), and Vellum die cut using the second largest Scalloped Contours Dies
- Card Insert: Basic White (10 x 14.35 cm)
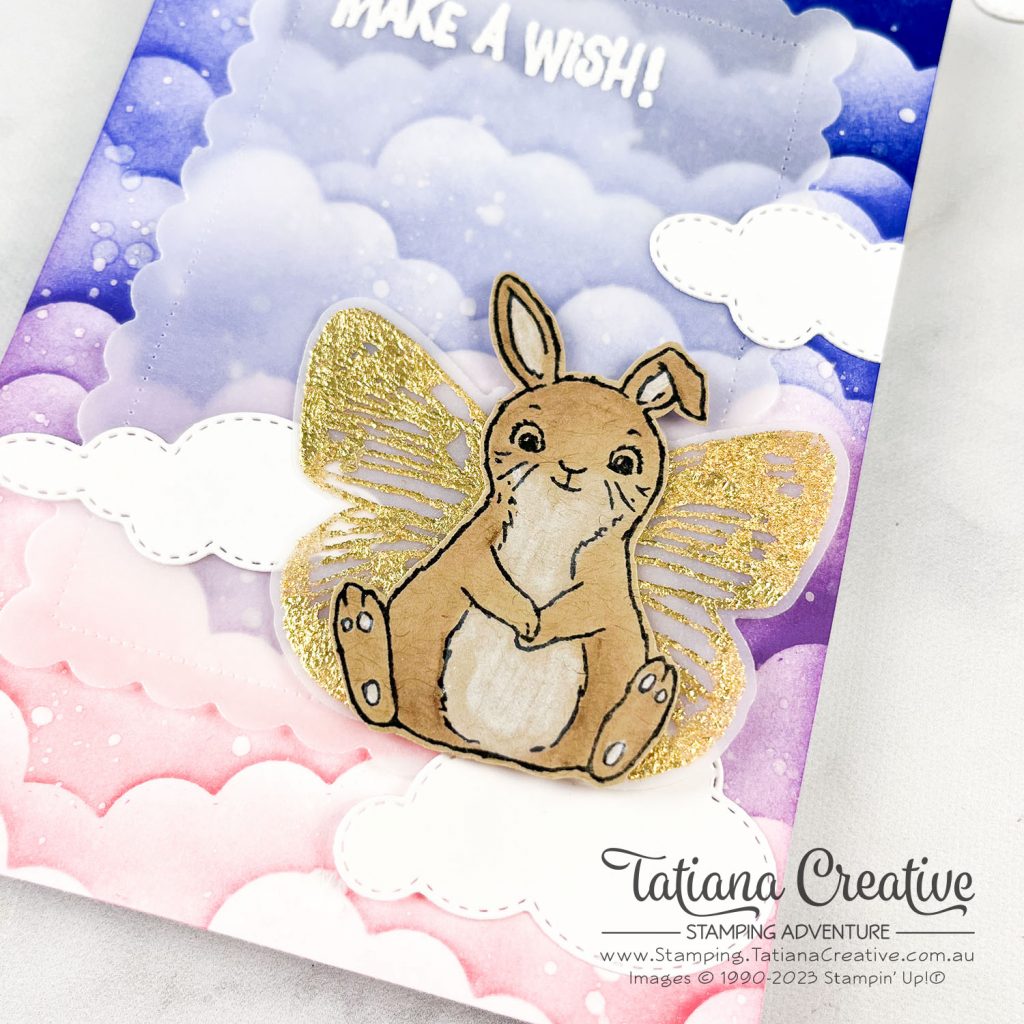
- Stamp the Bunny in Memento Ink onto Crumb Cake cardstock. Add some depth by colouring some Early Espresso Watercolour Pencil and blending with the Blender Pens. Add the Whisper White Watercolour Pencil to the belly and ears and blend using the Blender Pen. Fussy cut out.
- Stamp in Versamark the Butterfly Brilliance stamp set on Vellum and heat set using the Heat & Stick Powder. Then cover with Gilded Leafing. Die cut with coordinating die Brilliant Wings Dies. Find which butterfly you like best with the bunny and adhere to the back of the bunny.
- White heat emboss the “Make A Wish” sentiment from Party Puffins stamp set onto the Vellum die cut for the card front.
- To create the sunset background:
- Start with the Basic White cardstock that’s slightly larger than a card front.
- Die cut the cloud border from Basic Borders Dies from a 6″x6″ Window Sheet
- Position your cloud stencil close to the top of your card front. TIP: I found doing this on the Stamparatus platform was great so that you could use the magnets to hold the stencil. Start with Night Of Navy ink and blend.
- Clean the cloud stencil and place slightly lower than previously and blend more Night Of Navy ink.
- Repeat this process down the card front with all the colours, using each one at least twice. After Night Of Navy use Starry Sky, then Orchid Oasis, Then Highland Heather, and finally Flirty Flamingo.
- Trim down to 10.5 x 14.85 cm
- Ink splat some Whisper White Craft Ink watered down with a Water Painter and Wink of Stella
- Die cut the clouds from Give It A Whirl Dies in Basic White cardstock.
- To assemble, adhere the card front to the card base. Add the Vellum die cut and then the bunny fairy. Place the clouds around.


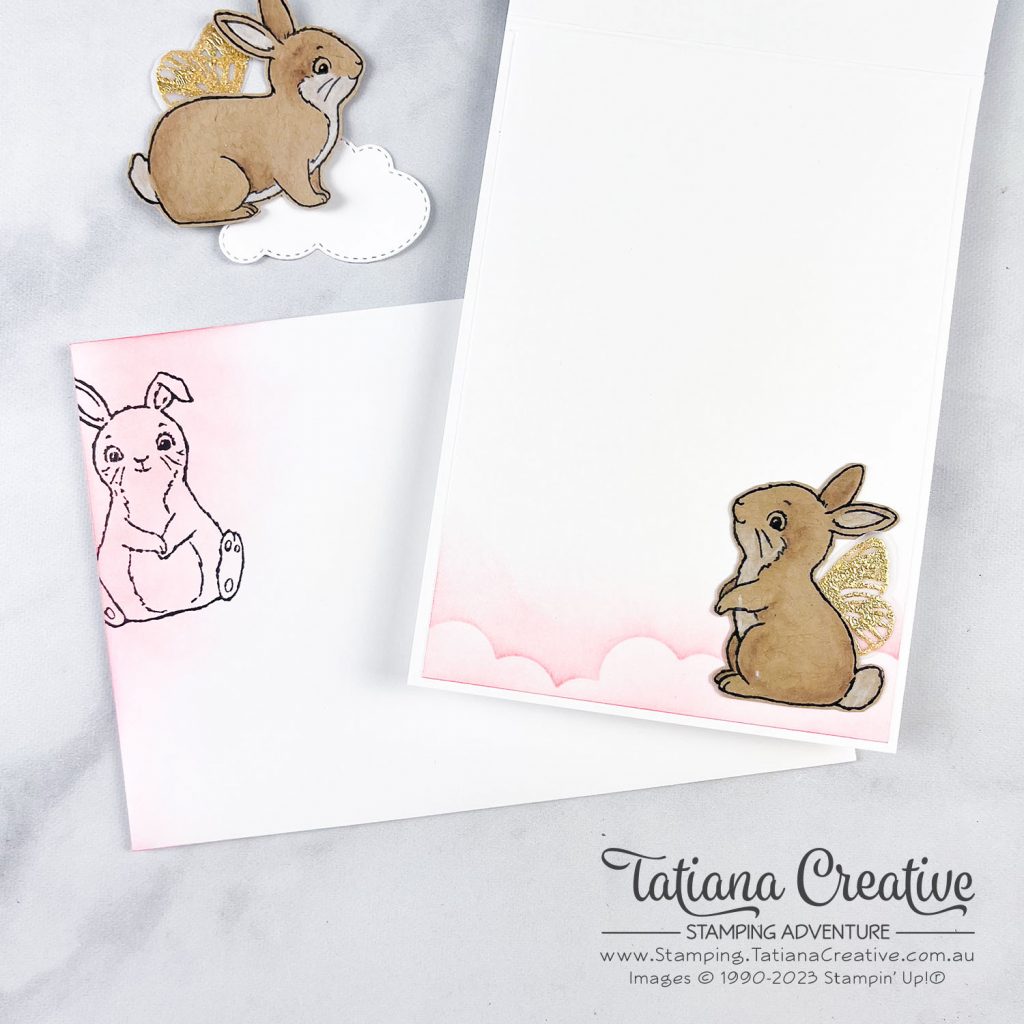
To complete the project I added some clouds in Flirty Flamingo to the card insert and another bunny fairy. On the envelope I blended some Flirty Flamingo Ink and stamped the bunny.
You can join the Stampin’ Fancy Friday Challenge too by creating a project, sharing on social media, and tagging us (@stampinfancyfriday). We would love for you to join in the fun!
Thank you for visiting my blog! I hope that I’ve inspired you to be creative.
Bye for now!
Tatiana
- Join Stampin’ Up!® to start getting your products at 20% discount: CLICK HERE
- Request a Catalogue to see what products you can purchase: CLICK HERE
- Subscribe to my newsletter to keep up to date with the latest news: CLICK HERE
- Follow me on Facebook for regular updates and inspiration: CLICK HERE
- Go SHOPPING for clearance items and specials: CLICK HERE
If you live in Australia you can purchase Stampin’ Up!® products from my online store.
Current Host Code (August 2024): NN39AWU4
(Use the hostess code when ordering less than $250. All orders over get a handmade card from me. Orders over $50 will receive a FREE gift, and collect stickers part of my Customer Loyalty Program! Orders over $90 will also get a FREE tutorial bundle the following month!!). Click here to shop now using the current Host Code.
Supplies:
You can purchase the of the supplies I used in this project. Please click on the image below to purchase. Thank you for your support.
Basic Supplies:
I highly recommend the following basic supplies to make your paper crafting experience easier. I use this products in every project.


